
The Ultimate Recipe for Easy Homemade Peanut Butter Banana Dog Treats
Every dog owner knows the joy of seeing their furry friend’s tail wag with excitement, especially when treats are involved. While store-bought options are convenient, there’s something truly special about baking homemade dog treats. Not only does it allow you to control the quality of ingredients, but it also gives you a chance to shower your pup with extra love. Among the countless recipes I’ve tried, this particular blend of peanut butter and banana has consistently proven to be my dogs’ absolute favorite. Though the process can sometimes be a little messy and the final product might not always win a beauty contest, the sheer delight on their faces makes every crumb of effort worthwhile. Get ready to bake some happy memories!
Why Choose Homemade Dog Treats? Unlocking Health & Happiness for Your Canine Companion
The decision to make DIY dog treats goes beyond just a fun kitchen project; it’s a mindful choice for your pet’s health and well-being. Here’s why opting for homemade often trumps store-bought:
- Ingredient Control: When you bake at home, you know exactly what goes into your dog’s snacks. This means no mystery meat by-products, artificial flavors, preservatives, or colors that are often found in commercial treats. You can specifically choose natural, wholesome ingredients that support your dog’s health.
- Avoiding Harmful Additives: Many commercial treats contain fillers and chemical additives that can be detrimental to your dog’s digestive system or overall health over time. Homemade treats allow you to bypass these entirely, offering a purer, safer snack.
- Tailored to Dietary Needs: If your dog has allergies, sensitivities, or specific dietary requirements (e.g., low fat, grain-free), homemade treats are a game-changer. You can easily adapt recipes to exclude certain ingredients or include beneficial supplements.
- Cost-Effective: Buying premium dog treats can be expensive. Making them yourself, especially in larger batches, often proves to be significantly more economical, allowing you to spoil your dog without breaking the bank.
- Fresher & More Palatable: There’s no denying the appeal of fresh-baked goods. Your dogs will likely find homemade treats more aromatic and tastier than their mass-produced counterparts, making them a high-value reward.
- Bonding Experience: The act of preparing something special for your pet strengthens your bond. And as you’ll see with my own dogs, they often enjoy the making process as much as the eating!
This peanut butter banana dog biscuit recipe uses simple, natural ingredients that most dogs adore, making it an ideal choice for both novice and experienced bakers.
Meet the Taste Testers: Lexi & Zorro, My Dedicated Kitchen Companions
I genuinely believe my dogs get more excitement from me making these treats than most kids do from baking cookies with their parents. My two magnificent Great Pyrenees siblings, Lexi and Zorro, transform into my personal kitchen shadows the moment I pull out the mixing bowls. From the first measuring cup of oats to the final roll of dough, they are right there, offering their unwavering “supervision.”
Their mission, it seems, is to ensure I don’t miss a single step – or more likely, to ensure no stray crumb escapes their watchful eyes. They position themselves strategic points, often just inches from the counter, with noses twitching and tails gently thumping a rhythm of anticipation against the floor. While they can’t physically “help out,” their silent encouragement and hopeful gazes are a constant presence that adds an extra layer of warmth and joy to the baking process. It’s truly a collaborative effort, even if their primary contribution is simply being adorable (and extremely persuasive!).
Wholesome Ingredients for Happy Pups: What You’ll Need
This recipe for healthy dog treats relies on a few simple, readily available ingredients. Each one plays a role in both the delicious taste and the nutritional value for your canine companion. Remember to always opt for natural and plain versions where applicable.
Ingredients:
-
2 cups Rolled Oats: A fantastic source of dietary fiber, oats can aid in healthy digestion and provide sustained energy. They are also a good alternative for dogs with wheat sensitivities. Ensure they are plain, uncooked rolled oats, not instant or flavored varieties.
-
1 1/2 cups Natural Peanut Butter (xylitol-free): This is the star ingredient for flavor! Peanut butter is a great source of protein, healthy fats, and vitamins B and E. CRITICAL SAFETY NOTE: Always ensure your peanut butter is 100% xylitol-free. Xylitol is a sugar substitute highly toxic to dogs, even in small amounts. Opt for natural peanut butter with minimal ingredients (just peanuts, or peanuts and salt).
-
2 Ripe Bananas: Bananas add natural sweetness and moisture to the treats, making them extra appealing. They’re also packed with potassium, vitamin B6, and vitamin C. Ripe bananas (with a few brown spots) are softer and easier to mash, and their natural sugars are more pronounced.
-
2 cups Whole Wheat Flour (or alternative): Flour acts as the binding agent, giving the treats their biscuit-like consistency. Whole wheat flour adds extra fiber and nutrients compared to all-purpose flour. If your dog has a grain allergy, you can substitute with oat flour, rice flour, or a gluten-free blend.
-
1 1/3 cups Water: Water helps to bring the dough together, achieving the right consistency for rolling and cutting. Adjust slightly if needed, depending on the dryness of your flour and the mashiness of your bananas.
-
~1/4 cup Vegetable Oil: A touch of oil contributes to the texture of the treats, making them a bit more pliable and helping them achieve a nice crispness when baked. You can use common cooking oils like canola, sunflower, or coconut oil.
Step-by-Step Guide to Baking Canine Delights: Making Those Tail-Wagging Treats
Ready to get started? This process is straightforward, and even if your treats don’t come out perfectly aesthetic, your pups won’t care one bit. Their taste buds will be doing all the judging!
Directions:
-
Prepare Your Oven and Baking Surface: Begin by preheating your oven to 300°F (150°C). While it’s heating, line a couple of large baking sheets with parchment paper. This prevents sticking and makes cleanup a breeze.
-
Mash the Bananas: In a small bowl, take your ripe bananas and mash them thoroughly with a fork until they reach a smooth, creamy consistency. A few small lumps are perfectly fine, but aim for mostly smooth to ensure even distribution in the dough.
-
Combine All Ingredients: Transfer the mashed bananas to a large mixing bowl. Add the oats, peanut butter, flour, water, and oil. Using a sturdy spoon or your hands, mix all the ingredients together. It will be a bit thick and crumbly at first, but keep mixing until a cohesive, firm dough forms. You might need to knead it briefly in the bowl to ensure everything is well incorporated.
-
Embrace the Canine Supervision: This is where Lexi and Zorro really shine! As you work the dough, be prepared for an audience. They might try to get closer to the bowl or nudge your hand, but don’t worry, it’s just their way of showing enthusiastic support (and hoping for a taste!).
-
Roll Out the Dough: Lightly flour a clean surface (like a countertop or a large cutting board). Turn the dough out onto the floured surface. Using a rolling pin, roll the dough evenly to your desired thickness. Since I have large, fluffy Great Pyrenees, I typically aim for a slightly thicker treat, about 1/2 inch thick, so they have a good chew. If you have smaller dogs, you might prefer a thinner biscuit, around 1/4 inch.
-
Shape the Treats: Now for the fun part! You can use your favorite dog bone-shaped cookie cutters for cute, professional-looking treats. However, if you’re like me and sometimes prioritize ease, simple circles work just as well – a round cookie cutter, the rim of a glass, or even just a knife to cut squares will do the trick. Place the cut-out dough pieces onto your prepared baking sheets, leaving a little space between each one.
-
The Ultimate Reward: Licking the Bowl! After the dough is all rolled and cut, it’s time for the best part of baking for your dogs: letting them “clean” the mixing bowl and any leftover dough scraps. It’s a cherished ritual in my home and certainly a favorite for Lexi and Zorro.
-
Bake Until Dry and Crispy: Place the baking sheets in the preheated oven and bake for approximately 2 to 2 1/2 hours. The key is to get them nice and dry, like store-bought dog biscuits, which helps with shelf life. I recommend checking on them every half hour or so, especially towards the end of the baking time, to ensure they’re not browning too quickly. You want them hard and dry, not soft or chewy.
-
Enjoy Your Baking Break: While the treats are baking, take a well-deserved break! My dogs certainly do. After all that intense supervision and bowl-licking, a long nap is often in order.
-
Cool and Serve: Once baked to perfection, remove the treats from the oven and let them cool completely on a wire rack. This is crucial for them to fully harden and become crispy. Once cooled, they are ready to be enjoyed by your beloved pup! (Remember, these are for your furry friend, not for human consumption, tempting as they may be!).
Tips for Perfect Peanut Butter Banana Dog Biscuits Every Time
Even with a simple recipe, a few insider tips can elevate your homemade dog treats from good to absolutely fantastic:
- Banana Ripeness is Key: Don’t underestimate the power of ripe bananas. They are sweeter and much easier to mash, creating a smoother dough and a more flavorful treat.
- Peanut Butter Quality: Always use natural, unsweetened peanut butter. Avoid any brands that list xylitol as an ingredient. The fewer ingredients, the better.
- Dough Consistency: If your dough feels too dry and crumbly, add water a tablespoon at a time until it comes together. If it’s too sticky, add a little more flour. The ideal dough should be firm enough to roll without sticking excessively.
- Thickness Matters: Adjust the thickness of your rolled dough based on your dog’s size and chewing habits. Thicker treats are great for larger breeds or powerful chewers, while thinner ones suit smaller mouths. Keep in mind that thinner treats will bake faster.
- Baking for Dryness: The long, low-temperature bake is essential. It slowly dries out the treats, making them hard and extending their shelf life. If they come out soft, they still contain too much moisture and won’t last as long. Don’t be afraid to leave them in a little longer if needed, checking frequently.
- Parchment Paper is Your Friend: Seriously, don’t skip the parchment paper. It prevents sticking, ensures even baking, and makes cleanup effortless.
Storing Your Homemade Dog Treats: Keeping Them Fresh
Proper storage is vital to keep your peanut butter dog biscuits fresh and safe for your dog. Because these treats are baked until dry, they have a decent shelf life, similar to commercial dog biscuits.
- Airtight Container: Once completely cooled, store the treats in an airtight container at room temperature. A cookie jar or plastic container works perfectly.
- Shelf Life: Stored correctly, these treats should last for 2-3 weeks at room temperature.
- Refrigeration/Freezing: If you want to extend their freshness even further, you can store them in the refrigerator for up to a month, or freeze them for up to 3-4 months. When freezing, place them in a single layer on a baking sheet first to prevent them from sticking together, then transfer them to a freezer-safe bag or container. Thaw at room temperature before serving.
Creative Variations for Tail-Wagging Excitement
While this classic peanut butter banana recipe is a huge hit, don’t hesitate to get creative with add-ins! Just ensure any additions are safe for dogs. Here are a few ideas to customize your homemade dog biscuits:
- Pumpkin Puree: Substitute 1/2 cup of water with 1/2 cup of plain canned pumpkin puree (not pumpkin pie filling). Pumpkin is great for digestion and adds a lovely flavor.
- Sweet Potato: Add 1/2 cup of cooked and mashed sweet potato. Sweet potatoes are packed with vitamins and fiber.
- Flax Seeds: Stir in 1-2 tablespoons of ground flax seeds for an omega-3 boost, beneficial for skin and coat health.
- Cinnamon: A small pinch (1/2 teaspoon) of ground cinnamon can add a warm flavor and has anti-inflammatory properties.
- Carrots: Finely grated carrots (about 1/4 cup) can add crunch and extra vitamins.
Always research any new ingredient to ensure it is safe for dogs before adding it to your treats.
A Treat That’s Worth the Mess!
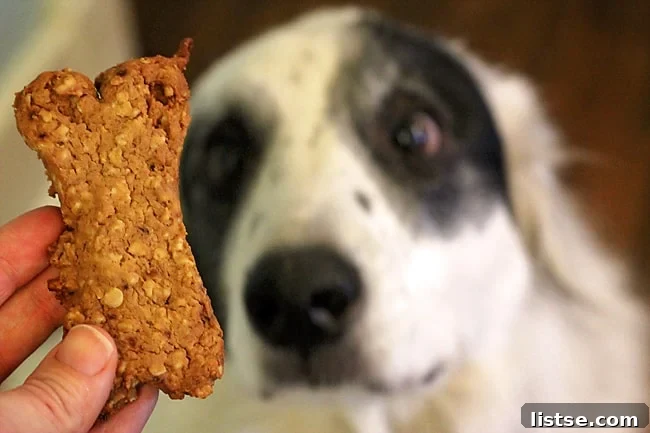
As I mentioned, these treats might not be the prettiest, but what they lack in visual perfection, they more than make up for in canine approval. The joy my pups get from these homemade delights is unparalleled, turning every baking session into a delightful memory. Seeing their happy faces and wagging tails is the best reward any pet parent could ask for.
They aren’t too pretty, perhaps, lacking the perfect symmetry of store-bought alternatives, but my pups sure do love ’em! And that, ultimately, is all that truly matters.
Final Thoughts: Happy Paws, Happy Home
Baking these homemade dog treats is more than just following a recipe; it’s an act of love. It’s about providing your dog with wholesome, delicious snacks that you can feel good about. This peanut butter banana recipe is simple, effective, and guaranteed to earn you plenty of tail wags and happy barks. So next time you’re looking to spoil your best friend, skip the store and head to the kitchen. You’ll not only create a treat they adore but also cherish the special moments you share during the process. Happy baking, and more importantly, happy treating!