
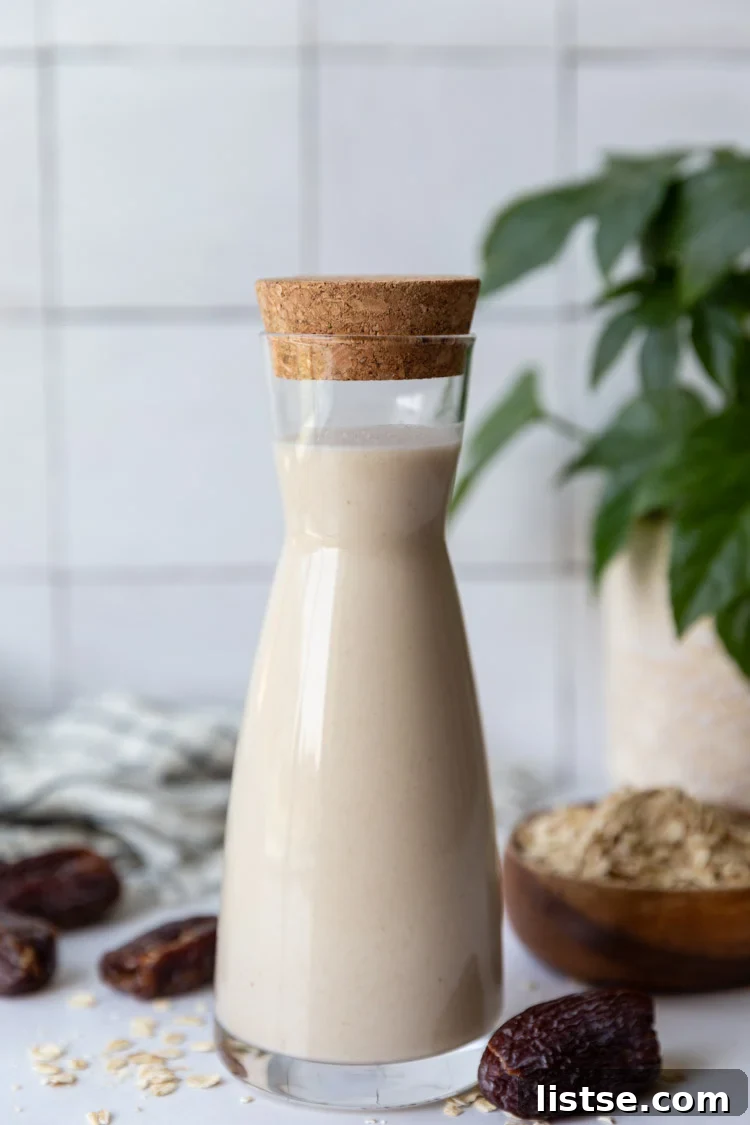
Transform your kitchen into a plant-based dairy haven by learning how to make the most exquisite, creamy, and utterly delicious oat milk right at home. Forget expensive store-bought cartons with questionable additives; this recipe requires just a few basic ingredients and a mere handful of minutes to prepare. Naturally sweetened with the rich caramel notes of Medjool dates, this homemade oat milk stands out as an unparalleled dairy-free delight, perfect for everything from your morning coffee to your favorite baked goods.

Embarking on the journey of homemade oat milk is not only incredibly simple but also remarkably rewarding. This guide is crafted to help you achieve perfect results every time, ensuring a smooth, rich, and utterly customizable plant-based milk that outshines its commercial counterparts. Whether you’re new to making dairy-free alternatives or a seasoned pro looking for the best recipe, you’re in the right place.
Why Choose Homemade Oat Milk?
There are numerous compelling reasons to ditch the store-bought versions and whip up your own oat milk. It’s a choice that benefits your wallet, your health, and even the environment. Let’s explore the advantages:
- Cost-Effective: Commercial oat milk can be surprisingly pricey, often ranging from $4-$5 per carton. In contrast, a batch of homemade oat milk costs approximately $1 in ingredients, offering significant savings over time. All you really need are inexpensive rolled oats and water!
- Unbeatable Freshness and Flavor: When you make oat milk at home, you control the freshness of every ingredient. The result is a vibrant, clean taste free from the stabilizers, gums, and artificial flavors often found in packaged varieties. Our recipe, enhanced with Medjool dates, delivers a naturally sweet and subtly caramel-like flavor that is simply irresistible.
- Complete Customization: This is perhaps the greatest benefit. You dictate the sweetness level, the thickness, and the flavor profile. Want it sweeter? Add an extra date. Prefer a creamier texture for your latte? Adjust the water ratio. You can infuse it with vanilla, cinnamon, or even a touch of cocoa for unique variations.
- Healthier Ingredients: By preparing oat milk yourself, you avoid unnecessary additives like carrageenan, emulsifiers, and preservatives. You have full transparency over what goes into your body, ensuring a cleaner, healthier beverage for you and your family.
- Eco-Friendly Choice: Making your own oat milk significantly reduces waste from single-use cartons. Opt for buying oats in bulk to further minimize your environmental footprint, contributing to a more sustainable lifestyle.
The Sweet Secret: Medjool Dates
Our recipe elevates homemade oat milk beyond the ordinary with the inclusion of Natural Delights Medjool dates. These aren’t just any dates; Medjool dates are renowned for their large size, soft, chewy texture, and rich, caramel-like sweetness. They are truly nature’s candy, and they play a pivotal role in this recipe.

Adding just 1-2 pitted Medjool dates provides a gentle, natural sweetness that complements the subtle oat flavor perfectly. This makes the oat milk ideal for a wide range of uses, from pouring over cereal and oatmeal to enhancing your coffee or incorporating into baking. Beyond their incredible taste, Medjool dates are packed with natural sugars, fiber, and essential minerals, offering an energizing and nourishing boost.
I personally love the versatility of dates. Lately, I’ve been experimenting with them in various baked goods, creating delightful treats like these Date Nut Bars and these Homemade Snickers Bars. But even on their own, a Medjool date makes for a satisfying and wholesome snack when I crave something sweet while still aiming to nourish my body.
Essential Oat Milk Ingredients:
The beauty of homemade oat milk lies in its simplicity. You’ll be amazed at how a few humble ingredients can create such a luxurious and versatile dairy-free alternative. Here’s a breakdown of what you’ll need and why:

- Old Fashioned Rolled Oats: This is the star ingredient. Old fashioned oats (sometimes labeled “regular rolled oats”) are crucial because their structure allows them to blend into a creamy milk without becoming excessively slimy. Avoid quick oats, which can lead to a gummy texture, and steel-cut oats, which are too hard and require soaking/cooking. If gluten is a concern, ensure you purchase certified gluten-free old fashioned oats.
- Filtered Water: The quality of your water will affect the taste of your oat milk. Using filtered water ensures a cleaner, purer flavor.
- Medjool Dates (Optional but Highly Recommended): As discussed, these add a wonderful natural sweetness and depth of flavor. Pit them before adding to the blender. You can adjust the quantity based on your desired sweetness.
- Pinch of Sea Salt: A small amount of salt enhances all the flavors in the milk, much like it does in baking. It helps to balance the sweetness of the dates and brings out the natural earthiness of the oats.
- Vanilla Extract (Optional): A teaspoon of good quality vanilla extract adds a lovely aromatic warmth to your oat milk, making it even more delightful, especially in coffee or smoothies.
How to Make Oat Milk: A Quick and Easy Guide
This recipe truly is astonishingly easy and requires no complicated steps or lengthy soaking. You’ll have fresh, homemade oat milk ready in minutes!
The Blending Process:
Gather all your ingredients and a high-powered blender. The key to perfect oat milk is efficient blending without overdoing it. Add the old fashioned oats, filtered water, pitted Medjool dates (if using), pinch of salt, and optional vanilla extract to your blender. Blend on high for precisely 45 seconds to 1 minute. The goal is to fully break down the oats and dates into a smooth liquid. Be careful not to over-blend, as this can activate the oat’s starches and lead to an unpleasantly slimy texture. A minute is usually the sweet spot for achieving optimal creaminess without the sliminess.
The Straining Process:
Once blended, it’s time to strain the mixture to achieve that silky-smooth consistency. Place a nut milk bag or a clean, lint-free thin kitchen towel (like a flour sack towel) over a large bowl or pitcher. Carefully pour the blended oat mixture into the bag/cloth. Gently lift the bag/cloth and squeeze the liquid through it. Work slowly and patiently to extract as much milk as possible. Avoid excessively squeezing or wringing the bag with too much force, as this can push more of the starchy oat pulp through, potentially leading to a gummier milk. The pulp left behind can be discarded or repurposed (e.g., added to baked goods or composted).
Storage:
Pour your freshly made oat milk into an airtight container or glass bottle and store it in the refrigerator. Homemade oat milk typically stays fresh for up to 5-7 days. It’s natural for the milk to separate a bit in the fridge; simply give it a good shake before each use.
One of the fantastic things about using fresh Medjool dates is that they blend seamlessly into the milk. If you’re using high-quality, fresh dates, there’s no need to soak them beforehand; they’ll incorporate perfectly, leaving no unwanted chunks.

How to Customize Your Oat Milk: From Beverage to Creamer
The versatility of homemade oat milk extends to its thickness and flavor, allowing you to tailor it perfectly to your needs. One of my favorite customizations is creating an ultra-thick and creamy oat milk creamer—it’s absolutely divine in morning coffee!
Adjusting Thickness:
The thickness of your oat milk is primarily determined by the water-to-oat ratio. For a standard drinking consistency, like what you’d pour over cereal or use in smoothies, I recommend using approximately 4 to 4.5 cups of water per 1 cup of oats. However, if you desire a rich, luscious oat milk creamer:
- For Creamer Consistency: Simply reduce the amount of water in your blend. Aim for 3 to 3.5 cups of water per 1 cup of oats. This yields a much thicker, more concentrated milk that mimics the consistency of heavy cream, making it ideal for coffee, tea, or even richer sauces.
Flavor Variations:
Beyond the optional vanilla extract, there’s a world of flavors you can infuse into your homemade oat milk:
- Cinnamon Spice: Add a pinch of ground cinnamon or a whole cinnamon stick to the blender for a warm, comforting twist.
- Chocolate Bliss: Incorporate 1-2 tablespoons of unsweetened cocoa powder or cacao powder for a delicious chocolate oat milk, perfect for a treat or hot cocoa base.
- Nutty Notes: While oat milk is naturally nut-free, a tablespoon of almond butter or cashew butter (if not avoiding nuts) can add extra richness and a subtle nutty flavor.
- Fruity Infusion: For a unique twist, blend in a few frozen berries or a small piece of ripe banana. Remember that fruit might make the milk thicker, so adjust water if necessary.
Experiment with these variations to find your perfect homemade oat milk. It’s such a simple way to elevate everyday beverages and recipes!

Troubleshooting Common Oat Milk Issues
While making oat milk is generally straightforward, sometimes minor issues can arise. Here’s how to tackle them:
- Slimy Oat Milk: This is the most common complaint and almost always due to over-blending. Oats contain starches that, when blended too vigorously or for too long, release and create a gummy texture. To prevent this, stick to the 45-second to 1-minute blending time. Also, using cold water can help minimize starch activation.
- Gritty Texture: If your oat milk feels gritty, it means your straining method wasn’t thorough enough. Ensure you’re using a fine-mesh nut milk bag or a very tightly woven, lint-free cloth. Don’t rush the straining process, and gently squeeze to extract the liquid without forcing pulp through.
- Separation in the Fridge: This is completely normal and expected for homemade plant milks, as they lack the stabilizers found in commercial versions. The heavier oat solids will settle at the bottom. Simply give your container a good shake or stir before each use to recombine.
- Watery or Thin Milk: If your milk isn’t as creamy as you’d like, you might have used too much water. Adjust the water-to-oat ratio in your next batch, starting with less water and adding more only if needed for your desired consistency.
Delicious Ways to Enjoy Your Homemade Oat Milk
Once you’ve mastered this easy recipe, a world of culinary possibilities opens up! Homemade oat milk is incredibly versatile and can be used in almost any application where you’d typically use dairy milk or other plant-based alternatives.
- Morning Coffee & Tea: Its natural creaminess makes it an ideal addition to your daily brew. Use the thicker creamer version for a truly indulgent latte or cappuccino.
- Cereal & Oatmeal: Pour it over your favorite breakfast cereal, granola, or use it as the liquid base for a comforting bowl of oatmeal or overnight oats.
- Smoothies & Shakes: It blends beautifully into fruit and vegetable smoothies, adding a creamy texture and subtle sweetness without overpowering other flavors.
- Baking & Desserts: Substitute it for dairy milk in recipes for pancakes, waffles, muffins, cakes, and cookies. Its rich texture contributes to moist and tender baked goods.
- Soups & Sauces: Use it to add creaminess to savory dishes like creamy tomato soup, vegan mac and cheese, or rich pasta sauces. Just be mindful of its slight sweetness if using dates.
- Hot Chocolate: Create an extra decadent vegan hot chocolate with your homemade oat milk, a perfect treat on a chilly evening.
Frequently Asked Questions About Homemade Oat Milk
Here are answers to some common questions about making and enjoying your own oat milk:
While oats are naturally gluten-free, they are very often processed and packaged in facilities that also handle gluten-containing grains like wheat, barley, and rye. This can lead to cross-contamination. If you need to ensure your homemade oat milk is completely gluten-free, it is crucial to purchase old fashioned oats that are specifically labeled and certified as “gluten-free.”
Oat milk is indeed a healthy, dairy-free milk option and one of our top favorites! It’s a great choice for those with nut allergies or anyone seeking a dairy-free milk that offers a creamier and thicker texture than many nut milks. While it tends to be slightly higher in calories than almond milk, it provides beneficial fiber from the oats, and when made at home, it avoids the added sugars and stabilizers found in many commercial varieties. As with any food, enjoy it in moderation as part of a balanced diet.
The calorie count of your oat milk can vary slightly depending on how it’s prepared, including the amount of water used (which affects thickness) and whether you add dates for sweetness. On average, a cup of homemade oat milk, prepared as per this recipe, contains approximately 90-120 calories. This makes it a satisfying and energy-rich option.
Oat milk has a wonderfully mild, subtly “oaty” flavor that is largely neutral, making it highly versatile. It’s not as distinctive as coconut milk or as watery as some almond milks. When naturally sweetened with Medjool dates, it gains a delicate caramel undertone. Its texture is notably creamy and smooth, often described as slightly thicker than traditional dairy milk, providing a luxurious mouthfeel.
No, for this recipe using old fashioned rolled oats, there is no need to soak them. Soaking can sometimes lead to a slimier texture. The brief blending time is sufficient to break down the oats effectively.
It is highly recommended to use old fashioned rolled oats. Quick oats are too finely processed and will yield a very slimy, gummy milk. Steel-cut oats are too coarse and hard to break down effectively in a blender without pre-soaking and/or cooking, and they don’t produce the desired creamy texture for oat milk.
Making your own oat milk is a simple yet impactful step towards a healthier, more sustainable, and delicious lifestyle. With this detailed guide, you have all the knowledge and tools to create a creamy, customizable dairy-free milk that will quickly become a staple in your home.
As always, if you try this fantastic recipe, we’d love to hear from you! Be sure to come back and leave a comment sharing your thoughts. Or, snap a quick photo and tag us on Instagram @foodwithfeeling and use the hashtag #foodwithfeeling! We absolutely love seeing all the wonderful creations you make from the blog!
And a special thank you once again to Natural Delights for partnering with us on this post and providing such incredible Medjool dates!
Homemade Medjool Date Oat Milk
Brita Britnell
2 mins
2 mins
4 servings
Ingredients
- 1 cup old fashioned rolled oats
- 3.5-4.5 cups filtered water, depending on desired thickness. Use 4.5 cups for traditional oat milk and 3.5 cups for a thicker creamer consistency.
- ⅛ teaspoon sea salt
- 1-2 Natural Delights Medjool dates, pitted (optional, for natural sweetness)*
- Optional for flavoring: 1 teaspoon of vanilla extract
Instructions
-
Place all of the ingredients (oats, water, salt, dates, and optional vanilla) into a high-powered blender. Blend on high for precisely 45 seconds to 1 minute. The key is to blend just until all ingredients are combined and smooth, but avoid over-blending, which can make the oat milk slimy. There should be no large chunks left, but a few tiny specks are fine as they will be strained out.
-
Strain the oat milk through a nut milk bag or a clean, lint-free thin kitchen towel placed over a large bowl or pitcher. Pour the blended mixture into the bag/cloth and gently lift, allowing the milk to filter through. Squeeze gently to extract all the liquid, being careful not to force too much pulp through, which could result in a gritty texture.
-
Discard the leftover oat pulp. Pour the finished oat milk into an airtight container or bottle and store it in the refrigerator for up to 5-7 days. It’s natural for separation to occur; simply shake well before each use.
Notes
Nutrition
Calories: 93kcal
,
Carbohydrates: 18g
,
Protein: 3g
,
Fat: 1g
,
Saturated Fat: 0.2g
,
Polyunsaturated Fat: 0.5g
,
Monounsaturated Fat: 0.4g
,
Sodium: 84mg
,
Potassium: 115mg
,
Fiber: 2g
,
Sugar: 4g
,
Vitamin A: 9IU
,
Calcium: 21mg
,
Iron: 1mg
Nutrition information is automatically calculated and should only be used as an approximation.
Tried this recipe?
Mention @foodwithfeeling or tag #foodwithfeeling!