
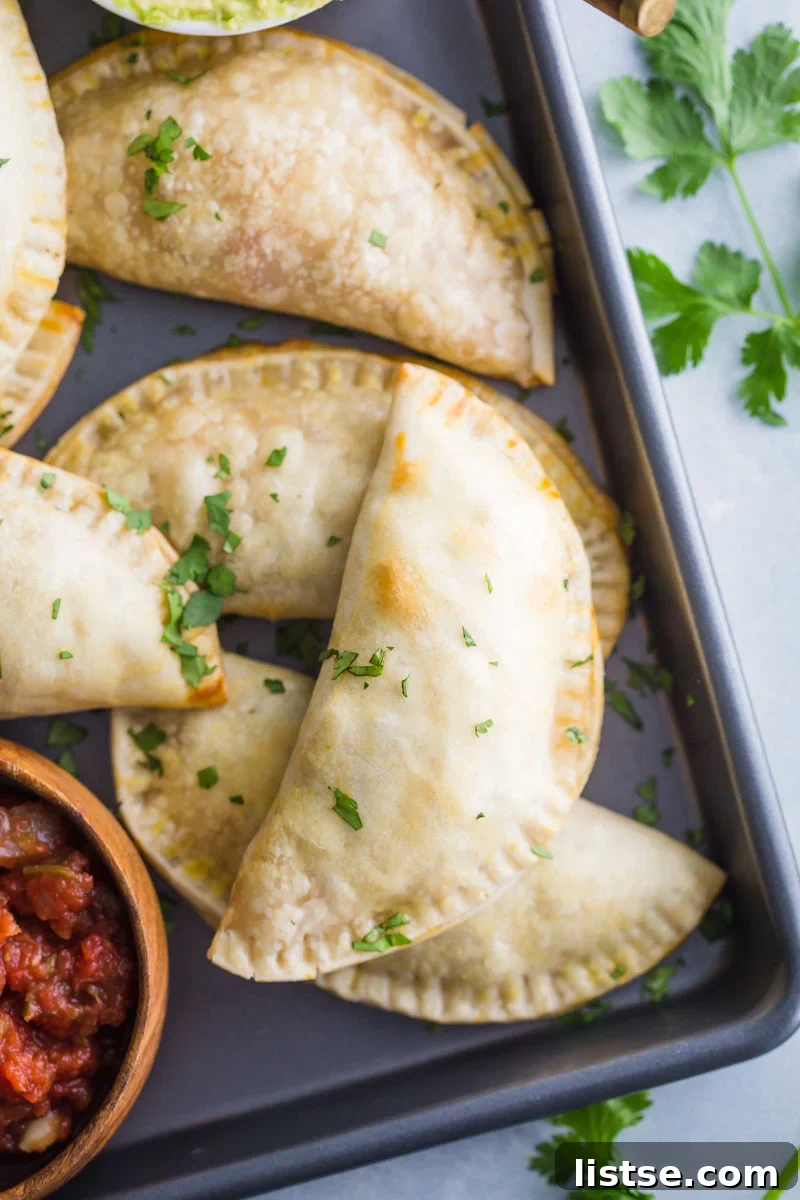
Easy Chicken Empanadas: A Quick, Delicious, and Family-Friendly Meal
Are you constantly searching for a dinner recipe that’s not only incredibly delicious but also comes together in a flash? Look no further! These **Easy Chicken Empanadas** are a true revelation, designed to satisfy the entire family with minimal effort. Imagine golden, flaky pastry pockets brimming with a creamy, savory chicken and cheese filling so irresistible, you might just find yourself sneaking spoonfuls of it straight from the bowl!
This recipe promises a delightful culinary experience without hours in the kitchen. In about 30 minutes, you can have a batch of these baked beauties ready to serve, making them an ideal choice for busy weeknights, casual gatherings, or whenever a craving for something warm, cheesy, and satisfying strikes. Get ready to add this incredible dish to your regular meal rotation!
The Secret to Simplicity: Ready-Made Empanada Discs
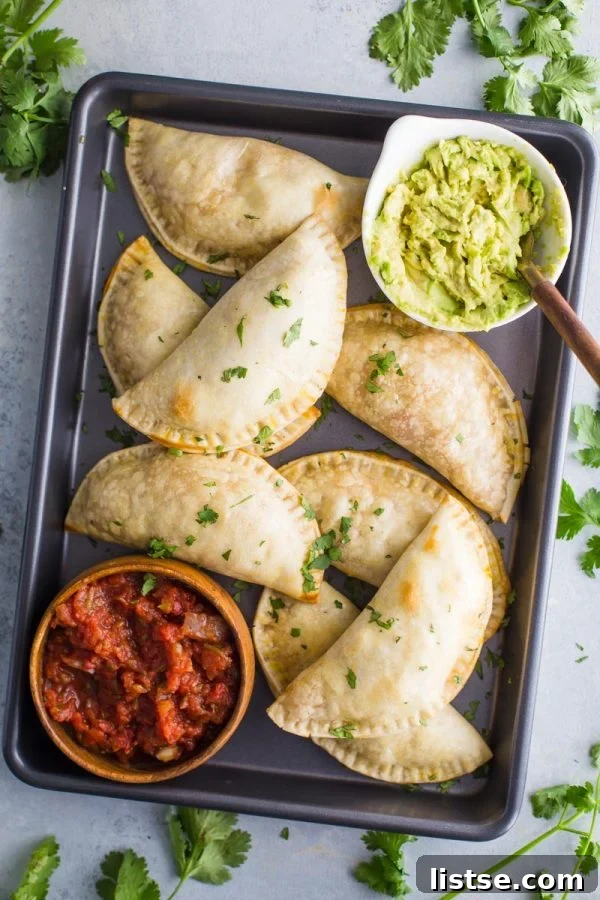
My journey to perfecting these easy chicken empanadas began, surprisingly, with a client video where I was introduced to the magic of Goya empanada discs. These convenient, pre-made pastry discs are an absolute game-changer for anyone intimidated by homemade pastry. The moment I realized how effortlessly they streamlined the entire empanada creation process, I knew I had to adapt them for my own kitchen.
My goal was clear: create a baked chicken empanada recipe that was both quick enough for weeknights and bursting with flavor. The beauty of using store-bought empanada discs isn’t just about saving precious time; it ensures a consistently tender, flaky crust every single time, without the fuss and mess of rolling out dough from scratch. This convenience allows you to focus all your energy on crafting the true star of the show: the incredibly flavorful filling that will have everyone asking for more.
Crafting the Irresistible Chicken Empanada Filling
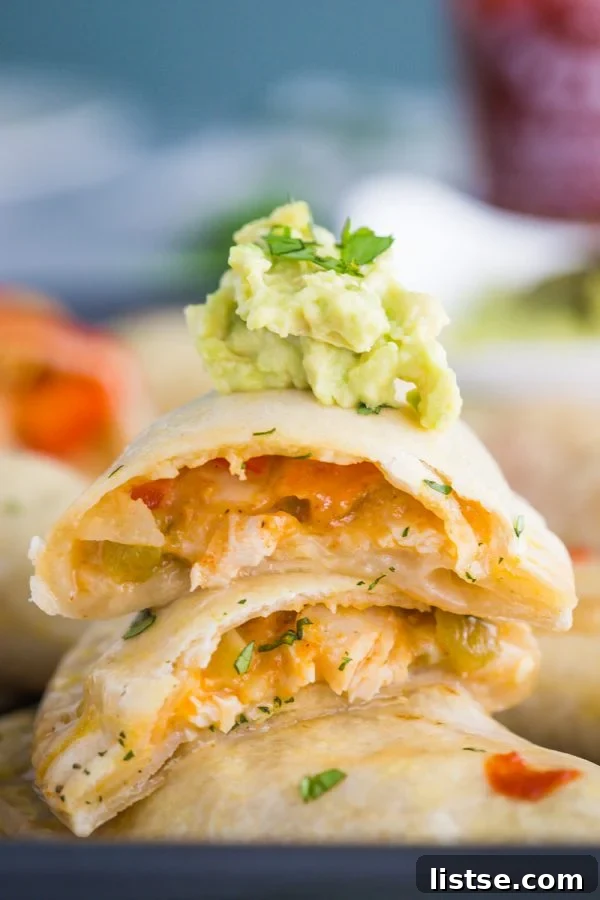
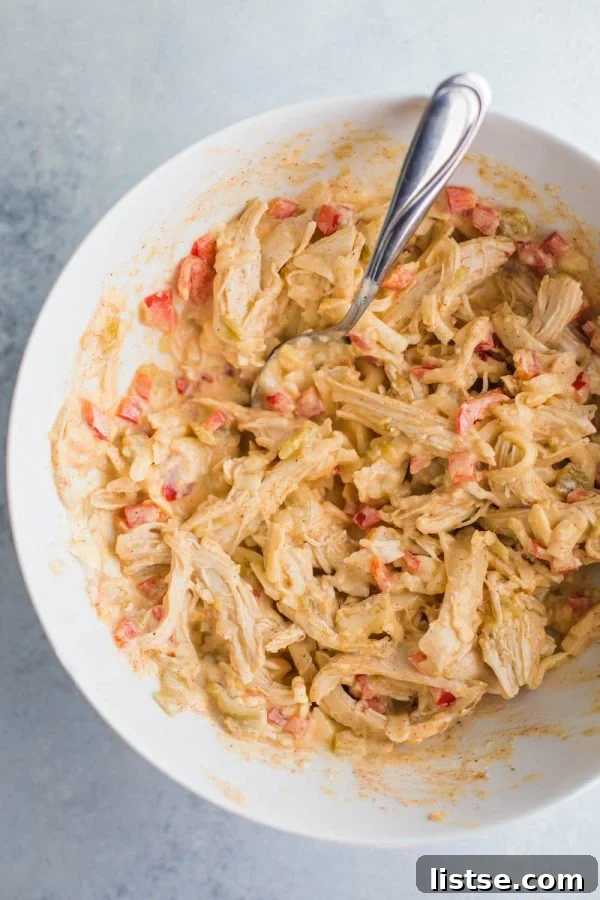
The heart of any great empanada lies in its filling, and this one is nothing short of spectacular. Designed for maximum flavor with minimal fuss, our chicken empanada filling is a harmonious blend of creamy, savory, and subtly spicy notes. It’s so good, you might just be tempted to eat it with a spoon before it even makes it into the dough – and that’s perfectly understandable! This simple yet rich mixture is what transforms a basic pastry into a memorable meal.
Choosing Your Chicken: Convenience Meets Flavor
One of the elements that makes this chicken empanada recipe so quick and accessible is the flexibility in choosing your chicken. To make it “extra easy,” as I like to say, simply grab a pre-cooked rotisserie chicken from your local grocery store. Shred it, and you’re halfway there! Alternatively, any leftover cooked chicken works beautifully – a fantastic way to repurpose dinner from the night before and reduce food waste.
If you prefer to cook your chicken fresh, I highly recommend baking chicken breasts or thighs ahead of time. A simple seasoning of salt, pepper, and a drizzle of olive oil, baked until cooked through, yields tender, flavorful chicken perfect for shredding. Planning this step allows you to have the chicken ready when you’re preparing dinner, cutting down on active cooking time significantly and making the assembly process a breeze.
The Creamy, Cheesy Core: Greek Yogurt and Monterey Jack
What truly sets this filling apart is the luscious combination of Greek yogurt and Monterey Jack cheese. The Greek yogurt adds a wonderful tang and an incredible creaminess, ensuring the filling isn’t dry or crumbly. It binds all the ingredients together beautifully. Paired with the Monterey Jack cheese, known for its superb melting qualities, you get that satisfyingly gooey, stretchy cheese pull in every single bite. This dynamic duo creates a rich, comforting texture that coats the shredded chicken perfectly, making each empanada a delightful and utterly satisfying experience.
Spice It Up (Or Down!): Customizing Your Heat
For a subtle warmth and a touch of complexity, I incorporate a small amount of sriracha into the filling. I’m not one for extreme heat, so I use just enough to provide a gentle kick that complements the other flavors without overwhelming them. It adds a background note that elevates the entire dish. However, if you’re a spice enthusiast, please feel free to increase the amount of sriracha to your liking. A little extra can transform these into a vibrant, fiery treat! You could also experiment with a pinch of cayenne pepper or a dash of your favorite hot sauce if sriracha isn’t readily available or to your preference.
Essential Filling Ingredients at a Glance:
- **Cooked Chicken (shredded or diced):** The lean, flavorful protein base for our empanadas.
- **Shredded Monterey Jack Cheese:** Crucial for that irresistible gooey, cheesy goodness and rich flavor.
- **Diced Green Chiles:** Adds a mild, earthy pepper flavor and a touch of moisture without much heat.
- **Red Bell Pepper (finely diced):** Provides a hint of sweetness, a pleasant color, and a subtle crunch.
- **Greek Yogurt (non-fat 0% preferred):** Creates a creamy texture, adds tanginess, and keeps the filling moist.
- **Cumin:** Essential for that warm, earthy, classic Latin American flavor profile that defines many empanada fillings.
- **Salt & Pepper:** Basic seasoning to enhance and balance all the flavors in the mixture.
- **Paprika:** Adds a vibrant reddish hue and a smoky-sweet note, deepening the overall taste.
- **Sriracha (optional):** For a customizable touch of heat, allowing you to tailor the spice level to your preference.
Flavor Variations for Your Empanada Filling:
While the classic recipe is perfect as is, don’t hesitate to get creative and customize your chicken empanada filling to suit your taste or what you have on hand:
- **Vegetable Boost:** Incorporate finely chopped corn, black beans, sautéed onions, or fresh spinach for added nutrients, texture, and a touch of sweetness.
- **Cheese Swap:** Experiment with other melty cheeses like sharp cheddar, zesty pepper jack, or a ready-made Mexican cheese blend for different flavor profiles.
- **Herb Infusion:** Freshly chopped cilantro or parsley can brighten the flavors and add a fresh, aromatic note.
- **Smoky Depth:** A pinch of chipotle powder or smoked paprika can introduce a delicious smoky character that pairs wonderfully with chicken.
- **A Touch of Sweetness:** A small amount of finely diced sweet potato (pre-cooked) can add a unique and delightful twist.
Step-by-Step Guide: How to Assemble and Bake Perfect Chicken Empanadas
Once your delectable chicken empanada filling is ready, the rest of the process is incredibly straightforward. It’s an almost assembly-line-like efficiency that gets these beauties into the oven and onto your table in no time, proving just how easy these can be.
Preparing Your Workspace for Empanada Assembly
Before you begin assembling, ensure your oven is preheated to a perfect 400°F (200°C). Have a baking sheet lined with parchment paper ready, as this will prevent sticking and make cleanup an absolute breeze. Also, prepare your essential egg wash: whisk one large egg with a tablespoon of water or milk until well combined. This mixture will give your empanadas that beautiful golden, glossy finish and, crucially, help seal the edges tightly.
Filling and Folding with Ease
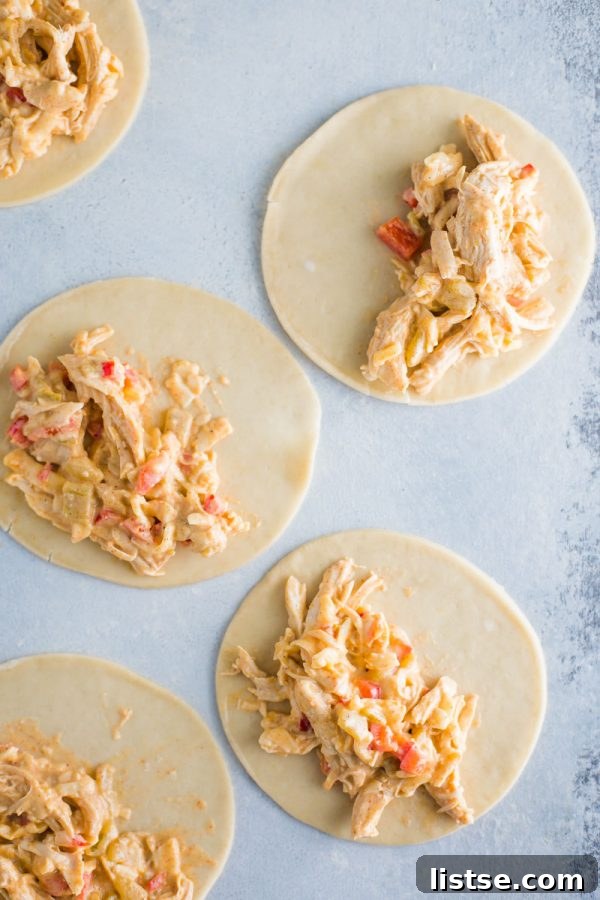
Lay out your thawed empanada discs on your prepared, clean surface. Spoon about two heaping tablespoons of the chicken mixture onto one half of each disc, making sure to leave approximately a quarter-inch clean margin around the edge. This clean, unfilled edge is crucial for a proper and secure seal. Next, dip a finger or a small pastry brush into your prepared egg wash and apply a thin, even layer along the entire perimeter of the filled half of the disc. Carefully fold the other half of the disc over the filling, creating a perfect crescent shape. Gently press down around the edges with your fingers to seal them completely. If any filling tries to escape, simply push it back in with your fingers before sealing.
The Golden Finish: Sealing, Brushing, and Baking Instructions
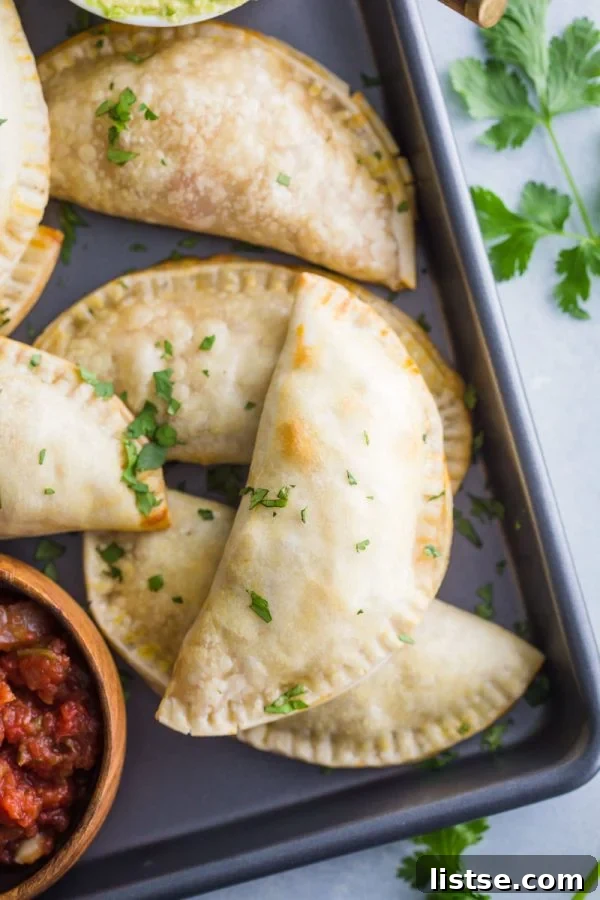
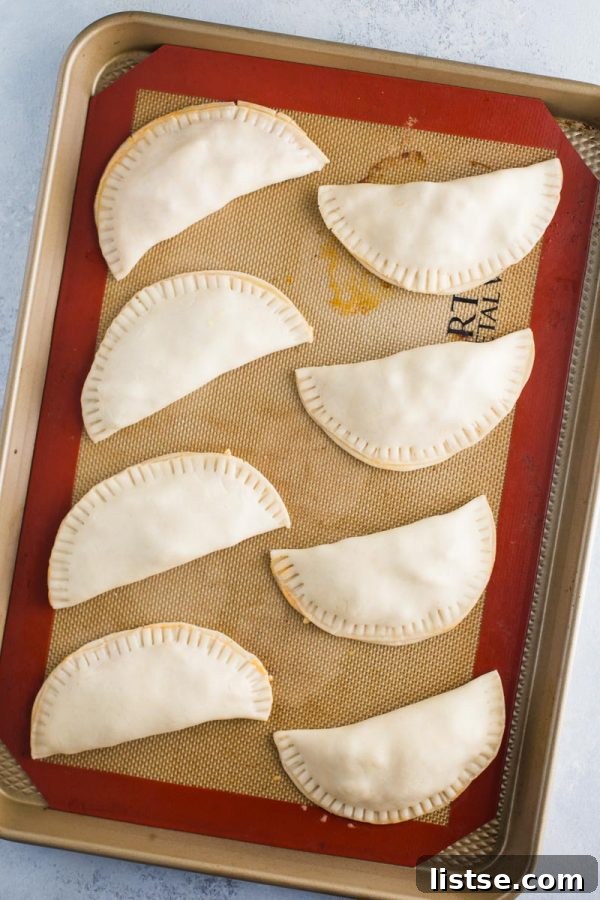
To create the classic, rustic empanada look and ensure a tight seal that keeps all that delicious filling inside, crimp the edges firmly with the tines of a fork. This not only makes them look professionally made but also provides an extra layer of security. Once all your empanadas are crimped, brush the tops of each one generously with the remaining egg wash. This egg wash is key to achieving that appetizing, rich golden-brown color and a wonderfully crisp exterior during baking.
Carefully transfer your assembled empanadas to the prepared baking sheet. Place them into the preheated oven and bake for 12-15 minutes, or until their tops are beautifully golden and the filling is bubbly and hot. Keep a close eye on them, as oven temperatures can vary and cooking times might differ slightly. The wait will be tough as the delicious aromas fill your kitchen, but the reward is immense: perfectly baked, irresistible Easy Chicken Empanadas ready for you and your family to enjoy!
Make Ahead Magic: Freezer-Friendly Chicken Empanadas
One of the most incredible and practical features of this recipe is how wonderfully these chicken empanadas freeze. This makes them an absolute lifesaver for meal prepping, busy weeknights, or even unexpected guests. I often reflect on how invaluable a ready-made stash of these would have been during my maternity leave – having quick, comforting, homemade meals truly feels like a gift when time is scarce!
Batch Cooking for Busy Weeks and Easy Meal Prep
Making a large batch of these easy chicken empanadas and freezing them is a smart, strategic move for anyone looking to save time and reduce stress during a hectic week. You can easily double or even triple the recipe, turn the assembly process into a fun family activity, and then store the extras for future quick dinners. Imagine the sheer joy of pulling a delicious, homemade meal from the freezer on a night when you have no time or energy to cook – it’s convenience without sacrificing quality!
Freezing Cooked vs. Uncooked Empanadas: The Best Method
For the absolute best results and to ensure they hold their shape and texture perfectly upon reheating, I strongly recommend freezing these empanadas *after* they have been fully baked. To freeze, simply place the freshly baked (and slightly cooled) empanadas on a flat baking tray, ensuring they don’t touch each other. Pop the entire tray into the freezer until the empanadas are completely solid – this usually takes a few hours. Once frozen solid, you can then transfer them to an airtight freezer-safe container or a large plastic baggie. This initial “flash freeze” on a tray prevents them from sticking together, allowing you to easily grab just one or two as needed without thawing the whole batch.
Reheating Instructions for Frozen Empanadas: Quick & Delicious
When you’re ready to enjoy your frozen chicken empanadas, you have a couple of great options for reheating, depending on your preferred texture:
- **Oven Method (Recommended for Crispiest Results):** Preheat your oven to 350°F (175°C). Place the frozen empanadas directly on a baking sheet. Bake for 15-20 minutes, or until they are heated through to the center and the crust is wonderfully crisp and golden again.
- **Air Fryer Method (For Speed and Crispiness):** For an even quicker and extra crispy finish, preheat your air fryer to 325°F (160°C). Air fry the frozen empanadas for 8-12 minutes, flipping them halfway through, until they are hot, thoroughly warmed, and beautifully golden brown.
Tips for the Best Homemade Chicken Empanadas
To ensure your easy chicken empanadas turn out perfectly every single time, keep these additional practical tips in mind:
- **Don’t Overfill:** While tempting to pack in as much delicious filling as possible, overfilling the empanada discs can make sealing incredibly difficult and often leads to burst empanadas during baking. Stick closely to the recommended two tablespoons per disc for optimal results.
- **Thaw Discs Properly:** Ensure your frozen empanada discs are fully thawed but still cold when you begin to work with them. This perfect temperature makes them pliable, easy to fold, and less prone to tearing.
- **Egg Wash is Key:** Do not skip the egg wash! It’s essential not only for effectively sealing the edges but also for achieving that beautiful, appetizing golden crust that makes empanadas so appealing. It makes a significant difference in both appearance and texture.
- **Vary Your Spice Level:** As mentioned earlier, feel free to adjust the amount of sriracha (or any other hot sauce or spice) to perfectly match your family’s preference for heat. Tailor it to your taste buds!
- **Serve Fresh:** While these empanadas freeze and reheat exceptionally well, they are always best enjoyed warm, shortly after baking, when the cheese is at its gooest, the filling is piping hot, and the crust is at its absolute crispiest.
- **Experiment with Dips:** Empanadas are fantastic on their own, but serving them with a side of salsa, sour cream, guacamole, or even a simple hot sauce can elevate the experience.
Frequently Asked Questions About Chicken Empanadas
Here are answers to some common questions you might have about making and enjoying chicken empanadas:
Can I use other types of meat for the filling?
Absolutely! This recipe is incredibly versatile and can be adapted with various proteins. Ground beef, shredded pork (like carnitas), or even ground turkey would work wonderfully. Just make sure the meat is fully cooked, seasoned similarly to the chicken, and well-drained of any excess fat before mixing it with the other filling ingredients.
What if I can’t find Goya empanada discs?
No problem at all! Many brands offer similar frozen pastry discs. Look for “discos para empanadas” or other frozen pastry circles in the international or freezer section of your grocery store. You could also use store-bought puff pastry sheets, cut into circles, though the texture might vary slightly from traditional empanada dough. The convenience, however, remains.
How long do baked chicken empanadas last in the refrigerator?
Leftover baked empanadas can be stored in an airtight container in the refrigerator for up to 3-4 days. For best results and to maintain a crispy crust, reheat them in the oven or an air fryer. Microwaving is an option for speed, but it can unfortunately make the crust soft and soggy.
Can I fry these empanadas instead of baking them?
While this recipe is specifically designed for baking, you can certainly fry empanadas if you prefer. Heat about 2-3 inches of vegetable oil in a deep pan to 350°F (175°C). Fry the empanadas for 2-4 minutes per side, or until golden brown and cooked through. Be sure not to overcrowd the pan and drain them on paper towels after frying.
Chicken Empanadas Recipe
Chicken Empanadas
Brita Britnell
Ingredients
- 10 empanada disks, thawed (Goya brand preferred)
- 2 cups of cooked chicken, shredded or diced
- 1 ½ cups of shredded Monterey Jack cheese
- 4 oz can of diced green chiles, drained
- ½ cup of red bell pepper, finely chopped
- ½ cup of Greek yogurt (non-fat 0% recommended)
- 1 tablespoon of cumin
- 1 teaspoon of salt
- ½ teaspoon of pepper
- ½ teaspoon of paprika
- Optional: 1-2 tablespoons of sriracha for heat
- 1 Egg, beaten for egg wash
Instructions
- Pre-heat your oven to 400 degrees F (200°C). Line a baking sheet with parchment paper to prevent sticking.
- In a large mixing bowl, combine the cooked chicken (shredded or diced), shredded Monterey Jack cheese, drained diced green chiles, finely chopped red bell pepper, Greek yogurt, cumin, salt, pepper, paprika, and sriracha (if you desire a bit of heat). Mix all ingredients thoroughly until well combined.
- Lay out your thawed empanada discs on a clean, flat surface. Spoon approximately 2 heaping tablespoons of the chicken mixture onto one half of each disc. Ensure you leave a clean margin of about ¼ inch around the edge of the disc for proper sealing.
- In a small bowl, beat the egg with a tablespoon of water to create an egg wash. Brush this egg wash lightly around the edges of the filled half of the empanada disc. Carefully fold the other half of the disc over the filling, creating a crescent shape. Gently press the edges together with your fingers to seal them completely. If any filling escapes, gently push it back inside.
- To further seal and create a classic look, use the tines of a fork to crimp the sealed edges of each empanada. This also adds a decorative touch. Afterwards, generously brush the top surface of each empanada with the remaining egg wash for a beautiful golden-brown finish once baked.
- Carefully transfer the prepared empanadas to the lined baking sheet. Bake in the preheated oven for 12-15 minutes, or until the tops of the empanadas are gorgeously golden brown and the filling is heated through and bubbly.
- Once baked, remove the empanadas from the oven and let them cool slightly on the baking sheet for a few minutes before serving. This allows the filling to set and prevents burns. Enjoy your warm, delicious, and easy Chicken Empanadas!
If you end up making this Easy Chicken Empanadas Recipe, we’d absolutely love to hear from you and see your culinary creations! Please share your delicious results by tagging us on social media @foodwithfeeling and using the hashtag #foodwithfeeling! For more delightful and easy meal ideas, don’t forget to check out our Loaded Veggie Enchiladas and these incredibly tasty Black Bean and Sweet Potato Tacos!