
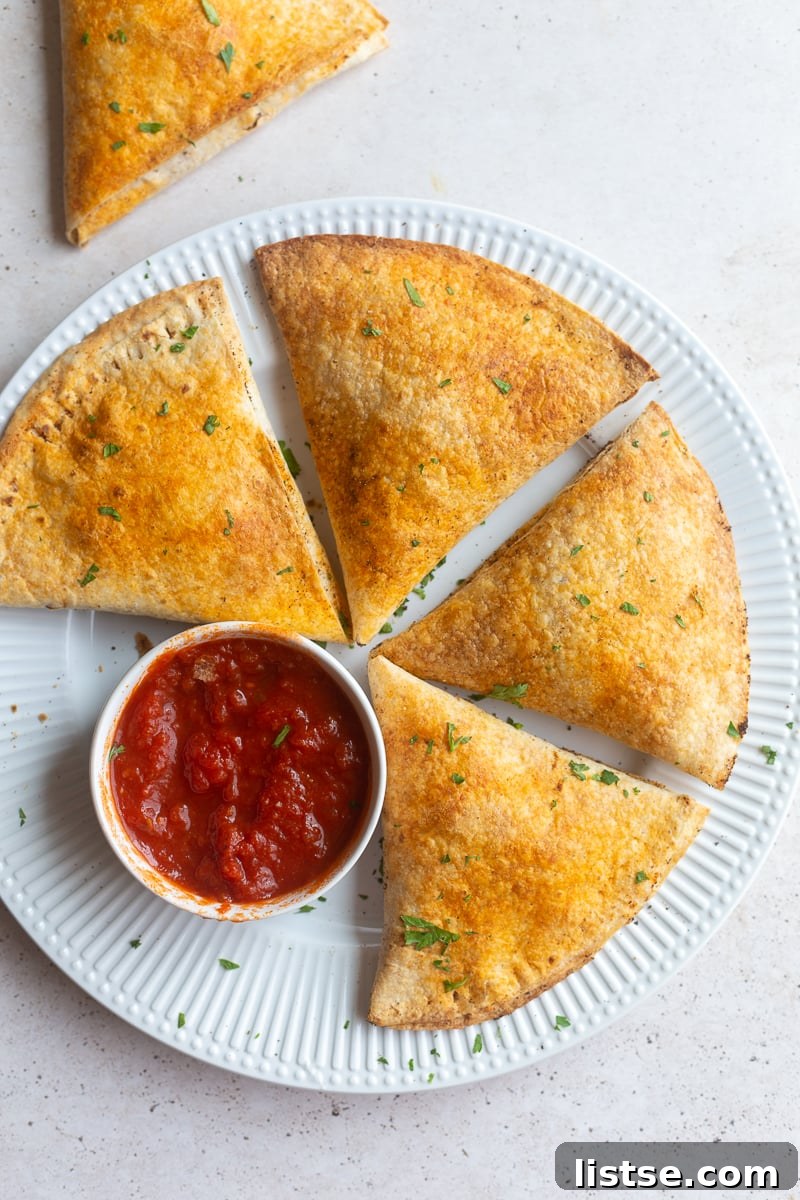
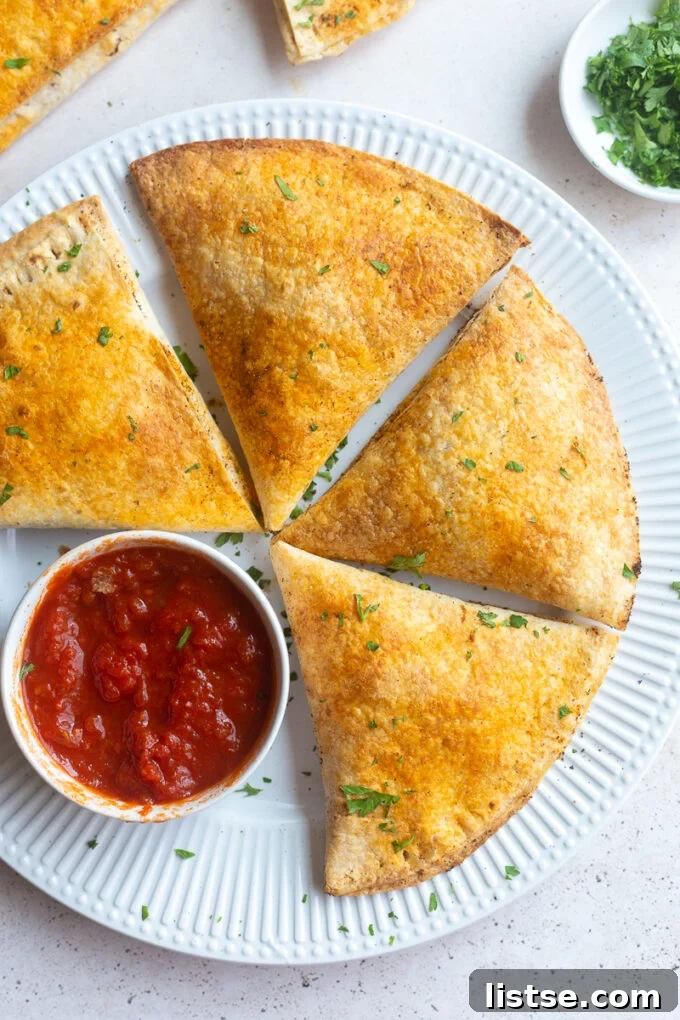
These Healthier Homemade Pizza Pockets come together in mere minutes and are so fun to make! It’s a great recipe to involve the whole family in – everyone can add in their favorite pizza toppings. I made my vegetarian but feel free to use whatever fillings you’d like; they’re incredibly customizable!
For many of us, pizza pockets evoke a strong sense of nostalgia, recalling simpler times, particularly childhood summers. I, like countless others who grew up in the 90s, have fond memories of relying on these convenient and delicious treats for lunch. My brother and I couldn’t get enough of them! The joy of a warm, cheesy, and savory pocket filled with classic pizza flavors was truly unmatched, offering a quick and satisfying meal that felt like a special treat.
Recently, a viral social media video sparked an idea that would revolutionize my homemade pizza pocket experience: using tortillas instead of traditional pizza dough. The concept was brilliant in its simplicity, promising a quicker, lighter, and incredibly crispy alternative. Naturally, I had to put my own spin on this ingenious hack, and the results were absolutely delightful. These tortilla-based pizza pockets are not only healthier but also incredibly fun to customize, making them an instant family favorite for any day of the week.
Delicious Homemade Pizza Pockets: The Ultimate Tortilla Recipe for Quick & Customizable Meals
Say goodbye to bland store-bought snacks and hello to a homemade delight! These incredibly easy and delicious homemade pizza pockets are here to transform your mealtime. Moving beyond the traditional dense crust, we’re embracing the versatility of tortillas to create a lighter, crispier, and faster alternative to your favorite classic snack. Perfect for busy weeknights, convenient lunchboxes, or a fun cooking project with the kids, these customizable pockets are destined to become a staple in your kitchen. Whether you’re a vegetarian, a meat-lover, or somewhere in between, this recipe offers endless possibilities to fill them with your preferred pizza toppings, ensuring everyone gets exactly what they crave.
Why Tortillas Are The Secret Ingredient for Perfect Pizza Pockets
Traditional pizza pockets, while delicious, often come with a denser, breadier crust that can be time-consuming to prepare from scratch. This recipe ingeniously swaps out pizza dough for large burrito-sized tortillas, unlocking a world of benefits that make homemade pizza pockets a breeze to prepare and even more enjoyable to eat:
- Unmatched Speed: The most significant advantage of using tortillas is the drastic reduction in prep time. There’s no more waiting for dough to rise, kneading, or fussing with rolling out a perfect crust. Tortillas are ready to go straight from the pack, allowing you to whip up these delicious pockets in mere minutes, making them ideal for spontaneous snack attacks or quick weeknight dinners.
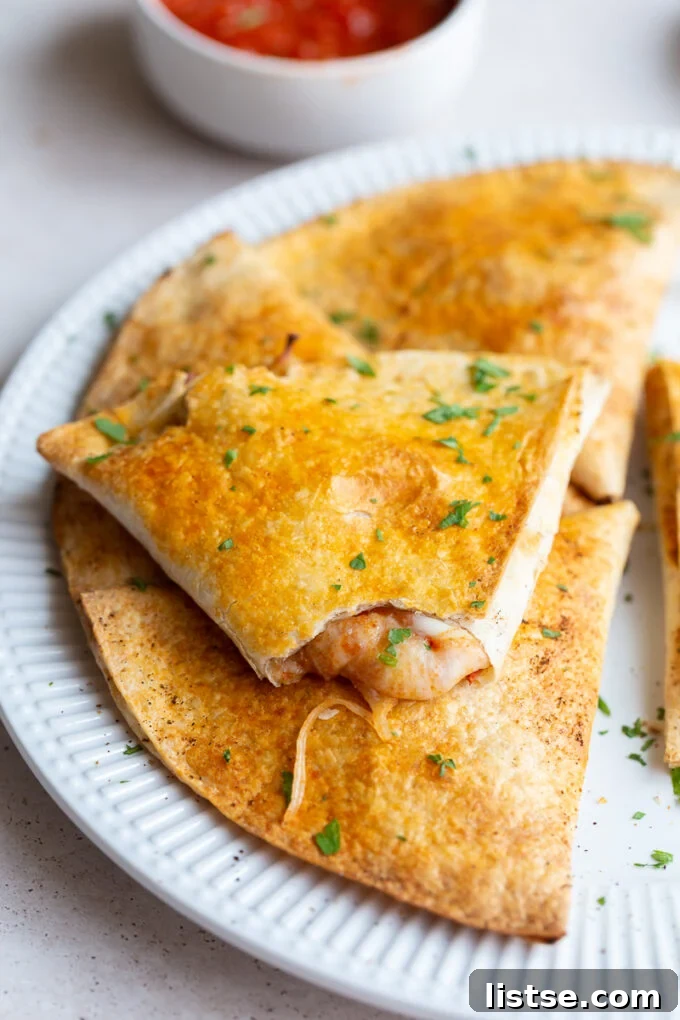
- Irresistible Crispiness: When air-fried or baked in the oven, tortillas achieve an incredible crispiness that rivals even the best thin-crust pizzas. This light, crunchy texture offers a deeply satisfying contrast to the warm, gooey filling inside, elevating the entire pizza pocket experience.
- A Lighter Alternative: For those looking to reduce carbohydrates or calories without sacrificing flavor, tortillas often provide a lighter base compared to traditional pizza dough. This is especially true if you opt for whole wheat or low-carb varieties, making these pockets a smarter choice for a balanced diet.
- Effortless Ease of Use: The pliable nature of tortillas makes them incredibly easy to fold and seal, creating perfectly shaped pockets that securely hold all your delicious fillings. This simplicity is a game-changer, eliminating the struggles often associated with working with sticky dough.
- Family-Friendly Fun: The straightforwardness of working with tortillas makes this recipe ideal for involving children in the kitchen. Kids can easily choose their favorite fillings, help assemble their own personalized pizza pockets, and take pride in creating their own meal or snack. It’s a wonderful way to encourage culinary creativity and picky eaters to try new things.
Essential Ingredients for Your Healthier Homemade Pizza Pockets
Gathering your ingredients is the foundational step to creating these delightful pockets. While the core components are simple, the true beauty of this recipe lies in its adaptability, allowing you to tailor it precisely to your dietary preferences, pantry staples, and taste buds. Here’s what you’ll need, along with some fantastic customization ideas:
- Burrito-Sized Tortillas: These are undoubtedly the star of our show, providing the perfect foundation for our pizza pockets. Opt for large, plain flour tortillas for the most classic taste and easiest handling. However, don’t hesitate to experiment with different varieties:
- Whole Wheat Tortillas: For added fiber and a nuttier flavor, whole wheat tortillas are an excellent choice.
- Low-Carb/Low-Calorie Tortillas: If you’re aiming for a lighter option, many brands offer reduced-carb or calorie versions that work just as well.
- The larger size of burrito tortillas is crucial, as it ensures you have ample space for generous fillings and makes the folding and sealing process significantly easier.
- Shredded Mozzarella Cheese: A generous amount of mozzarella is absolutely key for that classic gooey, stretchy, and melty pizza experience. We recommend starting with about two cups, but feel entirely free to add more if you’re a true cheese enthusiast! For an extra layer of flavor and complexity, consider mixing in other cheeses like sharp cheddar, provolone, or Monterey Jack.
- Pepperoni Slices (or alternative protein): While classic pepperoni is a beloved staple for many, this is where your customization truly shines.
- Vegan Option: I personally love using plant-based pepperonis, such as those often found at Trader Joe’s, for a delicious and ethical twist.
- Meat Options: Traditional pork or beef pepperoni slices work wonderfully. Other excellent choices include cooked crumbled sausage, finely diced ham, or even shredded cooked chicken.
- No Meat? No Problem!: If you prefer to keep your pizza pockets vegetarian, simply omit the pepperoni and load up on extra cheese and a vibrant array of vegetables.
- Pizza Seasoning: A good seasoning blend is essential for elevating the flavor profile significantly, imparting that unmistakable pizza essence. I recently discovered a fantastic “pizza seasoning” from Trader Joe’s that perfectly complements these pockets. If you don’t have access to it, a homemade blend of garlic powder, dried oregano, basil, and a pinch of red pepper flakes (for a little kick!) works just as well. You can also simply use a high-quality Italian seasoning blend with a dash of garlic powder for a robust flavor.
- All-Purpose Flour + Water (Our “Magic Glue”): This incredibly simple mixture is absolutely crucial for sealing the tortilla pockets tightly. It forms a robust, edible adhesive that prevents any delicious fillings from oozing out during cooking, ensuring a neat and contained pocket every time.
- Optional Other Fillings: This is where you can truly unleash your creativity and make each pocket uniquely yours!
- Classic Vegetables: Finely chopped onion, diced fresh tomatoes, sliced black olives, vibrant green bell peppers, and sautéed mushrooms are all classic and fantastic additions.
- Bold Additions: Consider adding fresh spinach (wilting it slightly first), zesty jalapeños for a touch of heat, or even marinated artichoke hearts for a gourmet touch.
- Dare to be Different: For the truly adventurous, a controversial but often beloved topping like pineapple can add a surprisingly sweet and tangy dimension to your savory pockets.
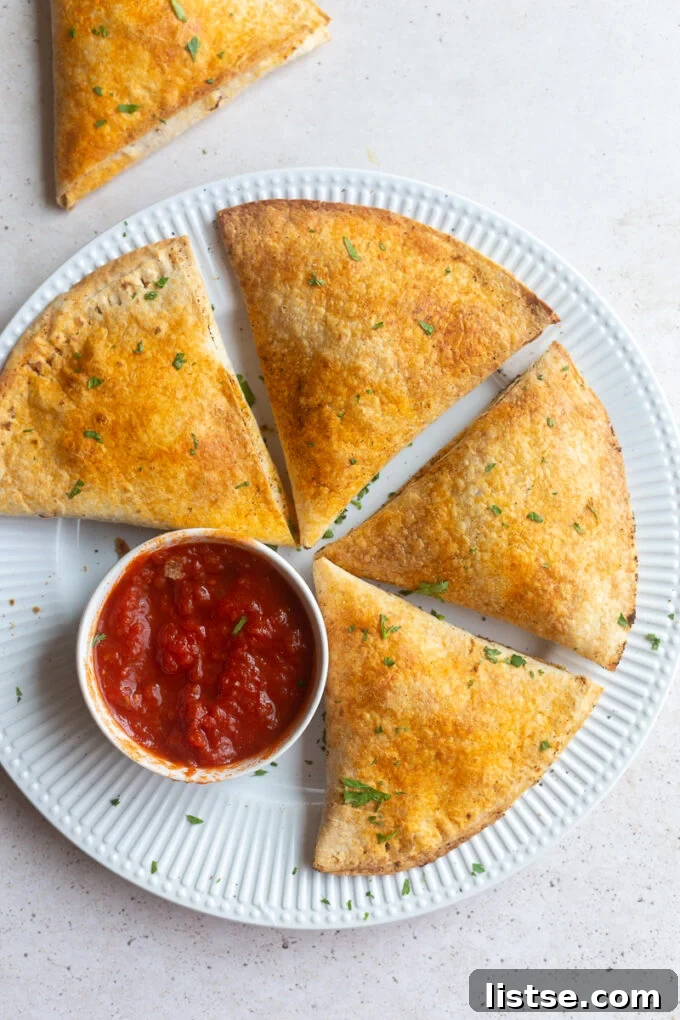
- Pizza Sauce/Marinara for Dipping: While I initially debated adding the pizza sauce directly into the pockets, I ultimately decided that serving it on the side as a dipping sauce was the superior choice. This approach prevents the pockets from becoming soggy during cooking and allows for a satisfying, saucy dip with every single bite. A warm, rich marinara sauce is the perfect accompaniment, adding that essential tomato flavor.
Step-by-Step Guide: Crafting Your Delicious Homemade Pizza Pockets
Don’t let the idea of making homemade pizza pockets intimidate you! These are surprisingly straightforward to assemble, making them an excellent choice for a quick meal or a fun family cooking activity. The process is intuitive and rewarding, leading to perfectly crafted pockets every time. Let’s walk through the simple steps:
- Prepare Your Flavorful Filling: In a medium-sized bowl, combine your generously shredded mozzarella cheese, your chosen pepperoni slices (or any other protein or vegetable additions), and your favorite pizza seasoning. Mix all the ingredients thoroughly to ensure that the flavors are evenly distributed throughout the mixture. Set this bowl aside for a moment.
- Create the Essential “Glue”: In a small, separate bowl, whisk together the all-purpose flour and water. Continue mixing until a smooth, thick, and consistent paste forms. This paste is our edible adhesive, and it’s absolutely crucial for securely sealing the edges of your tortilla pockets.
- Prepare the Tortillas: Take one large burrito-sized tortilla and carefully cut it in half using a sharp knife or kitchen shears. This will yield two semi-circular pieces, each ready to be transformed into a pizza pocket.
- Form the Cone Shape: Take one of the tortilla halves you just cut. Fold one of the straight edges over towards the center of the semi-circle. Then, fold the other straight edge over to overlap the first fold, creating a neat cone shape. This cone will serve as the structural base of your pocket.
- Seal the Cone Base: Using a small pastry brush or even your finger, apply a thin, even layer of your prepared flour “glue” along the overlapping edge of the newly formed cone. Press the edges firmly together to seal them shut. Ensuring a good, tight seal at this stage is important to prevent any leakage of fillings during the cooking process.
- Generously Fill the Cones: Now, spoon your prepared cheese and pepperoni mixture into the tortilla cone. Aim to fill it about two-thirds of the way full. Be careful not to overfill, as this can make the final sealing step challenging and might cause the pockets to burst during cooking.
- Securely Seal the Entire Pocket: Apply more of the flour “glue” along the open top edge of the filled cone. Gently lay the pocket flat on a clean, dry surface. Using the tines of a fork, firmly crimp all the open edges together. Press down well and thoroughly to ensure that the pizza pocket is completely sealed, perfectly encasing all the delicious filling inside. Repeat this entire process (from step 3 to 7) with the remaining tortilla halves until all your pizza pockets are expertly assembled.
- Optional Pre-Cooking Seasoning: For an extra layer of flavor and to help achieve a beautiful golden-brown and crispy crust, lightly spray the tops of your assembled, uncooked pizza pockets with a little cooking spray. Then, if desired, sprinkle a little more pizza seasoning or a pinch of garlic powder over them just before cooking.
Cooking Methods: Achieve Perfect Crispy Pizza Pockets Every Time
One of the best features of these homemade pizza pockets is their incredible versatility in cooking methods. Both the air fryer and a conventional oven yield fantastic results, consistently delivering a wonderfully crispy exterior and a molten, cheesy interior. Choose the method that best suits your equipment and time constraints:
- Air Fryer Method (My Preferred Choice):
The air fryer is a game-changer for achieving maximum crispiness in minimal time. Begin by preheating your air fryer to 400°F (200°C). When cooking, work in batches, ensuring you do not overcrowd the air fryer basket; this allows for optimal air circulation and even crisping. Place the pizza pockets in a single layer. Lightly spray both sides of the pockets with cooking spray, then cook for approximately 6-8 minutes total. Make sure to flip them halfway through the cooking time to ensure even browning. Cook until they are beautifully golden brown, visibly puffy, and the cheese inside is thoroughly melted and bubbly. Keep in mind that the exact cooking time may vary slightly depending on your specific air fryer model.
- Oven Baking Method:
While I often opt for the speed and convenience of the air fryer, these pizza pockets bake absolutely beautifully in a conventional oven, often offering a slightly more even, all-around crispness that some prefer. Preheat your oven to 400°F (200°C). To prevent sticking and make cleanup a breeze, line a baking sheet with parchment paper. Arrange the assembled pizza pockets on the prepared baking sheet in a single layer, ensuring they are not touching each other, which would prevent even cooking. Bake for about 10-15 minutes, or until the tortillas are wonderfully golden brown and crispy along the edges, and the filling is piping hot and gloriously gooey. Always keep a watchful eye on them to prevent any over-browning.
Storing and Freezing for Future Enjoyment
These homemade pizza pockets are not only delicious when freshly made but also make fantastic freezer-friendly meals, perfect for thoughtful meal prepping or having a quick, satisfying snack readily available. The convenience of having these on hand for a busy day is truly invaluable. While I haven’t personally tested reheating cooked pockets extensively, I believe they would freeze beautifully before cooking, preserving their texture and flavor.
- Freezing Uncooked Pockets (Recommended Method):
Follow the recipe instructions up to the point of assembling and securely sealing the pockets. At this stage, do not spray them with cooking spray or apply any additional seasoning. Once assembled, arrange the uncooked pizza pockets in a single layer on a parchment paper-lined baking sheet. Place the baking sheet in the freezer for 1-2 hours, or until the pockets are completely solid. This “flash freezing” step prevents them from sticking together. Once frozen solid, transfer the pockets to a freezer-safe airtight bag or container. They can be stored in the freezer for up to 1-2 months, providing a convenient grab-and-go option.
To Cook from Frozen: There’s no need to thaw these delicious pockets! Simply follow either the air fryer or oven baking methods described above. You’ll just need to add an extra 3-5 minutes to the cooking time, or until they are golden, wonderfully crispy, and thoroughly heated through. Remember to spray with cooking spray and season just before placing them in the air fryer or oven.
- Storing Cooked Pockets (Short Term):
If you happen to have leftover cooked pizza pockets, allow them to cool completely to room temperature before storing them. Place them in an airtight container and keep them in the refrigerator. They will remain fresh and tasty for 2-3 days. To reheat, I recommend using the air fryer or oven for a few minutes. This will help them regain their desired crispiness, rather than becoming soft in a microwave.
Customization Beyond the Basics: Unleash Your Inner Pizza Chef
The true beauty of homemade pizza pockets, especially with a versatile tortilla base, lies in the endless potential for customization. Don’t feel limited by the classic pepperoni and cheese combination; this is your invitation to experiment and unleash your inner pizza chef! Here are some creative ideas to inspire your next batch and keep mealtime exciting:
- Hearty Breakfast Pockets: Start your day with a savory twist! Fill your pockets with fluffy scrambled eggs, cooked sausage crumbles or crispy bacon bits, and a generous sprinkle of sharp cheddar cheese. A dash of hot sauce or a sprinkle of fresh chives would be a delicious addition.
- Mediterranean Delight: Transport your taste buds to the sunny coasts of the Mediterranean. Combine briny Kalamata olives, juicy sun-dried tomatoes (chopped), crumbled feta cheese, and a pinch of dried oregano for a savory, tangy, and aromatic pocket.
- Spicy Southwest Kick: For those who love a bit of heat, try a Southwest-inspired filling. Mix black beans, sweet corn kernels, finely diced jalapeños, spicy pepper jack cheese, and a dash of chili powder for an exciting kick. Serve these with a side of fresh salsa or a dollop of cool sour cream.
- Philly Cheesesteak Style: Bring the flavors of a classic sandwich to your pizza pockets. Fill them with thinly sliced cooked steak, perfectly sautéed onions and bell peppers, and melted provolone cheese for a truly satisfying bite.
- Tangy BBQ Chicken Pockets: A fantastic way to use leftover chicken! Shredded cooked chicken mixed generously with your favorite smoky BBQ sauce, finely diced red onion, and creamy mozzarella cheese creates a sweet and savory sensation.
- Sweet Dessert Pockets (A delightful surprise!): Who says pizza pockets can only be savory? Skip the traditional fillings and go sweet! Fill your pockets with a mixture of cream cheese and your favorite fruit preserves, or try decadent Nutella spread with sliced bananas or strawberries. Crimp them shut, lightly brush the tops with melted butter, sprinkle with cinnamon sugar, and bake until golden. They are a delightful, unexpected treat!
Serving Suggestions for Your Perfectly Crispy Pizza Pockets
While these homemade pizza pockets are incredibly satisfying and delicious on their own, pairing them with a flavorful dipping sauce or a fresh side can elevate the entire meal experience. Think beyond just the pocket and consider how you can complement their rich flavors:
- Classic Marinara: The undeniable champion! A warm, rich marinara or classic pizza sauce is the perfect companion for dipping, adding that essential tangy tomato flavor that perfectly rounds out the pizza experience.
- Creamy Ranch Dressing: For a delightful contrast, a creamy, cool, and tangy ranch dressing offers a refreshing counterpoint to the savory and warm pizza flavors.
- Homemade Garlic Parmesan Dip: Elevate your dipping game with a simple yet incredibly flavorful dip. Whisk together mayonnaise, freshly grated Parmesan cheese, finely minced garlic, and a squeeze of fresh lemon juice for a rich and aromatic accompaniment.
- Vibrant Pesto: For a fresh, herbaceous, and slightly nutty note, a vibrant basil pesto can be a wonderful and unexpected dipping option, adding a touch of gourmet sophistication.
- Fresh Side Salad: A simple green salad with a light vinaigrette dressing provides a refreshing and healthy balance, perfectly complementing the richness of the pizza pockets without overwhelming them.
- Crunchy Vegetable Sticks: Serve a platter of crisp carrot sticks, cool cucumber slices, or colorful bell pepper strips for a fresh and crunchy addition. These also provide a healthy way to scoop up any extra sauce!
I genuinely hope you enjoy making and devouring these healthier homemade pizza pockets as much as I do! They truly are a testament to how simple ingredients, a little creativity, and minimal effort can create something incredibly satisfying, fun, and nostalgic. Whether you’re making them for a quick lunch, a family dinner, or a party snack, they’re sure to be a hit. If you give this recipe a try, I would absolutely love to hear about your experience and how you customized them! Please feel free to come back here and leave a comment, or better yet, share your delicious creations on Instagram by tagging me (@foodwithfeeling) and using the hashtag #foodwithfeeling. Your feedback and photos always bring a huge smile to my face!
More Delicious Pizza Recipes to Explore
If you’re a pizza enthusiast like me, you’re always looking for new and exciting ways to enjoy those beloved flavors and textures. From classic interpretations to creative twists, the world of pizza is vast and delicious. Here are some other fantastic pizza-inspired recipes from Food With Feeling that you might love to try next:
- Rainbow Veggie Pizza
- Easy Pizza Dough
- English Muffin Pizzas
- Dessert Pizza
- Delicious Vegan Pizza
- Vegan Grilled Pizza

Homemade Pizza Pockets Recipe
By Brita Britnell
Prep Time: 20 mins
Cook Time: 12 mins
Total Time: 32 mins
Servings: 8 pizza pockets
These Healthier Homemade Pizza Pockets come together in mere minutes and are so fun to make! It’s a great recipe to involve the whole family in – everyone can add in their favorite pizza toppings. I made my vegetarian but feel free to use whatever fillings you’d like; they’re so customizable!
Print Recipe
Ingredients
- 2 cups shredded mozzarella cheese
- Half packet of pepperoni (~3 oz total, or vegan version)
- 1 tablespoon Trader Joe’s Pizza seasoning (or a mix of Italian seasoning + garlic powder)
- 2 tablespoons all-purpose flour
- 1 tablespoon water
- 4 large burrito tortillas, cut in half
- Optional marinara for serving
Instructions
- In a small bowl, mix together the mozzarella, pepperoni, and seasoning. Set aside.
- Make your “glue” by mixing together the flour + water until a paste forms.
- Taking one tortilla half at a time, fold one side over to the middle and then fold the other side over top of that to create a cone. Brush some of the “glue” along the side edge and press to seal.
- Fill the cone 2/3 of the way full with the cheese mixture. Add more glue to the top of the tortilla and lay it flat on a clean surface. Use a fork to crimp the edges shut. Press firmly so that the pizza pocket is fully sealed. Repeat with the remaining tortillas.
- Air Fryer Method: Working in batches, place the pizza pockets into the air fryer and spray both sides with cooking spray. Top with additional seasoning as desired. Cook at 400°F (200°C) for 6-8 minutes, flipping halfway, or until golden brown and crispy.
- Oven Method: Preheat oven to 400°F (200°C). Place pockets on a parchment-lined baking sheet. Spray with cooking spray and season. Bake for 10-15 minutes, or until golden brown and crispy.
Notes
- The pizza seasoning is totally optional and not entirely necessary. I tested these with just a little garlic powder sprinkled in and they were still delicious!
- For freezing: Assemble pockets but do not cook. Flash freeze on a baking sheet until solid, then transfer to a freezer-safe bag. Cook from frozen, adding a few extra minutes to the cooking time.
Nutrition (Approximate per serving)
- Calories:
- 238 kcal
- Carbohydrates:
- 17g
- Protein:
- 11g
- Fat:
- 14g
- Saturated Fat:
- 6g
- Polyunsaturated Fat:
- 1g
- Monounsaturated Fat:
- 5g
- Trans Fat:
- 0.2g
- Cholesterol:
- 32mg
- Sodium:
- 565mg
- Potassium:
- 98mg
- Fiber:
- 1g
- Sugar:
- 1g
- Vitamin A:
- 200 IU
- Vitamin C:
- 0.01mg
- Calcium:
- 198mg
- Iron:
- 2mg
Nutrition information is automatically calculated and should only be used as an approximation.
Tried this recipe?
Mention @foodwithfeeling or tag #foodwithfeeling!