
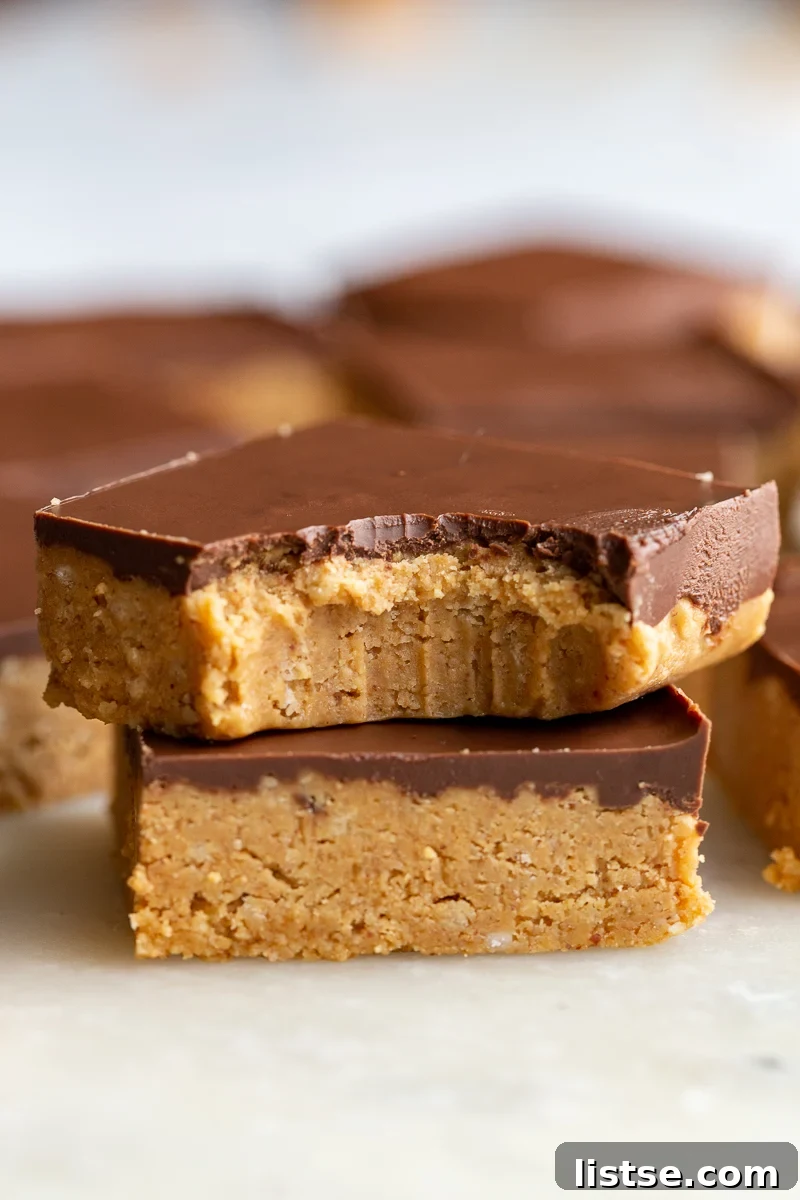
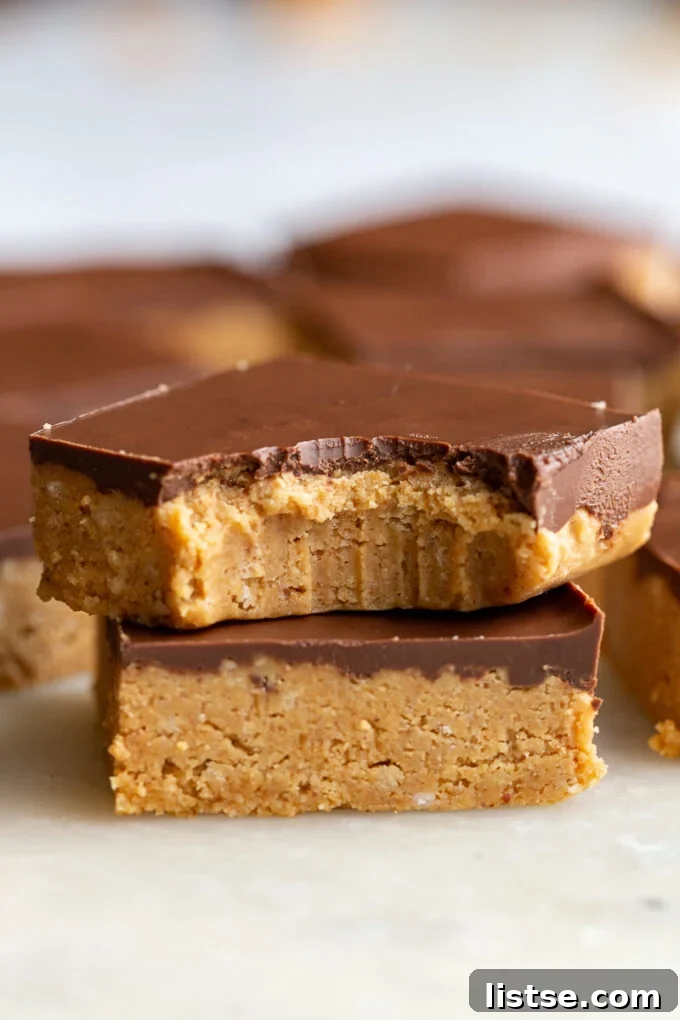
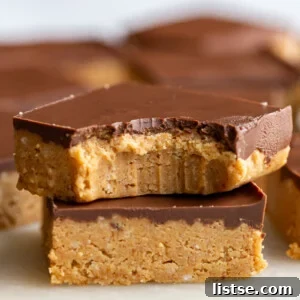
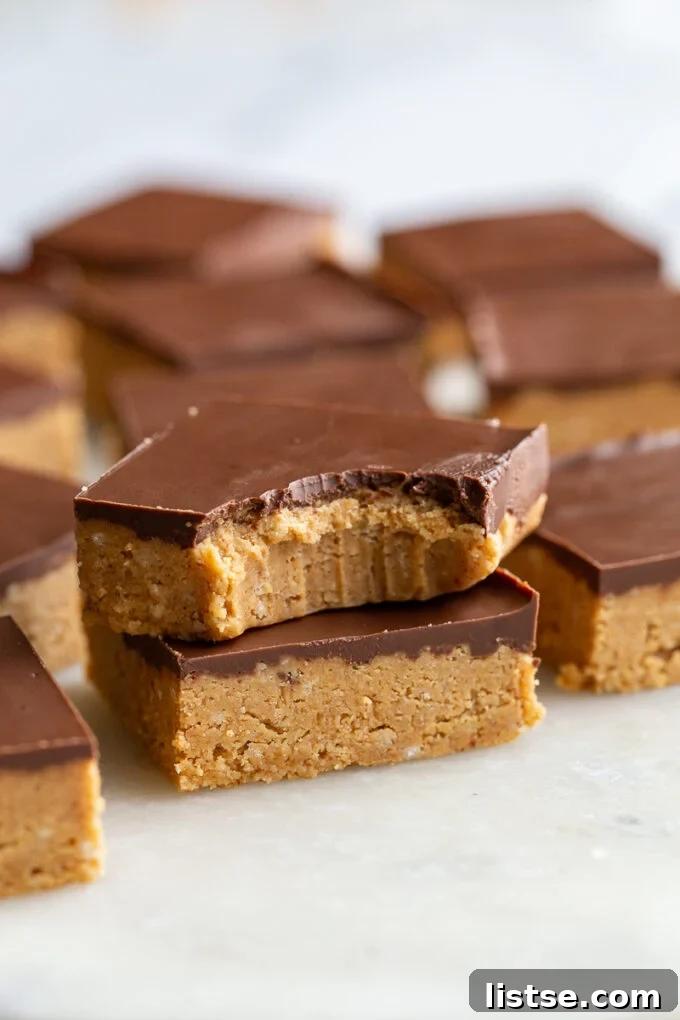
Prepare for an explosion of flavor with these incredibly simple, yet profoundly satisfying No-Bake Peanut Butter Bars! Crafted for ultimate convenience, this recipe requires just 10 minutes of active preparation time, demands absolutely no oven baking, and delivers an undeniably delicious dessert. These bars perfectly capture the beloved combination of creamy, rich peanut butter and a smooth, decadent chocolate topping, making them an instant favorite for anyone with a sweet tooth.
My personal journey to perfecting these peanut butter bars has a rather unique and nostalgic origin. Many years ago, I embarked on an unexpected chapter of my life, spending about a year in a convent. While that experience itself is a vast story for another time, one aspect that consistently brought joy was the remarkable food. It turned out that one, or perhaps a few, of the sisters had been professionally trained chefs before joining the convent, ensuring every meal was a culinary delight. Among all the exquisite dishes and desserts served, the no-bake peanut butter bars stood out as my absolute favorite. The mere sight of them appearing on the menu would fill me with an excitement that transcended the everyday.
After that transformative year, I frequently found myself reminiscing about those heavenly bars. The specific craving for that perfect balance of sweet, salty, and utterly comforting peanut butter and chocolate became a persistent longing. It only seemed fitting, then, that I would dedicate myself to recreating that cherished memory. After much experimentation and tweaking, I developed my own version of these beloved treats, eager to bring that same delightful experience from the convent kitchen into the comfort of my home and, now, into yours. These bars aren’t just a dessert; they’re a taste of nostalgia and a testament to the power of simple ingredients creating extraordinary flavor.
Why These No-Bake Peanut Butter Bars Are Your New Favorite Dessert
If you’re searching for a dessert that marries ease with undeniable deliciousness, look no further. These no-bake peanut butter bars are not just a recipe; they are a delightful solution for quick cravings, impromptu gatherings, or simply treating yourself. Here’s why they are an absolute must-try:
- Effortless Preparation: Say goodbye to complex baking techniques and extensive clean-up. These bars are entirely no-bake, requiring only a few simple steps of mixing, pressing, and chilling. This makes them perfect for beginner bakers or busy individuals.
- Incredibly Speedy: You can have these delectable bars assembled and chilling in your refrigerator in typically less than 15 minutes of hands-on time. They are the ideal last-minute dessert when you need something impressive in a hurry.
- Minimal Pantry Staples: The ingredient list is short and sweet, featuring items you likely already have in your kitchen. Simple, high-quality ingredients come together to create a profoundly satisfying taste.
- Classic Flavor Perfection: The timeless duo of peanut butter and chocolate is celebrated in these bars. Each bite offers a harmonious blend of nutty, sweet, and salty notes that appeal to almost everyone.
- Highly Customizable: While perfect as they are, these bars are also a fantastic canvas for creativity. Easily add various toppings, experiment with different nut butters, or adapt them to suit dietary preferences.
- Guaranteed Crowd-Pleaser: From family dinners to holiday parties, these no-bake bars consistently receive rave reviews. Their universal appeal makes them a reliable choice for any social occasion.
- Perfect Texture: The firm, yet tender graham cracker and peanut butter base topped with a smooth, snappy chocolate layer creates a textural delight that keeps you coming back for more.
Essential Ingredients for Your Perfect No-Bake Peanut Butter Bars
The secret to the irresistible taste and texture of these bars lies in a carefully selected blend of common ingredients. Each component contributes significantly to the overall deliciousness. Let’s break down what you’ll need and why each plays a vital role in achieving no-bake perfection:
- Drippy Natural Peanut Butter: This is a cornerstone for the creamy, cohesive texture of the base layer. Natural peanut butter, which often separates with oil on top, blends more easily and creates a smoother consistency. If you prefer a thicker, more conventional brand like Jif or Skippy, it will also work, but ensure it’s at room temperature for easier mixing. The natural oils and rich roasted flavor are essential for the classic peanut butter taste.
- Graham Cracker Crumbs: These form the structural, subtly sweet foundation of your bars. It’s crucial that the crumbs are finely crushed, resembling fine sand or breadcrumbs, to ensure a compact and even base. The best way to achieve this is by pulsing whole graham crackers in a food processor or blender. Alternatively, you can place them in a sturdy plastic bag and crush them thoroughly with a rolling pin. For a gluten-free option, simply substitute with gluten-free graham crackers. Other excellent alternatives include digestive biscuits, vanilla wafers, or even crushed shortbread cookies for a different flavor profile.
- Melted Butter (Salted or Unsalted): Butter acts as the primary binder for the graham cracker and peanut butter mixture, giving the base its rich flavor and firm structure. Whether you opt for salted or unsalted butter is a matter of taste; salted butter can beautifully enhance the sweet-and-salty dynamic, while unsalted provides more control over the overall sodium content. For those seeking a dairy-free or vegan option, a good quality plant-based butter substitute can be used effectively.
- Powdered Sugar (Confectioners’ Sugar): This is paramount for sweetening the bars without introducing a grainy texture. Unlike granulated sugar, powdered sugar dissolves effortlessly into the peanut butter mixture, ensuring a velvety-smooth and melt-in-your-mouth base. Do not substitute with granulated sugar, as it will significantly alter the texture.
- Chocolate Chips: The star of the luscious top layer! Standard semi-sweet chocolate chips are a reliable choice for a balanced flavor. However, feel free to personalize your bars by using dark chocolate chips for a more intense, less sweet finish, or milk chocolate chips for a sweeter, creamier indulgence. High-quality chocolate bars, finely chopped, also work wonderfully for a more gourmet touch.
- Coconut Oil or Melted Butter (for topping): A small amount of coconut oil or additional melted butter mixed with the chocolate is the secret to a perfectly smooth, glossy, and easily spreadable chocolate topping. This addition helps the chocolate set firmly but not too hard, preventing it from cracking when you slice the bars. Refined coconut oil is typically preferred as it has a neutral flavor, but unrefined coconut oil can be used if you enjoy a subtle coconut note.
- Sea Salt (Optional, for the base): A pinch of fine sea salt integrated into the peanut butter base truly elevates the overall flavor. It perfectly balances the sweetness, deepens the nutty notes of the peanut butter, and adds a subtle gourmet touch.
Easy Step-by-Step Instructions for No-Bake Peanut Butter Bars
Creating these delightful bars is remarkably straightforward, making them accessible even for those new to dessert making. The entire process is designed for minimal effort and maximum flavor impact. Follow these simple, detailed steps to bring your no-bake peanut butter chocolate dreams to life:
Peanut Butter Bars
Pin Recipe
Print Recipe
Ingredients
- 1 cup graham cracker crumbs
- ½ cup butter, melted
- 1 cup powdered sugar
- ½ teaspoon sea salt
- 1 cup natural peanut butter
- 1 cup chocolate chips
- 1 tablespoon melted coconut oil or butter
Instructions
-
1. Prepare Graham Cracker Crumbs: Begin by ensuring your graham cracker crumbs are finely prepared. The quickest method is to pulse whole graham crackers in a food processor or blender until they achieve a consistency similar to fine breadcrumbs. If you don’t have these appliances, place the crackers in a sturdy zip-top bag and thoroughly crush them using a rolling pin or the bottom of a heavy pan. Fine crumbs are crucial for a smooth, stable base.
-
2. Line Your Baking Pan: Line a square baking pan (an 8×8 inch or 9×9 inch pan is ideal) with parchment paper. Leave a generous overhang on two opposite sides; these will serve as convenient “handles” to easily lift the entire block of bars out of the pan once they are chilled and set. This step is key for clean removal and perfectly cut squares.
-
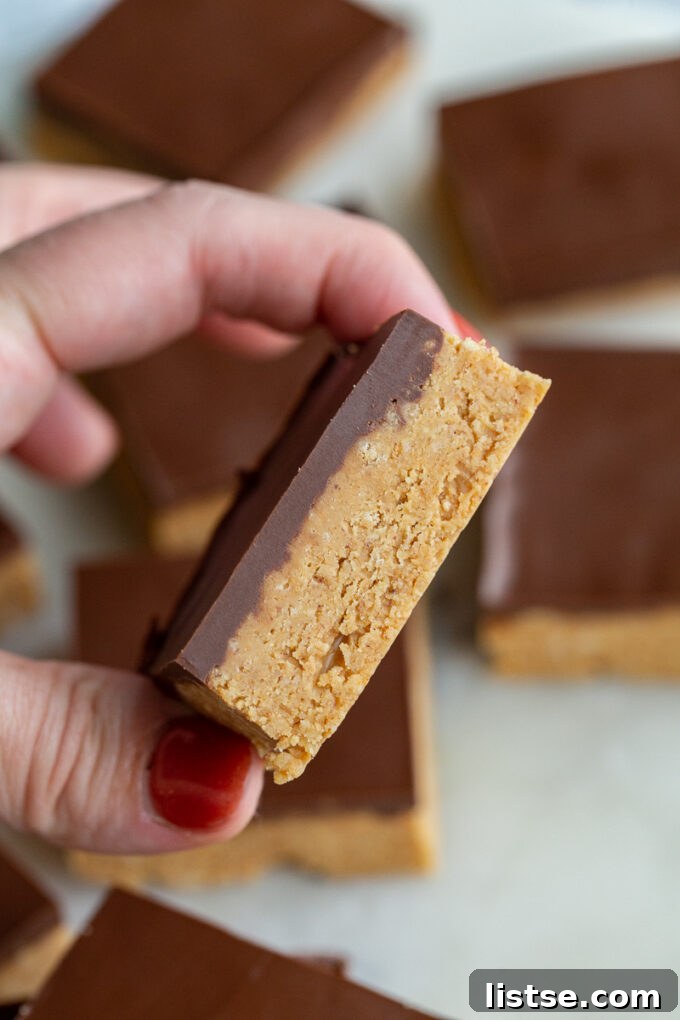
3. Create the Peanut Butter Base: In a large mixing bowl, combine your finely crushed graham cracker crumbs, the melted butter, powdered sugar, the optional sea salt, and the natural peanut butter. Mix all ingredients thoroughly until they are well combined and form a thick, uniform, and slightly sticky mixture. This should resemble wet sand in texture. Transfer this mixture into your prepared baking pan and press it down very firmly and evenly across the entire bottom. You can use the back of a spoon, a flat-bottomed glass, or your clean hands to compact the base, ensuring it is dense and level.
-
4. Prepare and Pour the Chocolate Topping: Using the same mixing bowl (to minimize dishwashing!), add the chocolate chips and the melted coconut oil (or extra butter). Microwave the mixture in short 30-second bursts, stirring diligently after each interval, until the chocolate is completely smooth, glossy, and free of any lumps. Be cautious not to overheat the chocolate, as it can seize and become unusable. Alternatively, you can melt it gently over a double boiler. Once perfectly smooth, immediately pour the melted chocolate over the pressed peanut butter base, spreading it out evenly with an offset spatula or the back of a spoon to create a uniform and appealing top layer.
-
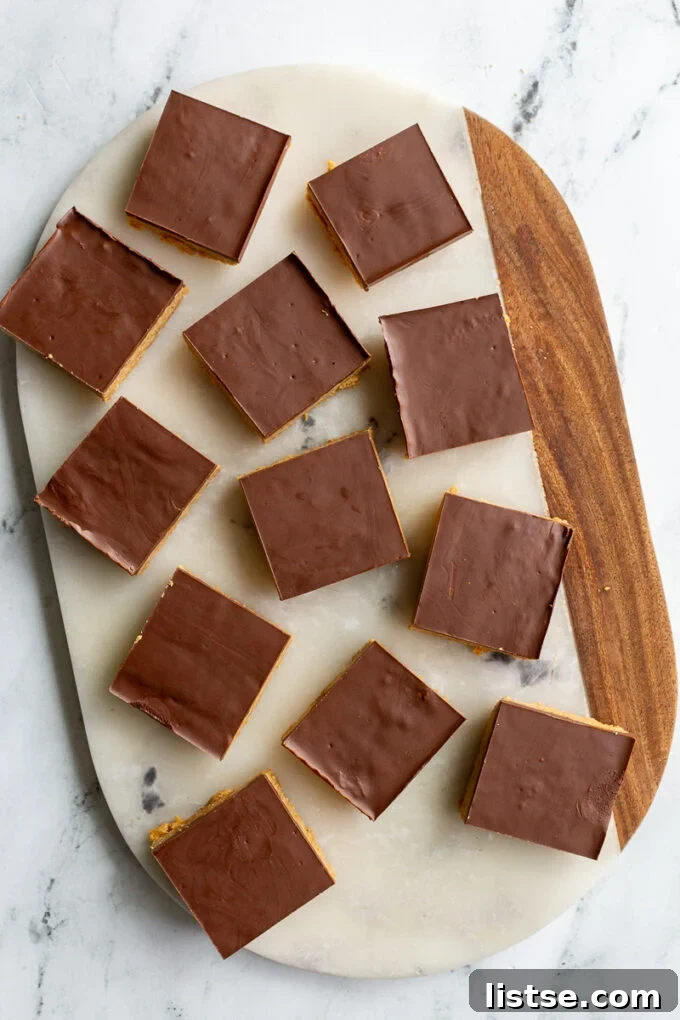
5. Chill, Cut, and Enjoy!: Carefully transfer the pan to your refrigerator. Allow it to chill for at least 30 minutes, or until the chocolate layer is completely firm and set to the touch. Once fully hardened, use the parchment paper overhangs to gently lift the entire slab of bars out of the pan. Place it on a clean cutting board and, using a sharp knife, slice it into your desired squares or rectangles. For the cleanest cuts and a professional finish, you can dip your knife in hot water and wipe it dry between each slice. Serve immediately and savor these incredibly easy and utterly delicious no-bake treats!
Pro Tips for Perfect No-Bake Peanut Butter Bars Every Time
While this recipe is wonderfully simple, a few expert tips can ensure your peanut butter bars consistently turn out flawless, delivering optimal flavor and texture:
- Achieve Ultra-Fine Crumbs: The foundation of your bars is key. Ensure your graham cracker crumbs are ground to a very fine, uniform consistency, resembling fine sand. Any larger chunks can make the base crumbly and prevent it from holding together properly when pressed.
- Press the Base Down Firmly and Evenly: When pressing the peanut butter mixture into your pan, use consistent and firm pressure across the entire surface. This creates a dense, stable base that won’t crumble or fall apart when you slice the bars. A flat-bottomed measuring cup or a heavy glass works wonders for this task.
- Melt Chocolate Gently: Chocolate is delicate. When melting it, use short intervals (30 seconds in the microwave) and stir frequently to distribute heat evenly. Overheating or introducing any moisture (even a tiny drop of water or steam) can cause the chocolate to seize, turning it into a thick, clumpy mess.
- Don’t Skip the Coconut Oil (or Extra Butter) in Chocolate: The small addition of coconut oil or butter to your chocolate topping is not optional. It’s crucial for achieving a smooth, pourable chocolate that sets with a perfect snap and prevents unsightly cracks when the bars are cut.
- Chill Thoroughly for Best Results: Patience is a virtue here! Ensure the bars are completely chilled and the chocolate layer is fully firm before attempting to slice them. Rushing this step will lead to a gooey, messy outcome and unevenly shaped bars.
- Use a Warm Knife for Clean Slices: For impeccably clean and sharp cuts, dip a sharp knife in hot water, wipe it dry, and then make your slice. Repeat this warming and wiping process for every few cuts to maintain pristine edges and a professional appearance.
- Always Line Your Pan: Lining your baking pan with parchment paper, especially with an overhang, is a non-negotiable step. It makes the removal of the entire slab of bars from the pan incredibly easy, allowing for neat and effortless slicing.
- Room Temperature Peanut Butter: Ensure your peanut butter is at room temperature before mixing. This makes it much softer and easier to combine with the other ingredients, resulting in a smoother, more uniform base.
Delicious Variations and Customizations for Your Peanut Butter Bars
These no-bake peanut butter bars are already a showstopper, but they also offer a fantastic foundation for your culinary imagination! Feel free to experiment with these ideas to tailor them to your personal taste or specific dietary needs:
- Creative Toppings: Before the chocolate topping fully sets, sprinkle your bars with flaky sea salt (for an enhanced sweet and salty contrast), mini chocolate chips, chopped roasted peanuts or other nuts, colorful sprinkles, or even a delicate drizzle of white chocolate or caramel sauce.
- Alternative Nut Butters: While classic peanut butter is phenomenal, you can certainly experiment with other nut butters. Almond butter, cashew butter, or even sunflower seed butter (for a nut-free option) can be used. Just ensure their consistency is similar to natural peanut butter for the best results; you might need to slightly adjust the butter content if they are much thicker or thinner.
- Different Crust Varieties: Replace graham cracker crumbs with other crushed cookies for a unique base. Consider vanilla wafers for a lighter flavor, digestive biscuits, shortbread cookies, or even crushed Oreo cookies for a rich, dark, and chocolatey twist. Adjust the amount of melted butter as needed to ensure the crust holds together well.
- Chocolate Layer Diversity: Play with different types of chocolate for the top layer. Use extra dark chocolate for a less sweet, more intense flavor, or opt for milk chocolate for an extra creamy and sweet experience. You could even create a marbled effect by drizzling melted white chocolate over the semi-sweet layer before it sets.
- Flavor Enhancers: A tiny splash of pure vanilla extract or even a hint of almond extract added to the peanut butter base can introduce another layer of delightful flavor complexity.
- Dairy-Free and Vegan Adaptations: To make these bars suitable for dairy-free and vegan diets, simply use a high-quality plant-based butter alternative, ensure your chosen chocolate chips are certified dairy-free (many dark chocolate varieties are), and, if necessary, use vegan-friendly graham crackers or another vegan cookie for the crust.
Storage Tips for Maintaining Freshness
Proper storage is essential to keep your delicious no-bake peanut butter bars fresh, firm, and enjoyable for as long as possible. Follow these guidelines to maximize their shelf life:
- Refrigerator Storage: For everyday storage, place any leftover bars in an airtight container. Keep them in the refrigerator for up to 1 week. The cool temperature ensures the chocolate layer remains firm and prevents the peanut butter base from becoming too soft or oily.
- Freezer Storage for Longer Life: To extend their freshness, these bars freeze beautifully. First, wrap individual bars tightly in plastic wrap or parchment paper, then place them in an airtight, freezer-safe container or a heavy-duty freezer bag. They can be stored in the freezer for up to 2-3 months.
- Thawing Frozen Bars: When you’re ready to enjoy a frozen bar, simply transfer it to the refrigerator for a few hours to thaw, or let it sit at room temperature for about 30 minutes. This allows them to soften slightly to the perfect eating consistency.
- Room Temperature Considerations: While the bars can safely sit at room temperature for a few hours (especially if the room isn’t too warm), chilling them is strongly recommended for the best texture. At warmer temperatures, the chocolate might soften and the peanut butter base could become a bit oily.
- Preventing Sticking: If stacking bars in a container, place a small piece of parchment paper between layers to prevent them from sticking together, especially if the chocolate topping is slightly soft.
Frequently Asked Questions About No-Bake Peanut Butter Bars
- Can I use crunchy peanut butter instead of smooth?
- Absolutely! Using crunchy peanut butter will add a wonderful textural element to the base with delightful bits of peanuts. Just ensure that, if it’s a very thick crunchy peanut butter, it’s at room temperature to make mixing easier, and you may slightly adjust the amount of melted butter if needed to achieve the right consistency.
- Why is my chocolate topping turning thick and clumpy (seizing)?
- Chocolate typically seizes if it’s exposed to too much heat too quickly, or if even a tiny amount of water or steam comes into contact with it during the melting process. To avoid this, always melt chocolate slowly in short intervals (e.g., 30 seconds in the microwave) stirring well after each, or use a clean, dry double boiler over simmering (not boiling) water.
- How long do these no-bake peanut butter bars typically last?
- When stored correctly in an airtight container in the refrigerator, these delicious bars will maintain their freshness and perfect texture for up to one week.
- Can I easily make these bars gluten-free?
- Yes, it’s very simple! Just substitute traditional graham crackers with your favorite brand of gluten-free graham crackers. Most other ingredients in this recipe are naturally gluten-free, but always double-check product labels for any hidden gluten-containing additives.
- What if I don’t have coconut oil for the chocolate topping?
- No problem at all! Melted butter makes an excellent substitute for coconut oil in the chocolate topping. It serves the same purpose of creating a smooth, spreadable chocolate that sets beautifully without cracking.
- Can I use a different size pan than specified?
- You certainly can adjust the pan size. An 8×8 or 9×9 inch square pan is recommended for the ideal bar thickness. If you opt for a larger pan, such as a 9×13 inch, your bars will be thinner. To maintain a similar thickness in a larger pan, you might consider increasing the recipe quantities by about 1.5 times. Conversely, a smaller pan will yield much thicker bars, which may require a slightly longer chilling time.
- Are these bars suitable for parties or gatherings?
- Absolutely! Their ease of preparation, universal appeal, and ability to be made in advance make them a perfect dessert for any party, potluck, or gathering. They’re always a hit!
Nutrition
Carbohydrates: 30g,
Protein: 5g,
Fat: 25g,
Saturated Fat: 11g,
Polyunsaturated Fat: 3g,
Monounsaturated Fat: 8g,
Trans Fat: 0.3g,
Cholesterol: 20mg,
Sodium: 208mg,
Potassium: 178mg,
Fiber: 1g,
Sugar: 22g,
Vitamin A: 236IU,
Calcium: 29mg,
Iron: 1mg
Nutrition information is automatically calculated and should only be used as an approximation.
Tried this recipe?Mention @foodwithfeeling or tag #foodwithfeeling!