
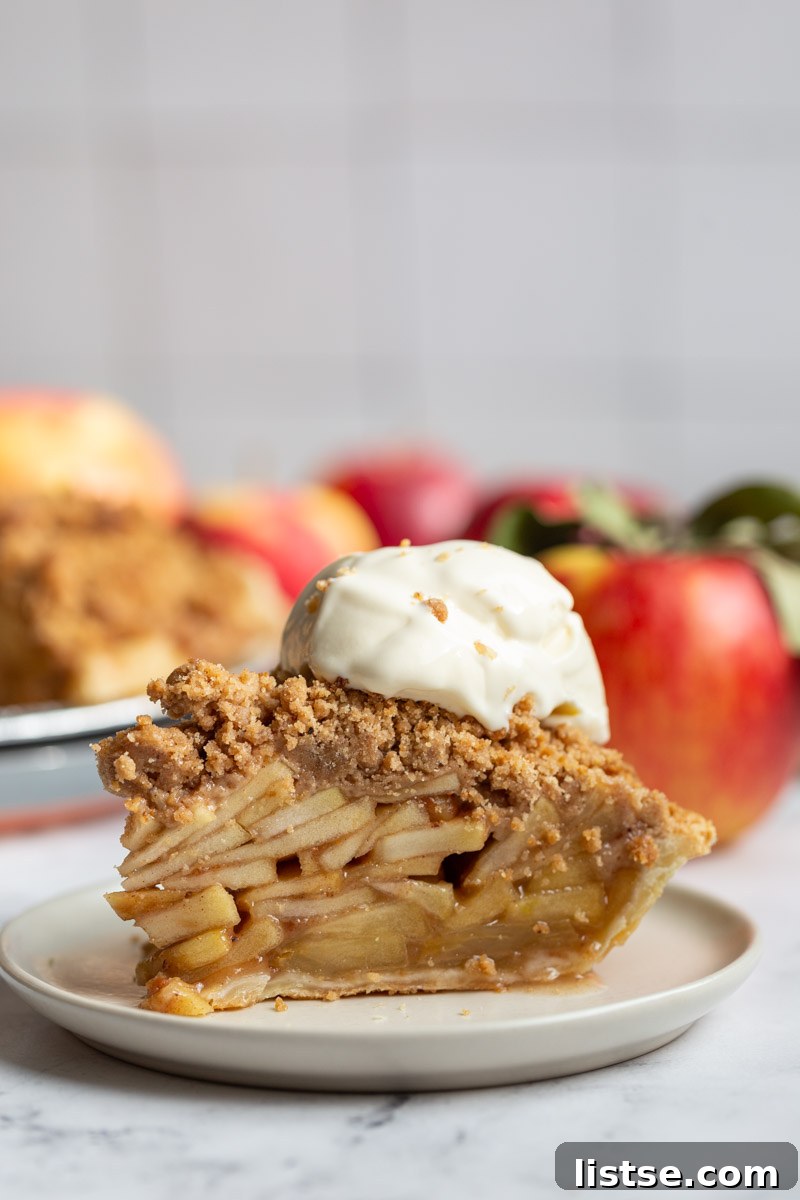
The Ultimate Homemade Dutch Apple Pie Recipe: A Guide to Perfect Crumb Topping Perfection
Prepare to fall in love with our absolute favorite Dutch Apple Pie, a dessert that masterfully combines a wonderfully spiced apple filling, a perfectly flaky crust, and a rich, buttery streusel crumb topping. This recipe transcends seasons, making it an ideal choice for festive holiday gatherings or simply a comforting treat any time of the year. Its irresistible aroma and delightful blend of textures are sure to make it a beloved classic amongst your family and friends. For the ultimate dessert experience, serve a warm slice with a generous scoop of creamy vanilla ice cream.
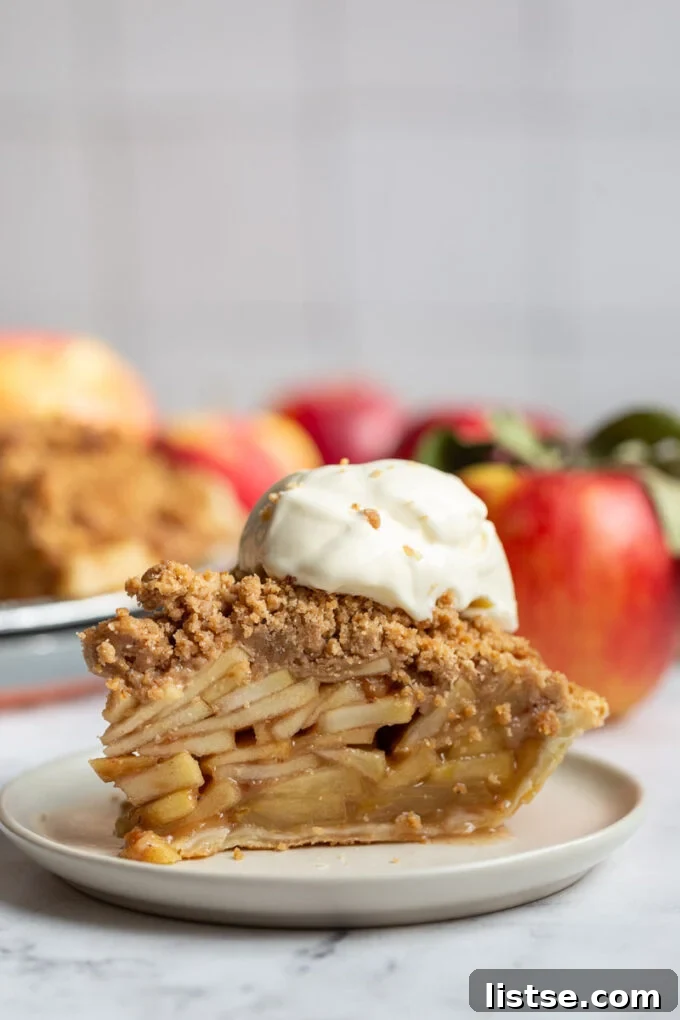
Embrace the vibrant flavors of autumn and the bounty of fresh-picked apples with this exceptional Dutch Apple Pie recipe. If the notion of baking an apple pie has ever felt daunting, it’s likely because you haven’t yet discovered a recipe that makes the process so straightforward and rewarding. This particular apple pie is incredibly forgiving; you can even streamline your baking by using a high-quality store-bought pie crust (we won’t tell!) and finishing it with an utterly irresistible, rich, and buttery crumble. The result is a dessert that looks impressive and tastes even better, proving that homemade perfection is truly within reach.
Dutch Apple Pie vs. Traditional Apple Pie: Unveiling the Delicious Distinction
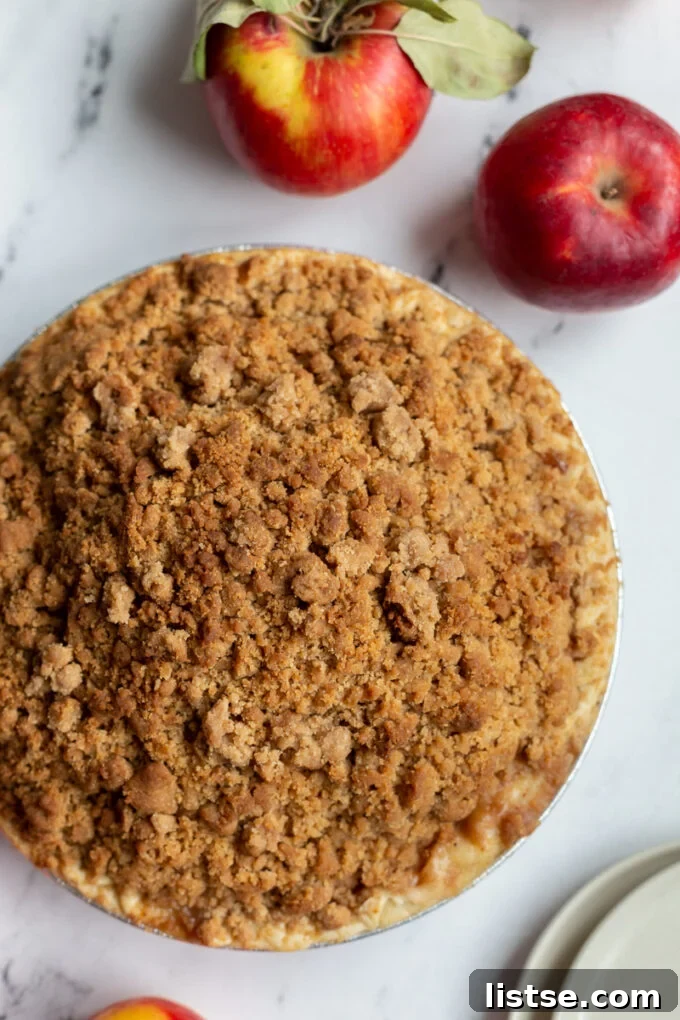
This recipe is a true celebration for all streusel topping enthusiasts out there! The core difference between a traditional apple pie and a Dutch apple pie lies solely in its crowning glory: the topping. While a classic apple pie typically features a full pastry crust, often intricately woven or decorative, a Dutch apple pie distinguishes itself with a generous, irresistible crumb or streusel topping. This buttery, sugary, and spiced crumble provides a delightful textural contrast to the soft, warm apple filling below. Call it what you like – Dutch apple pie, apple streusel pie, or apple crumb pie – its deliciousness is undeniable, offering a unique and satisfying experience that sets it apart from its double-crusted cousin. The streusel adds an extra layer of flavor and texture, transforming a simple fruit pie into a decadent dessert with a satisfying crunch in every bite.
Essential Ingredients for Your Homemade Dutch Apple Pie
Not only is this Dutch apple pie spectacularly delicious, but it also relies on a selection of simple, everyday baking ingredients that you likely already have stocked in your pantry. This makes whipping up a spontaneous pie remarkably easy. Here’s a detailed look at everything you’ll need to create this comforting dessert:
- Pie Crust: The foundation of any great pie! While a homemade pie crust adds an extra touch of love, don’t hesitate to use a store-bought crust for convenience without sacrificing flavor. You can find excellent recipes for a classic vegan pie crust here, or a coconut oil version here. Many bakers, myself included, often opt for a store-bought frozen crust for its consistent results and time-saving benefits, especially when time is of the essence.
- Apples: The star of the show! Selecting the right apples is crucial. Choose varieties that are firm and crisp, ensuring they hold their shape beautifully during baking without turning mushy. I find that a combination of Honeycrisp and Granny Smith apples creates the perfect balance of sweetness and tartness, adding depth to the pie’s flavor profile. (More suggestions below!)
- Lemon Juice: A splash of fresh lemon juice is essential. It brightens the flavor of the apple filling, preventing it from tasting overly sweet, and plays a vital role in reducing the natural browning of the apple slices, keeping them visually appealing.
- Sugar (Granulated & Brown): We use a thoughtful blend of granulated sugar and brown sugar. Granulated sugar provides clean sweetness to the apple filling, while brown sugar adds a rich, molasses-like depth to both the filling and, most importantly, the irresistible crumb topping, contributing to its caramelized flavor.
- Spices: The warm, inviting heart of the pie. A harmonious blend of ground cinnamon and nutmeg perfectly complements the apples, infusing the entire pie with a cozy, aromatic, and distinctly autumnal flavor. You can also experiment with a pinch of allspice or cloves for added complexity.
- Butter: High-quality melted butter is the secret to a rich, golden streusel topping. Its fat content binds the topping ingredients together, creating those desirable large clumps. For those seeking a plant-based option, feel free to use your preferred vegan butter substitute.
- All-Purpose Flour: This versatile ingredient serves a dual purpose. A quarter cup is incorporated into the apple filling to thicken the juices released during baking, preventing a watery pie. Additionally, flour forms the base of the crumb topping, giving it structure and that signature crumbly texture.
Choosing the Best Apples for Your Perfect Apple Pie
The success of your apple pie hinges significantly on the type of apples you select. Firm, crisp apples are paramount as they maintain their structure and offer a pleasant texture even after baking, avoiding a mushy filling. For an exquisitely balanced pie with a harmonious blend of sweet and tart notes, I highly recommend using a mix of apple varieties. My personal favorites for this Dutch apple pie recipe are Granny Smith and Honeycrisp.
- Granny Smith: Known for its bright, assertive tartness and firm texture, Granny Smith apples hold their shape exceptionally well. They provide a crucial counterpoint to the sweetness of the other ingredients, creating a vibrant flavor profile.
- Honeycrisp: These apples are celebrated for their incredible crispness and balanced sweet-tart flavor. They contribute a juicy, slightly sweet dimension that complements the tartness of Granny Smiths beautifully, resulting in a complex and delicious filling.
Beyond these two, several other apple varieties also perform admirably in apple pie, offering slight variations in flavor and texture:
- Pink Lady: Offers a delightful balance of sweet and tart, with a crisp texture that holds up well.
- Jazz: A naturally crisp and sweet apple with a tangy finish, perfect for baking.
- Gala: Mildly sweet and aromatic, these apples soften nicely while still offering some structure.
- Braeburn: Known for its complex sweet-tart flavor and firm flesh, Braeburn apples bake down beautifully.
- Fuji: Sweet, juicy, and very crisp, Fuji apples bring a lovely sweetness to the pie.
If you prefer to stick to just one type of apple for your pie, consider Honeycrisp for a sweeter, more mellow result, or Granny Smith for a pie with a pronounced tart and tangy character. Ultimately, the best apples are those you enjoy eating raw, as their inherent qualities will shine through in the baked pie.
Step-by-Step Guide: How to Make a Delicious Dutch Apple Pie
This Dutch apple pie recipe is genuinely simple to make, proving that a show-stopping dessert doesn’t have to be complicated. The most time-consuming part of the process is often the apple preparation, but every step is straightforward. For a full, printable recipe card with precise measurements, please refer to the end of this page. Here’s a simplified overview of the process:
- Prepare the Crust and Apples: Begin by preparing your pie crust. Whether you’re using a homemade recipe or a convenient store-bought option, ensure it’s placed in a 9-inch pie pan and chilled in the refrigerator while you work on the apples. Preheat your oven to 400°F (200°C). Then, meticulously peel, core, and slice your chosen apples into uniform ¼-inch thick pieces. Consistency in slice thickness ensures even cooking.
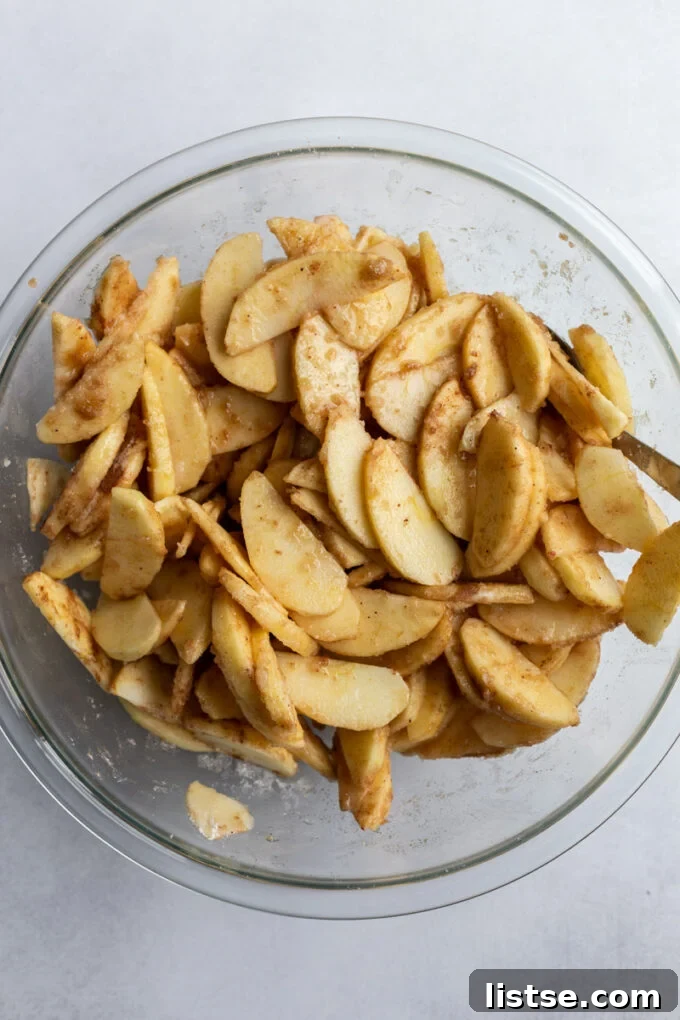
- Craft the Apple Filling: In a generously sized mixing bowl, combine the sliced apples with lemon juice, granulated sugar, brown sugar, all-purpose flour, ground cinnamon, and nutmeg. Toss gently until all the apple slices are evenly coated. Set this mixture aside, allowing the flavors to meld and the apples to slightly macerate while you prepare the topping.
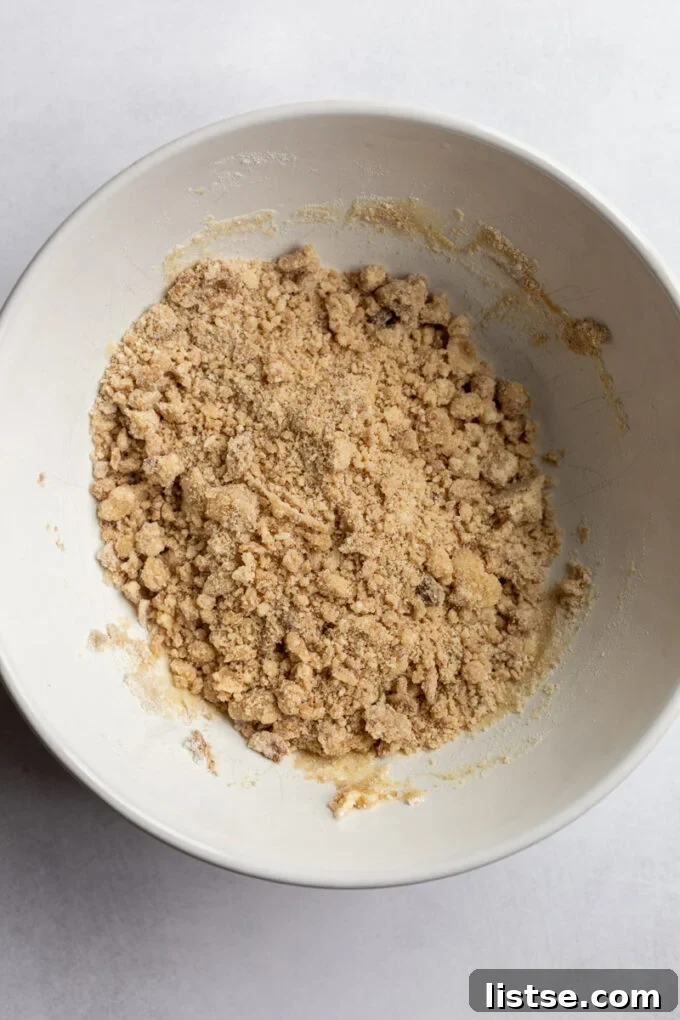
- Create the Buttery Crumb Topping: In a separate bowl, whisk together the all-purpose flour, brown sugar, nutmeg, and cinnamon. Pour in the melted butter and mix until large, distinct clumps begin to form. You might find it helpful to use your fingertips to gently press the mixture together, creating larger, more substantial streusel pieces as desired. Once prepared, place the topping mixture in the refrigerator to chill slightly, which helps maintain its crumbly texture during assembly.
- Assemble the Pie with Care: Retrieve your chilled pie crust. Begin meticulously stacking the apple filling neatly into the crust. While it doesn’t need to be absolutely perfect, arranging the apple slices, rather than simply dumping them, helps prevent gaps and ensures a beautiful, dense pie. Don’t be alarmed if the apples are stacked quite high; they will compact significantly as the pie bakes and even more as it cools, creating wonderfully rich layers.
- Add the Irresistible Topping: Evenly sprinkle the chilled streusel crumb topping over the carefully arranged apple filling. Ensure good coverage across the entire surface of the pie.
- Bake to Golden Perfection: Gently place the assembled pie onto a baking sheet. This acts as a safeguard, catching any potential spillage of delicious apple juices or butter during baking and preventing a messy oven. Bake for approximately 45-55 minutes, or until the topping is golden brown, the apple filling is bubbling around the edges, and the apples are tender when pierced.
- Cool and Serve: Patience is key for the perfect slice! It is crucial to let the pie cool completely, ideally in the refrigerator, before attempting to cut into it. If sliced too soon, the filling will be runny and the pie may not hold its shape. Once fully cooled and set, serve your magnificent Dutch apple pie with a dollop of freshly whipped cream or, for an even more decadent experience, a scoop of vanilla ice cream. If you prefer it warm, simply reheat individual slices in the microwave for about 20-30 seconds.
Expert Tips for Crafting the Perfect Dutch Apple Pie
Achieving a truly stellar Dutch Apple Pie is easier than you think with a few insider tips. Pay attention to these details, and you’ll be baking like a pro in no time:
- Apple Slice Uniformity: This is a critical step for even cooking. Ensure your apples are sliced to a similar thickness, ideally about ¼-inch. Uneven slices will lead to some apples being soft and mushy while others remain firm, creating an inconsistent texture in the final pie.
- Eliminate Excess Liquid from Apples: After tossing your apple slices with sugar, they will naturally release their juices. Allowing the apples to sit for a while, even up to 30 minutes, will encourage more liquid extraction. Before adding them to the crust, it’s vital to drain off as much of this excess liquid as possible. This step is key to preventing a soggy pie crust and ensuring your filling sets perfectly. You can gently press the apples in a colander or pat them with paper towels.
- Strategic Pie Assembly: While it might seem trivial, neatly stacking the apple slices into the crust, rather than simply pouring them in, makes a significant difference. This method helps to eliminate air pockets or holes in the pie, ensuring a dense, beautiful slice with apples that lay nicely. The apples will likely be mounded high at first, but they will compress considerably as they bake and soften, creating those incredible, dense layers once the pie cools.
- Embrace the Cooling Time: This might be the hardest part, but it’s absolutely non-negotiable for a well-structured pie. Allowing your pie ample time to cool completely (I often place mine in the fridge to speed things up) lets the filling set properly. Cutting into a warm pie too soon often results in a runny, messy slice. If you crave a warm slice, simply reheat it briefly in the microwave for 20-30 seconds after it has fully set.
- The Ultimate Topping Experience: While the streusel is the star, don’t forget the classic accompaniments! The two most popular toppings for apple pie are a dollop of freshly whipped cream or a scoop of velvety vanilla ice cream. I personally adore this apple pie topped with my cold and creamy vegan ice cream, which offers a delightful contrast to the warm, spiced apples.
- Preventing Over-Browning: If you notice your pie crust or streusel topping browning too quickly during baking, loosely tent the pie with aluminum foil. This will shield it from direct heat, allowing the apples to cook through without burning the top.
- Signs of Doneness: Your pie is ready when the streusel is golden brown, the filling is visibly bubbling around the edges (indicating it’s hot enough to thicken), and the apples are tender when pierced with a thin knife inserted through one of the vents or into the filling.
Make Ahead: Convenience and Flavor
Dutch Apple Pie is an exceptionally versatile dessert, making it an excellent candidate for advance preparation, particularly if you’re planning for busy holiday feasts or special occasions. This pie can be baked up to two days ahead of time, allowing you to focus on other culinary delights closer to your event. After baking, allow the pie to cool completely at room temperature. Once cool, cover it tightly with plastic wrap or aluminum foil to maintain its freshness and store it at room temperature for up to two days. If you need to store it for a longer period, transfer it to the refrigerator after two days to keep it fresh for an additional few days, ensuring deliciousness whenever you’re ready to serve.
Storing and Freezing Your Dutch Apple Pie
Ensuring your delicious Dutch apple pie remains fresh and ready to enjoy is simple with the right storage techniques:
- Storing Leftovers: Once your baked Dutch apple pie has cooled completely, it can be stored covered at room temperature for 1 to 2 days. For longer freshness, transfer the covered pie to the refrigerator, where it will remain delicious for up to 5 days. Always ensure it’s well-sealed to prevent it from drying out or absorbing other food odors.
- Freezing for Future Enjoyment: Baked Dutch apple pie freezes remarkably well, allowing you to savor its flavors for up to 3 months. To freeze, first ensure the pie is entirely cooled. Then, wrap the entire pie securely in several layers of aluminum foil, making sure no air can reach it. For an extra layer of protection against freezer burn, place the foil-wrapped pie into a large freezer bag. When you’re ready to enjoy it, thaw the frozen pie overnight in the refrigerator. Allow it to come to room temperature for the best texture and flavor before serving. If you prefer it warm, you can reheat the thawed pie in a preheated oven at 350°F (175°C) for 20-30 minutes, or until it’s warmed through to your liking.
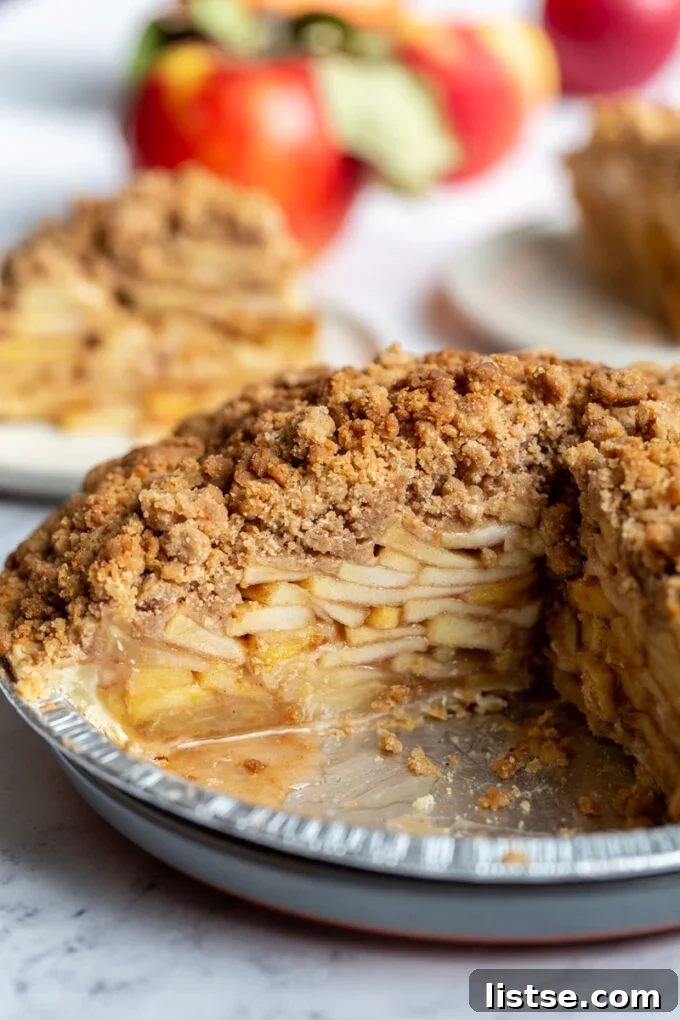
We genuinely hope you enjoy creating and tasting this exquisite Dutch Apple Pie! PLEASE let me know if you make this delicious recipe and share how much you love it! You can always come back here to leave a comment, or tag me on Instagram (@foodwithfeeling) when you share your masterpiece. Happy baking!
More Simple Desserts to Try: Expand Your Sweet Repertoire
Seeking more delightful and easy-to-make dessert recipes? Look no further! Here are some other favorites to inspire your next baking adventure:
- Baked Cinnamon Apples
- Cherry Crisp
- Vanilla Poached Pears
- Oatmeal Cream Pies
- Cherry Crumble Pie
- Vegan Pumpkin Pie
Dutch Apple Pie Recipe
A comforting classic, this Dutch Apple Pie features a delightful spiced apple filling, a tender flaky crust, and a sweet, buttery streusel crumb topping. Perfect for any occasion, especially when served warm with vanilla ice cream.
- Prep Time: 20 mins
- Cook Time: 55 mins
- Total Time: 1 hr 15 mins
- Servings: 8 servings
- Author: Brita Britnell
Ingredients
FOR THE APPLE FILLING:
- 8 cups of apples, peeled, cored, and thinly sliced (about 3 pounds of whole apples)
- 1 tablespoon of lemon juice
- ¾ cup of granulated sugar
- ¼ cup of light brown sugar
- ¼ cup of all-purpose flour
- 1 teaspoon of ground cinnamon
- ¼ teaspoon of ground nutmeg
- 1 prepared pie crust (classic vegan or coconut oil vegan, or store-bought)
FOR THE CRUMBLE TOPPING:
- 1 cup of all-purpose flour
- ½ cup light brown sugar
- ½ teaspoon of ground nutmeg
- 1 teaspoon of ground cinnamon
- 6 tablespoons of butter, melted (use vegan butter if desired)
Instructions
- Prepare your pie crust, placing it into a 9-inch pie pan and chilling it in the refrigerator. Preheat your oven to 400°F (200°C). Peel, core, and thinly slice your apples into uniform ¼-inch pieces.
- In a large bowl, combine the sliced apples with lemon juice, granulated sugar, brown sugar, all-purpose flour, ground cinnamon, and nutmeg. Toss gently until the apples are well coated. Set aside.
- To make the topping, in a separate bowl, mix together the all-purpose flour, brown sugar, nutmeg, and cinnamon. Pour in the melted butter and mix until large clumps begin to form. Use your fingers to press the mixture together for larger crumbs if preferred. Place in the fridge.
- Assemble the pie by neatly stacking the apple filling into the chilled pie crust. Arrange the slices to minimize gaps; the apples will be piled high but will compact during baking.
- Evenly sprinkle the chilled crumble topping over the arranged apples, ensuring good coverage.
- Place the pie on a baking sheet to catch any potential spills, and bake for 45-55 minutes. The topping should be golden brown and the filling bubbling.
- Allow the pie to cool completely in the refrigerator before slicing and serving. This ensures the filling sets properly. Serve with whipped cream or vanilla ice cream.
Notes
- Apples: A mix of sweet and tart apples (like Honeycrisp and Granny Smith) works best for a balanced flavor, but feel free to use your favorite baking apples.
- Crust: While homemade crusts are wonderful, a good quality store-bought frozen pie crust is a great time-saving option and works perfectly in this recipe.