


Irresistible Garlic Smashed Sweet Potatoes: Your New Favorite Side Dish
Prepare to fall in love with these incredibly simple yet profoundly delicious Garlic Smashed Sweet Potatoes! If you’re as much of a sweet potato enthusiast as I am, you’ll want to make this recipe a staple in your kitchen. It’s the perfect easy side dish that boasts an explosion of flavor and a delightful contrast in textures, making it an ideal accompaniment for almost any meal.
Sweet potatoes are a versatile root vegetable, celebrated for their natural sweetness, vibrant color, and impressive nutritional profile. When combined with the aromatic punch of garlic and the richness of butter, then smashed and roasted to perfection, they transform into a truly extraordinary dish. These smashed sweet potatoes offer a crispy exterior with a wonderfully soft and fluffy interior, creating a harmony that will leave everyone at the table asking for more.
Why These Garlic Smashed Sweet Potatoes Are a Must-Try
There are countless reasons to adore this recipe. Beyond their fantastic taste, these Garlic Smashed Sweet Potatoes are incredibly easy to prepare, making them perfect for busy weeknights or special occasions. Here’s why they’ll quickly become a cherished recipe in your culinary repertoire:
- Flavor Explosion: The natural sweetness of the sweet potatoes beautifully complements the savory garlic and herby notes from the rosemary. A touch of salt and pepper elevates all these flavors, creating a harmonious and addictive profile.
- Perfect Texture Contrast: Unlike traditional boiled potatoes, our baking and broiling method ensures a glorious crispy crust on the outside, while the inside remains wonderfully soft and tender. This textural complexity is what sets smashed potatoes apart.
- Simplicity at Its Best: With minimal ingredients and straightforward steps, even novice cooks can achieve restaurant-quality results. The process is designed to be hassle-free and enjoyable.
- Nutrient-Rich: Sweet potatoes are a powerhouse of vitamins (especially A and C), minerals, and fiber, making this side dish not only delicious but also incredibly healthy. It’s a fantastic way to add beneficial nutrients to your diet.
- Versatile Pairing: These potatoes are incredibly adaptable. They make a superb side for roasted chicken, grilled steak, pan-seared fish, or a hearty vegetarian main course. They’re also robust enough to stand alone as a flavorful snack.
- Customizable for Dietary Needs: Easily made vegan by swapping regular butter for a plant-based alternative, this recipe caters to a wider audience without sacrificing flavor.
Forget bland, mushy potato sides. These Garlic Smashed Sweet Potatoes bring excitement and deliciousness to the table with every bite.
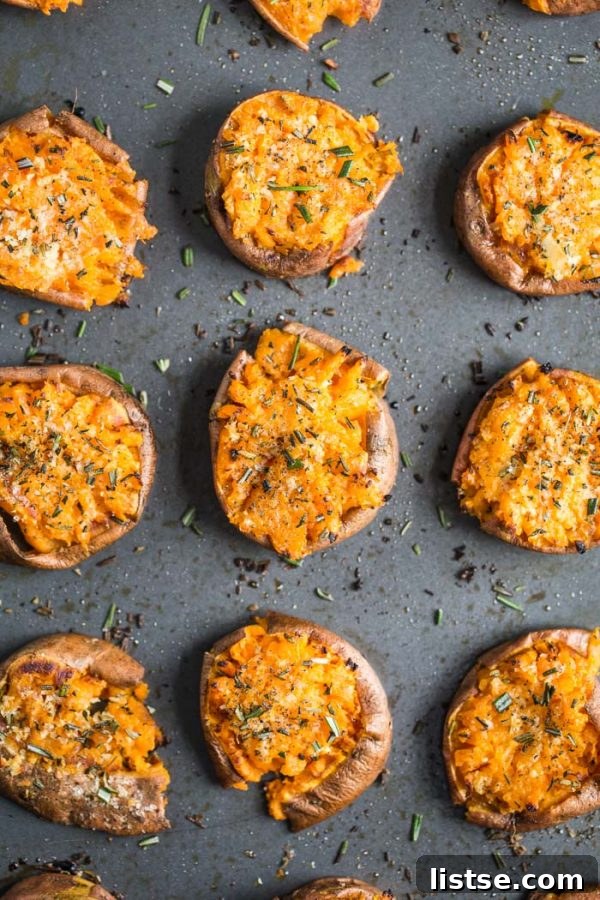
Crafting Your Perfect Smashed Sweet Potatoes: A Step-by-Step Guide
Making these smashed sweet potatoes is a breeze. While some similar potato recipes suggest boiling the potatoes first, I find baking to be a superior method. Baking enhances their natural sweetness and prevents them from becoming waterlogged, resulting in a richer flavor and better texture overall. Here’s a detailed look at the simple process:
Step 1: Preparation and Initial Bake
First, we begin by preheating your oven to 400 degrees Fahrenheit (200°C) and lightly greasing two large baking sheets. This ensures even cooking and prevents sticking. Next, select your sweet potatoes. Ideally, look for long, skinny ones, as these tend to slice into more uniform rounds, which helps them cook evenly. Trim the ends off the sweet potatoes, then slice them into rounds approximately 1 inch thick. Aim for consistent thickness across all slices for optimal results.
Arrange the sweet potato rounds in a single layer on your prepared baking sheets, making sure not to overcrowd them. Give them a light spray with cooking spray or a drizzle of olive oil, which aids in caramelization. Bake for about 25 minutes, or until the potatoes are fork-tender. You should be able to easily pierce them with a fork, but they should not be falling apart. This initial bake is crucial for softening the potatoes before smashing.
Step 2: The Smash and Flavor Infusion
Once baked, remove the sweet potato rounds from the oven and let them cool for a few minutes. They will be hot! While still warm, gently smash each potato round with a fork. Don’t worry if the skin splits a little – that’s part of the rustic charm of smashed potatoes. The goal is to flatten them slightly, creating more surface area for crispiness. If any rounds split too much, you can gently push them back together to maintain their shape.
In a small bowl, prepare your flavor bomb: cream together the softened unsalted butter and finely minced garlic. The garlic butter is what truly makes these sweet potatoes sing! If you’re making a vegan version, simply swap out the dairy butter for your favorite vegan butter, such as Earth Balance, which works beautifully in this recipe.
Generously spread this aromatic garlic butter mixture evenly over the smashed sweet potato rounds. Don’t be shy – this is where much of the flavor comes from! Then, sprinkle them with fine sea salt, freshly ground black pepper, and freshly minced rosemary. If fresh rosemary isn’t available, a teaspoon of dried rosemary can be used as a substitute, though fresh herbs always provide a brighter flavor.
Step 3: The Final Crispy Finish
Return the seasoned sweet potato rounds to the oven and bake for an additional 5 minutes. This allows the flavors to meld and the butter to melt fully into the potatoes. After this short bake, switch your oven to broiler mode. Broiling is the secret weapon for achieving that coveted crispy crunch on the outside while keeping the inside wonderfully soft and yummy. Keep a very close eye on the potatoes during this stage, as broilers can work quickly, and sweet potatoes can go from perfectly golden to burnt in a matter of seconds. Mine usually take about 3 minutes, but oven temperatures vary. Watch until the edges begin to turn golden brown and crispy.

Tips for the Best Garlic Smashed Sweet Potatoes
Achieving perfectly crispy and flavorful smashed sweet potatoes is easy with a few key tips:
- Choose Wisely: Opt for firm sweet potatoes without any soft spots or blemishes. Long, slender sweet potatoes are often easier to slice into uniform rounds.
- Uniform Slices: Ensure your sweet potato rounds are roughly the same thickness (about 1 inch). This promotes even cooking, so all potatoes become tender at the same time.
- Don’t Overcrowd the Pan: Give the potato rounds enough space on the baking sheet. If they’re too close together, they’ll steam instead of roast, preventing them from getting properly crispy. Use two baking sheets if necessary.
- Fork-Tender, Not Mushy: The goal of the initial bake is fork-tenderness. Over-baking can make them too soft to smash properly and less appealing in texture.
- Smash Gently but Firmly: Use the back of a fork or a potato masher to flatten the potatoes. You want them to be flattened and slightly spread out, creating more surface area for browning, but still holding together.
- Watch the Broiler Closely: Broiling is powerful! Stay by your oven and check frequently. The potatoes can go from perfectly golden to charred in moments.
- Season Generously: Don’t underestimate the power of salt and pepper. Taste and adjust seasoning as needed before serving. Fresh rosemary adds incredible aroma, but dried works too.
- Vegan Option: As mentioned, Earth Balance or another quality vegan butter substitute works wonderfully for a dairy-free version.

Variations and Customizations
This recipe is a fantastic foundation for experimentation. Feel free to play with different flavors and add-ins to suit your taste:
- Herbs: Experiment with other fresh herbs like thyme, sage, or finely chopped fresh parsley. A sprinkle of fresh chives after baking also adds a lovely oniony note.
- Spicy Kick: Add a pinch of red pepper flakes or a dash of cayenne pepper to the garlic butter for a little heat.
- Cheesy Goodness: For an extra layer of flavor, sprinkle a little grated Parmesan cheese over the potatoes during the last few minutes of baking, before broiling.
- Sweet & Savory: A light drizzle of maple syrup or honey can enhance the natural sweetness of the potatoes, creating a delightful sweet and savory balance.
- Smoked Paprika: A teaspoon of smoked paprika can add a beautiful color and a smoky depth to the potatoes.
- Lemon Zest: For a bright, fresh finish, grate a little lemon zest over the finished dish just before serving.
Serving Suggestions
These Garlic Smashed Sweet Potatoes are incredibly versatile and pair well with a wide range of main courses:
- Roasted Meats: They are a natural fit for roasted chicken, turkey, pork tenderloin, or a succulent beef roast.
- Grilled Dishes: Serve alongside grilled steak, sausages, or marinated chicken breasts for a hearty meal.
- Fish and Seafood: The sweetness of the potatoes complements pan-seared salmon, baked cod, or even shrimp scampi beautifully.
- Vegetarian Mains: Pair them with black bean burgers, a hearty lentil loaf, or a vibrant vegetable curry for a complete plant-based meal.
- Holiday Feasts: These potatoes are impressive enough for holiday gatherings like Thanksgiving or Christmas, offering a delicious alternative to traditional mashed potatoes.
No matter how you serve them, these garlic smashed sweet potatoes are sure to be a crowd-pleaser!

Frequently Asked Questions (FAQs)
Can I use regular potatoes instead of sweet potatoes?
Yes, you can absolutely use regular potatoes like Yukon Gold or Russet potatoes. The cooking times may vary slightly, and you might need to adjust the seasoning, but the smashed potato technique works wonderfully with them too.
Is it possible to prepare these ahead of time?
You can do some prep work in advance. You can slice the sweet potatoes and store them in water in the refrigerator for a day. You can also bake them until fork-tender and then store them. When ready to serve, smash them, add the garlic butter and seasonings, and finish baking/broiling. For best crispiness, I recommend smashing and seasoning just before the final bake.
How do I store and reheat leftovers?
Store any leftover smashed sweet potatoes in an airtight container in the refrigerator for up to 3-4 days. To reheat, spread them on a baking sheet and warm them in an oven or toaster oven at 375°F (190°C) until heated through and re-crisped. Microwaving is not recommended as it will make them soft.
Are sweet potatoes healthy?
Yes, sweet potatoes are incredibly healthy! They are rich in beta-carotene (which the body converts to Vitamin A), Vitamin C, manganese, and dietary fiber. They also have a lower glycemic index compared to white potatoes, making them a good option for managing blood sugar levels.
How can I make them extra crispy?
For extra crispiness, ensure the potatoes are well-spaced on the baking sheet and not overcrowded. Use a generous amount of oil or cooking spray. And most importantly, don’t skip the broiler step, but watch it very carefully!
That’s it! These Garlic Smashed Sweet Potatoes are truly SUPER easy to make and deliver incredible flavor and texture. Whether you’re a seasoned chef or a kitchen beginner, you’ll find this recipe rewarding. Give them a try – your taste buds will thank you!
Garlic Smashed Sweet Potatoes
Ingredients
- 3 large sweet potatoes, ideally long and skinny ones
- 3 tablespoons of unsalted butter, vegan butter if desired
- 3 large garlic cloves, pressed or finely minced
- 1 tablespoon of freshly minced rosemary, can use 1 teaspoon of dried rosemary instead
- ½ teaspoon of Fine sea salt
- Black pepper to taste
Instructions
-
Pre-heat your oven to 400 degrees F and lightly grease 2 large baking sheets.
-
Start by cutting the ends off of your sweet potatoes and then slicing them into large rounds that are about 1 inch thick. Place the rounds on your baking sheets, spray lightly with cooking spray and bake for 25 minutes or until the potatoes are fork tender.
-
Let cool a few minutes and then smash the rounds with a fork. The skin of mine split a bit but don’t worry about it. Do your best to keep them together. I pushed a few of mine together back into rounds if they split.
-
In a small bowl, cream together the butter and garlic. Spread the butter mixture evenly over the potato rounds. Sprinkle on the salt, pepper, and rosemary.
-
Bake for 5 additional minutes then switch on the broiler and broil until the edges start to get crispy. This can happen very fast so stand by the oven and watch. Mine took about 3 minutes.