
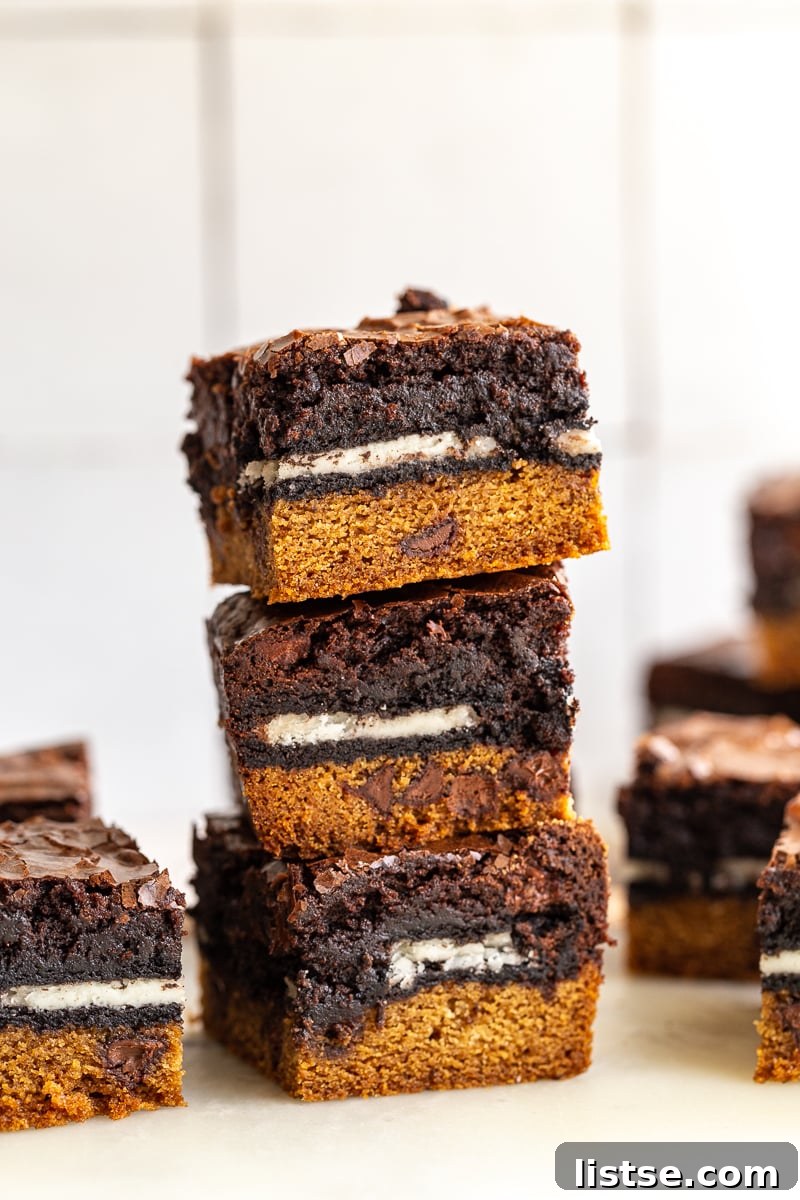
Experience the Ultimate Indulgence: Irresistible Layered Oreo Brownies (Slutty Brownies)
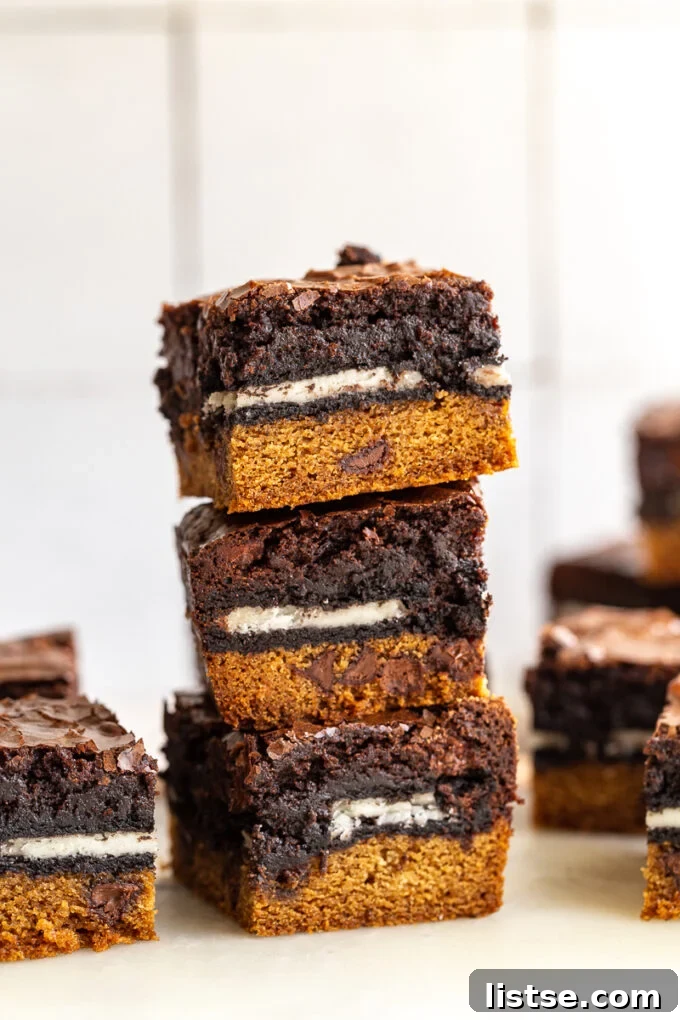
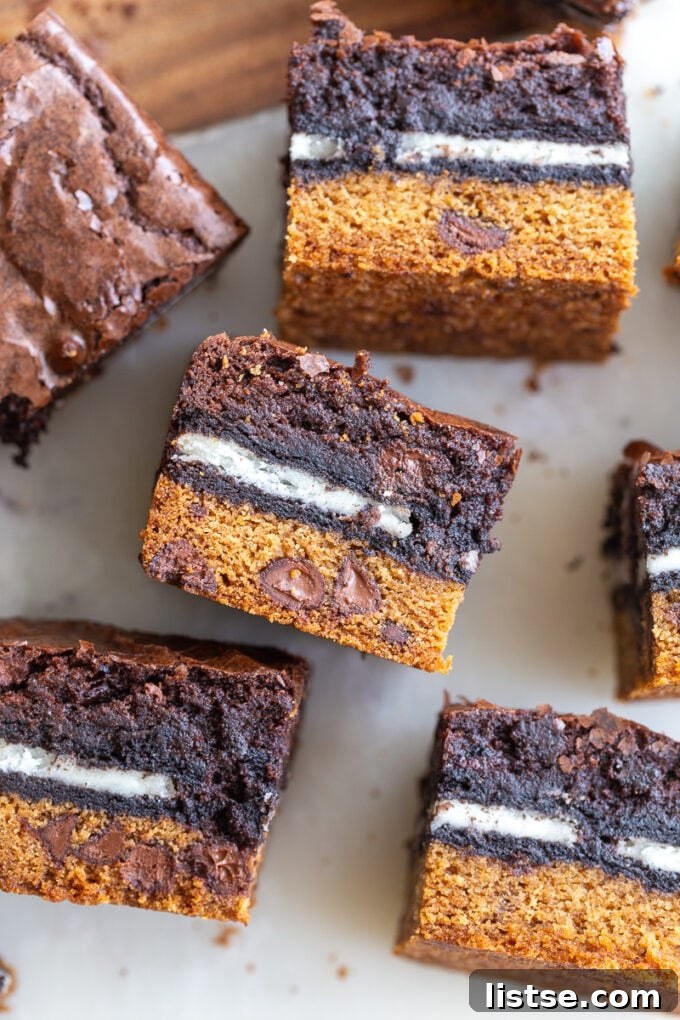
Prepare your taste buds for an extraordinary dessert experience! These irresistible layered Oreo brownies, affectionately known as “Slutty Brownies,” are a symphony of textures and flavors. Imagine a rich, chewy chocolate chip cookie base, crowned with a generous layer of classic Oreo cookies, and then topped with a thick, fudgy brownie batter that bakes to perfection. The result? An over-the-top, unique, and utterly delicious sweet treat that promises to hook you from the very first bite!
I’ve dreamt of sharing this incredible recipe for years, and I’m thrilled to finally present these beauties. The name, while traditional for this viral sensation, sparks some debate, but we’re sticking with it out of respect for its history. Rest assured, the delight these bars bring is undeniable. They are the epitome of a fun, occasional indulgence, perfect for sharing with a crowd or making any day feel like a celebration.
Why You’ll Fall in Love with These Layered Oreo Brownies
These layered dessert bars aren’t just a treat; they’re an event! Here’s why this particular “Slutty Brownie” recipe stands out and why you’ll want to make it again and again:
- Three Layers of Pure Bliss: Enjoy the distinct textures of a soft, chewy chocolate chip cookie, a crunchy Oreo center, and a rich, fudgy brownie all in one bite. It’s a flavor explosion!
- Completely Vegan & Dairy-Free: Surprisingly, this indulgent recipe is entirely plant-based, egg-free, and dairy-free, making it a fantastic option for everyone, including those with dietary restrictions.
- Perfect for Any Occasion: Whether it’s a casual get-together, a holiday party, or just a weekend craving, these brownies are a showstopper that always impresses.
- Surprisingly Easy to Make: While they look complex, the process is straightforward, especially since the recipe cleverly uses two of our favorite scratch-made vegan staples: chocolate chip cookie dough and fudgy brownie batter.
- Customizable: With endless possibilities for variations, you can tailor these layered bars to suit your preferences or seasonal themes.
Essential Ingredients for Your Layered Dessert Bars
This “Slutty Brownie” recipe celebrates homemade goodness, utilizing completely from-scratch components that are both egg-free, dairy-free, and proudly vegan. Gather these key ingredients to create your masterpiece:
- Vegan Chocolate Chip Cookie Dough: The foundation of these delightful bars. You’ll need one batch of a robust and chewy vegan chocolate chip cookie dough. This provides a soft, buttery, and perfectly sweet base that holds up beautifully to the layers above. If you have a favorite recipe, use it, otherwise, a reliable recipe that delivers a classic, soft-baked chocolate chip cookie is ideal.
- Oreo Cookies: The iconic crunchy and creamy middle layer. Approximately 24 Oreos are needed to cover a 9×9 inch pan. You can opt for classic Oreos or the extra indulgent Double Stuffed variety, depending on how much cream filling you desire. Most Oreo flavors are naturally vegan (check the FAQ for details!), offering a convenient and delicious plant-based option.
- Vegan Brownie Batter: The crowning glory – a rich, fudgy, and intensely chocolatey brownie topping. One batch of a high-quality vegan brownie batter will ensure a gooey center and crackly top, creating that quintessential brownie experience. The goal is a batter that bakes into a dense, moist brownie, not a cakey one.
- Flaky Sea Salt: This is an optional but highly recommended finishing touch. A sprinkle of flaky sea salt over the warm brownies enhances the chocolate flavor, balances the sweetness, and adds a delightful textural contrast. Don’t skip it if you love that sweet and salty combination!
Creative Variations to Customize Your Layered Oreo Brownies
While the classic combination is undeniably perfect, these layered Oreo brownies offer a fantastic canvas for culinary creativity. Here are some exciting variations to make this recipe uniquely yours:
- Baking Chips Bonanza: Elevate your chocolate chip cookie layer by experimenting with different types of dairy-free baking chips. Beyond traditional semi-sweet, consider white chocolate chips for a visual contrast, rich dark chocolate chunks for intensity, or mini chocolate chips for an even distribution. For a unique twist, try mint chips during the holidays, butterscotch chips for a nostalgic flavor, or even peanut butter chips for a nutty kick.
- Oreo Flavor Adventures: The world of Oreos is constantly expanding with exciting new flavors. While the classic white icing Oreo (and Double Stuffed!) is always a winner, don’t hesitate to explore. Mint Oreos would be phenomenal around Christmas, chocolate-flavored Oreos would amp up the chocolate factor, and peanut butter Oreos (ensure vegan, as some contain milk) could add a savory note. Golden Oreos offer a vanilla base for a different profile.
- Luscious Frosting Topping: For the ultimate level of indulgence, add a decadent layer of frosting once your brownies have cooled. A thick spread of Chocolate Vegan Buttercream Frosting would be exquisite, creating a truly showstopping dessert. Alternatively, an Oreo-inspired frosting, made with crushed Oreos, would perfectly complement the middle layer. Vanilla buttercream or a rich cream cheese frosting are also fantastic choices.
- Nutty Additions: Sprinkle chopped walnuts, pecans, or almonds over the cookie dough or brownie layer for added crunch and flavor. Toasted nuts will offer an even deeper aroma.
- Caramel or Peanut Butter Swirl: Before baking, drizzle melted vegan caramel sauce or smooth peanut butter over the top brownie layer and swirl gently with a knife for a beautiful marble effect and an extra burst of flavor.
- Seasonal Touches: Adapt the brownies for holidays! Add red and green sprinkles to the cookie dough for Christmas, or orange and black sprinkles for Halloween. For a fall treat, consider a hint of pumpkin spice in the brownie batter.
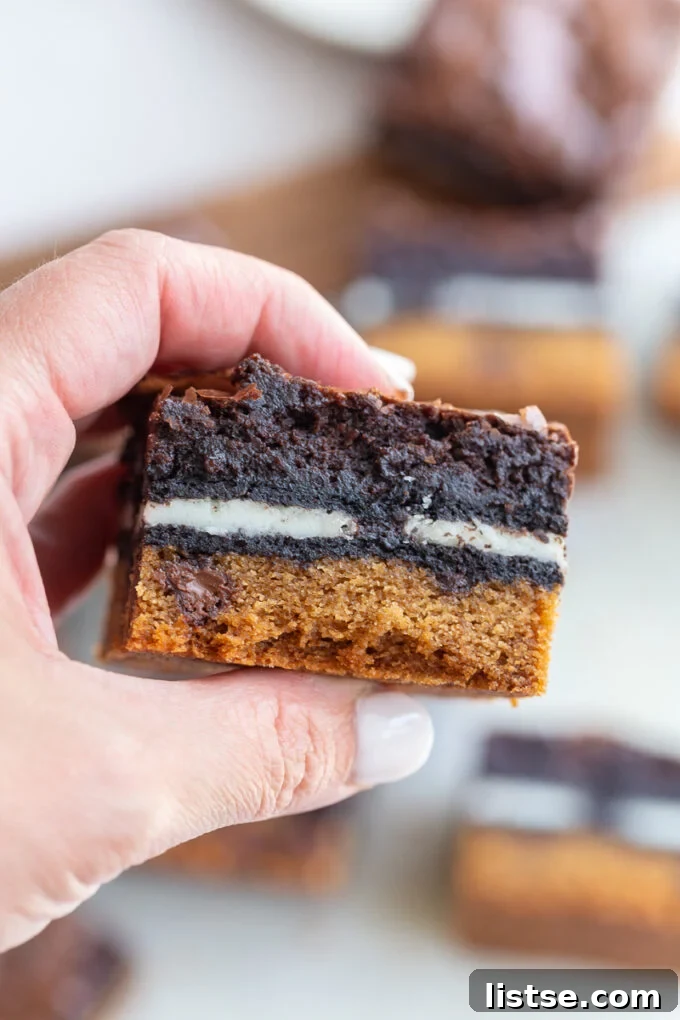
Mastering the Layered Perfection: How to Make This Recipe
While these “Slutty Brownies” boast impressive layers, the assembly process is surprisingly straightforward and incredibly rewarding. The recipe begins with preparing a batch of homemade vegan chocolate chip cookie dough and a luscious vegan brownie batter. Here’s a detailed guide to creating this epic dessert:
- Prepare Your Baking Pan: Begin by preheating your oven to 375 degrees F (190 degrees C). This ensures the oven is at the correct temperature for even baking. Next, line a 9×9-inch (23×23 cm) baking pan with parchment paper. Allow the parchment paper to overhang on two sides; these “slings” will make lifting the baked brownies out of the pan incredibly easy. Lightly spray the parchment paper and exposed pan sides with nonstick cooking spray to prevent any sticking.
- Form the Cookie Dough Base: Follow the instructions for your chosen vegan chocolate chip cookie dough recipe. Once prepared, transfer the dough into your lined baking pan. Using your hands or the back of a spoon, press the cookie dough firmly and evenly into the bottom of the pan, covering the entire surface. Ensure there are no gaps and the layer is consistent in thickness for an even bake.
- Arrange the Oreo Layer: Carefully arrange the Oreo cookies in a single, even layer over the pressed cookie dough. You’ll likely need about 24 standard Oreos. It’s perfectly fine, and often necessary, to break some cookies in half or into smaller pieces to fill any awkward gaps and ensure a complete, snug layer across the entire pan. This creates a solid foundation for the brownie topping.
- Top with Brownie Batter: Prepare your vegan brownie batter according to its recipe instructions. Once the batter is ready, gently pour it over the layer of Oreos in the baking pan. Use an offset spatula or the back of a spoon to carefully spread the brownie batter out evenly, ensuring it covers all the Oreos and reaches the edges of the pan. Be mindful not to disturb the Oreo layer too much during this step.
- Bake to Fudgy Perfection: Place the prepared pan in the preheated oven and bake for approximately 40-45 minutes. Baking times can vary slightly depending on your oven, so keep an eye on them. The brownies are ready when a wooden toothpick or skewer inserted into the center (making sure it goes through the brownie layer, not into the cookie layer too deeply) comes out with moist crumbs attached, but not wet batter.
- Crucial Cooling Step: This is arguably the most important step for perfectly sliceable brownies! Once baked, remove the pan from the oven and place it on a wire rack to cool completely. Resist the urge to slice them immediately. Allow the brownies to cool for at least 1 hour, or even longer, until they are firm to the touch. Cutting them too soon will result in a gooey, crumbly mess, as the layers need time to set.
- Slice and Enjoy: Once fully cooled, use the parchment paper overhangs to carefully lift the entire slab of brownies out of the pan and onto a cutting board. Use a sharp knife to slice them into desired squares or bars. For clean cuts, wipe your knife clean after every few slices. Now, indulge in your homemade, glorious layered Oreo brownies!
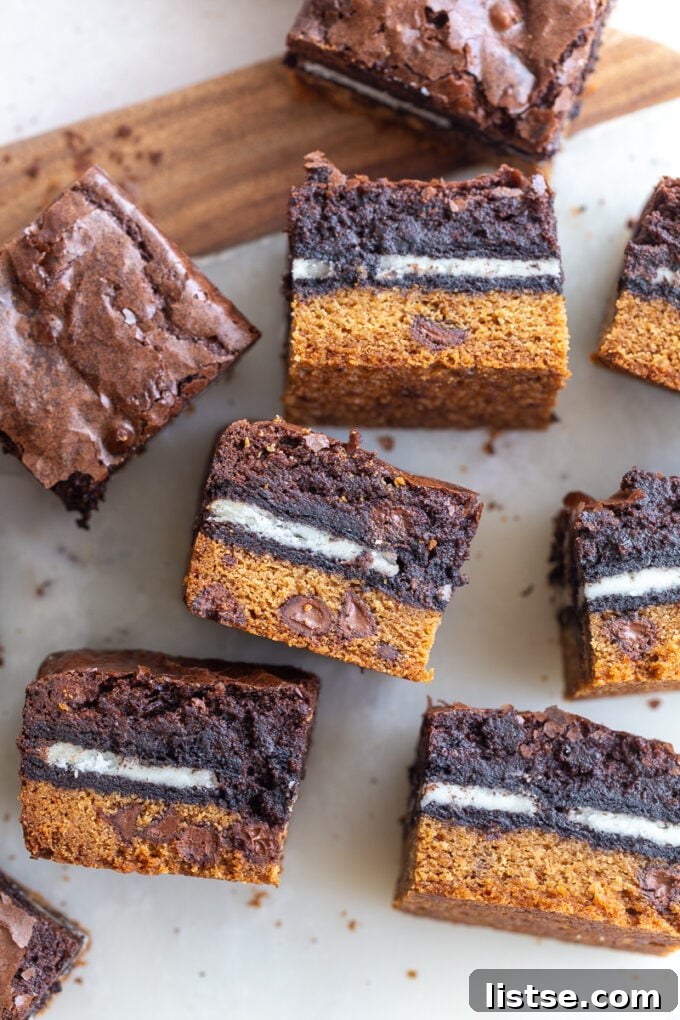
Pro Tips for the Best Layered Brownies
Achieving bakery-quality “Slutty Brownies” is easy with a few expert tips. Follow these guidelines to ensure your layered Oreo brownies are nothing short of spectacular:
- Perfect Oreo Placement: Don’t be afraid to break those Oreos! When creating the middle layer, it’s essential to ensure the cookies fit snugly in a single, even layer across the entire pan. Breaking some in half or into smaller pieces allows you to fill any gaps, creating a stable and uniform foundation for the brownie batter. A complete Oreo layer ensures every bite gets that satisfying crunch.
- Opt for Convenience (If Desired): While this recipe champions scratch-made vegan components, we understand that sometimes time is of the essence. You can absolutely use store-bought cookie dough (look for vegan varieties) and a boxed brownie mix as a shortcut. Many brands offer excellent vegan options, and the results will still be incredibly delicious. This is your kitchen adventure, so choose the path that best suits your schedule!
- The Golden Rule of Cooling: Patience is truly a virtue when it comes to these brownies. It is absolutely crucial to allow the brownies to cool for at least 1 hour (and ideally longer, until completely cool) before attempting to slice them. The layers need ample time to set and firm up. If you cut into them while still warm, you’ll end up with a delicious but messy, gooey heap rather than neat, distinct bars. For the cleanest cuts, you can even chill them in the refrigerator for 30 minutes before slicing.
- Enhance the Fudginess: To ensure an extra fudgy brownie layer, avoid overbaking. A slightly underbaked brownie center is often preferred for that gooey texture. The toothpick test should show moist crumbs, not liquid batter.
- Invest in Parchment Paper Slings: Using parchment paper with an overhang on two sides makes lifting the entire batch of cooled brownies out of the pan effortless, preventing any damage to your beautiful layers.
- Clean Slices Every Time: For perfectly neat squares, use a large, sharp knife. For the absolute cleanest cuts, run your knife under hot water and wipe it clean between each slice.
Frequently Asked Questions About Layered Oreo Brownies
“Slutty Brownies,” also known as layered Oreo brownies, are an incredibly indulgent dessert bar featuring three distinct layers. The base consists of a chewy chocolate chip cookie dough, followed by a generous layer of whole Oreo cookies, and finally, crowned with a rich, fudgy brownie batter. This combination creates an irresistible mix of flavors and textures that is truly over-the-top and utterly delicious.
The intriguing name for these super indulgent brownies originated in 2011. The original recipe, posted by Kevin & Amanda, was initially called “Cookie Dough Oreo Brownies.” However, as the recipe gained viral sensation status across the internet, eager bakers and food bloggers unofficially rebranded them as “Slutty Brownies,” a playful nod to their decadent, no-holds-barred indulgence and perceived “easy” appeal.
While culinary experimentation is always fun, it’s generally recommended to stick with the recipe as written, with the chocolate chip cookie dough as the bottom layer. The cookie dough creates a sturdier and more stable base that bakes a little quicker and provides better structural integrity to support the weight of the Oreos and the denser brownie layer on top. Flipping the layers might result in a less stable bar and potentially uneven baking.
Surprisingly, most Oreo varieties are indeed vegan-friendly! The classic Oreos, along with Golden Oreos, Double Stuffed Oreos, and Chocolate Cream Oreos, do not contain any milk or other animal-derived ingredients, making them suitable for a vegan diet. However, it’s always wise to double-check ingredient lists, especially for newer or seasonal flavors. Notably, some flavors, like Peanut Butter flavored cookies, historically have contained milk, so always read the labels if you’re unsure.
For perfectly neat slices, ensure your brownies are completely cool (or even slightly chilled in the refrigerator). Use a large, sharp knife, pressing down firmly rather than sawing. For the cleanest possible cuts, wipe your knife clean with a damp cloth after each slice to prevent crumbs and stickiness from transferring between cuts.
Absolutely! These layered Oreo brownies are an excellent make-ahead dessert. In fact, they often taste even better the next day as the flavors have more time to meld together. Prepare them a day in advance, store them properly, and simply slice and serve when ready. This also ensures they are perfectly cooled for easy cutting.
Storage Recommendations for Layered Oreo Brownies
Proper storage is key to keeping your delicious “Slutty Brownies” fresh and enjoyable for longer. Here’s how to store and even freeze them:
- Storing Leftovers at Room Temperature: Once your layered Oreo brownies have completely cooled and been sliced, store them in an airtight container at room temperature. They will maintain their freshness and delicious texture for up to 5 days. Ensure the container is truly airtight to prevent them from drying out.
- Freezing for Longer Enjoyment: These brownies freeze exceptionally well, making them perfect for meal prepping desserts or saving for a future craving.
- Freezing Uncut Bars: After the brownie bars have cooled completely, use the parchment paper “slings” to lift the entire batch out of the pan. Leave the bars uncut for best results. Wrap the entire slab tightly in plastic wrap, then wrap it again securely in aluminum foil. This double layer of protection helps prevent freezer burn. Freeze for up to 3 months.
- Freezing Individual Bars: For ultimate convenience, you can also individually wrap each cooled and sliced brownie bar in plastic wrap, then place them in a freezer-safe bag or container. This allows you to grab just one or two whenever a craving strikes!
- Defrosting: When you’re ready to enjoy, transfer the frozen brownies (either the whole slab or individual bars) to the refrigerator to defrost overnight. Alternatively, individual bars can be defrosted at room temperature for a couple of hours. Once thawed, they are ready to be sliced (if uncut) and served. You can even warm them slightly in the microwave for a fresh-baked feel!
More Irresistible Vegan Dessert Recipes to Explore:
If you loved these layered Oreo brownies, you’re sure to enjoy these other fantastic vegan dessert creations:
- The Best Vegan Chocolate Chip Cookies
- Delightful Vegan Sugar Cookies
- Warm & Cozy Vegan Skillet Cookie
- Colorful Rainbow Cookies
- Thick & Chewy Vegan Oatmeal Cookies
We absolutely love hearing from you! If you decide to make this incredible “Slutty Brownie” recipe, please let us know what you think. Come back here to leave a comment and share your experience, or tag us on Instagram (@foodwithfeeling). Your feedback and creations truly inspire us!
Slutty Brownies
Ingredients
- 1 batch of vegan chocolate chip cookie dough
- ~24 oreo cookies
- 1 batch of vegan brownie batter
- Optional: flaky sea salt for topping
Instructions
-
Pre-heat the oven to 375 degrees F. Line an 9×9 inch baking pan with parchment paper and spray with non-stick cooking spray.
-
Make the cookie dough according to the directions and press it evenly and firmly into the bottom of the prepared pan.
-
Top the cookie dough with the Oreos, tearing some in half as needed to fit in the pan.
-
Make the brownie batter according to directions and pour it on top of the Oreos. Spread the batter out evenly.
-
Bake for 40-45 minutes or until a toothpick comes out clean. Let rest for 1 hour before slicing into the brownies (I know this is hard but trust me!). ENJOY!