
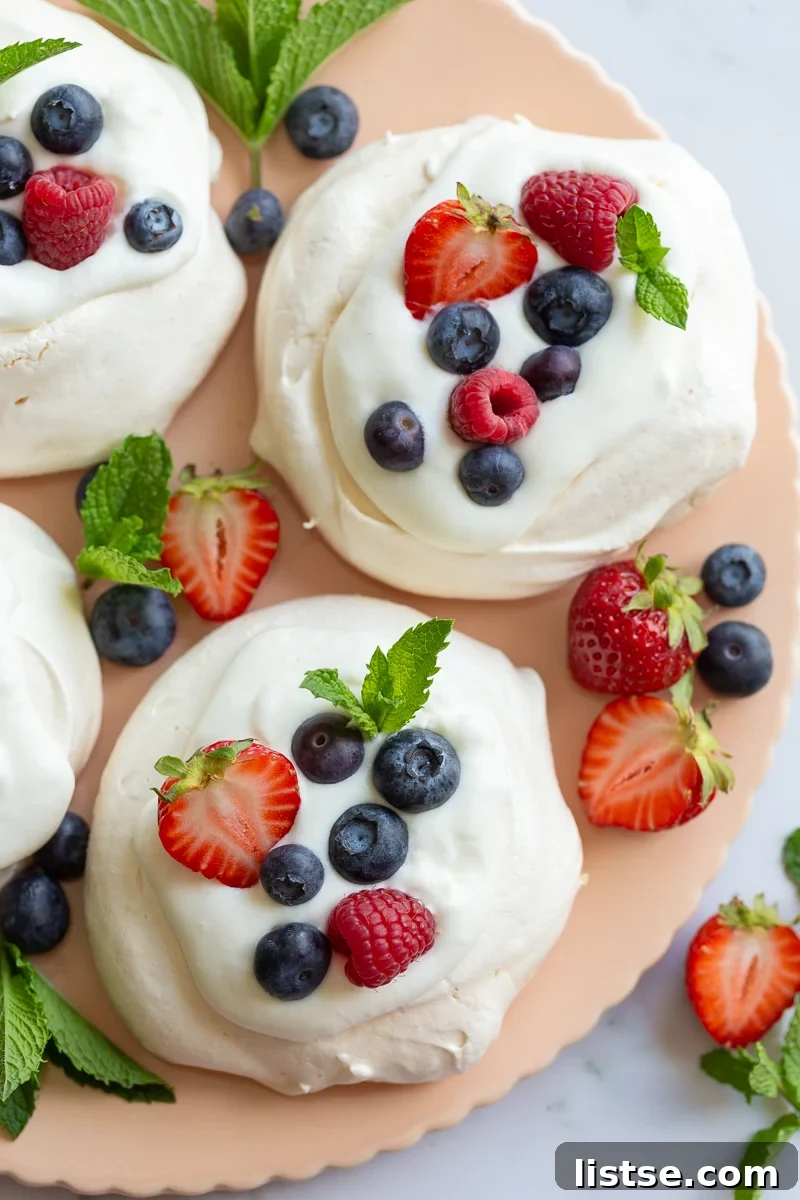
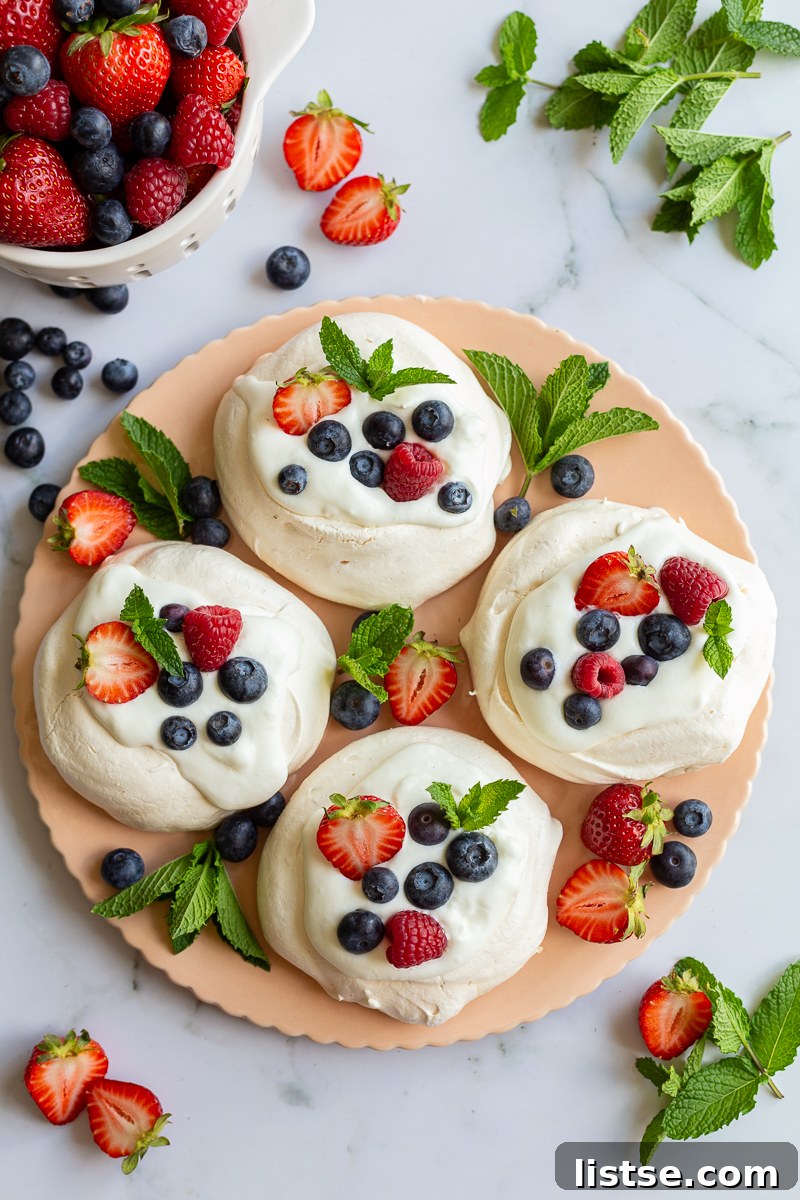
Prepare to be enchanted by the ultimate dessert sensation – the incredible Pavlova! This visually stunning sweet treat is a celebration of contrasting textures, offering a delicate, crisp shell that gives way to a wonderfully soft, marshmallow-like interior. Crowned with billows of luscious whipped cream and an abundance of vibrant fresh berries, it’s a show-stopping dessert perfect for any festive occasion, intimate gathering, or simply to elevate your everyday. Don’t let its elegant appearance fool you; crafting this gorgeous Pavlova is surprisingly straightforward, requiring just a handful of simple ingredients and a touch of meringue magic.
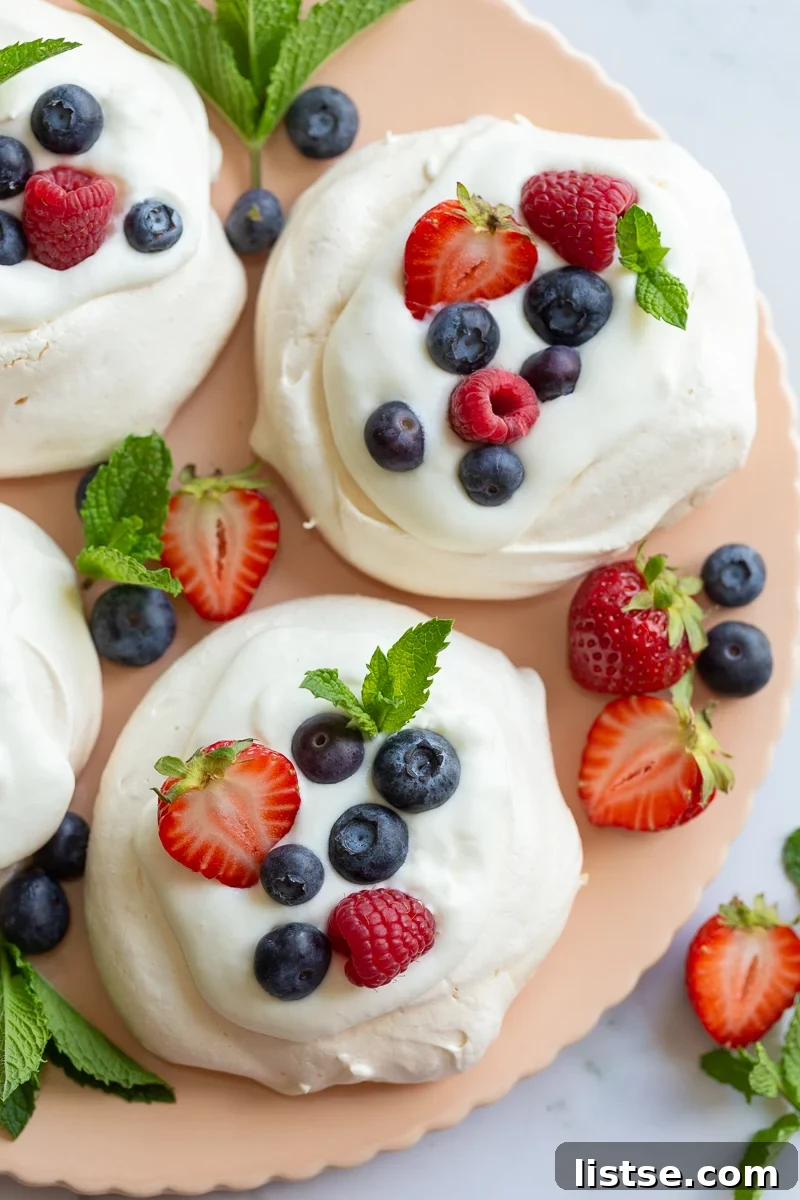
The journey to creating this irresistible dessert begins with a simple yet precise technique: whipping egg whites with sugar, vanilla, a hint of vinegar, and cornstarch. These humble components transform into a miraculous meringue that bakes into a pristine, crisp outer layer while maintaining an ethereal, cloud-like softness within. The addition of rich, sweet whipped cream and your favorite seasonal fruits truly elevates this dessert, creating a symphony of flavors and textures that will have everyone reaching for another slice. Pavlova isn’t just a dessert; it’s an experience that captivates both the eyes and the palate, leaving a lasting impression on all who taste it.
Why You’ll Fall in Love with This Pavlova Recipe
Beyond its undeniable beauty, this homemade Pavlova offers a myriad of reasons to make it your go-to dessert. From its delightful taste to its impressive presentation, here’s why this recipe stands out:
- Simply Stunning Elegance: This dessert is a true masterpiece that commands attention. Imagine bringing a freshly prepared Pavlova to your next party – its pristine white meringue, fluffy cream, and jewel-toned berries create an instant wow factor. While it looks incredibly sophisticated, the actual process is remarkably simple, making you look like a seasoned pastry chef without the effort! It’s the perfect centerpiece for celebrations, holidays, or any moment you want to make extra special.
- A Symphony of Flavors and Textures: Prepare your taste buds for an extraordinary adventure. The magic of Pavlova lies in its glorious contrast: a delicate, shatteringly crisp exterior that crackles with every bite, revealing a gloriously soft, chewy, and airy marshmallow-like center. This unique texture is perfectly complemented by the silky smoothness of fresh whipped cream and the burst of fresh, tangy fruit. Each spoonful offers a delightful interplay that is truly out of this world, making it a dessert experience unlike any other.
- Universally Loved and Crowd-Pleasing: Pavlova has a timeless appeal that transcends culinary preferences. Its light, refreshing nature makes it a fantastic option after a hearty meal, and its unique appearance sparks curiosity and conversation. It’s a guaranteed crowd-pleaser that guests will adore, often asking for the recipe before the last crumb is gone. Plus, its customizable toppings mean you can tailor it to suit any taste or dietary preference, ensuring everyone at your table finds something to love.
Essential Ingredients for Your Perfect Pavlova
Creating this magnificent Pavlova requires only a handful of common kitchen staples, most of which you likely have on hand. The secret to its signature texture and flavor lies in the quality and preparation of these simple components. Each ingredient plays a vital role in achieving that delicate balance of crisp and soft, sweet and fresh. Let’s explore what you’ll need to gather:
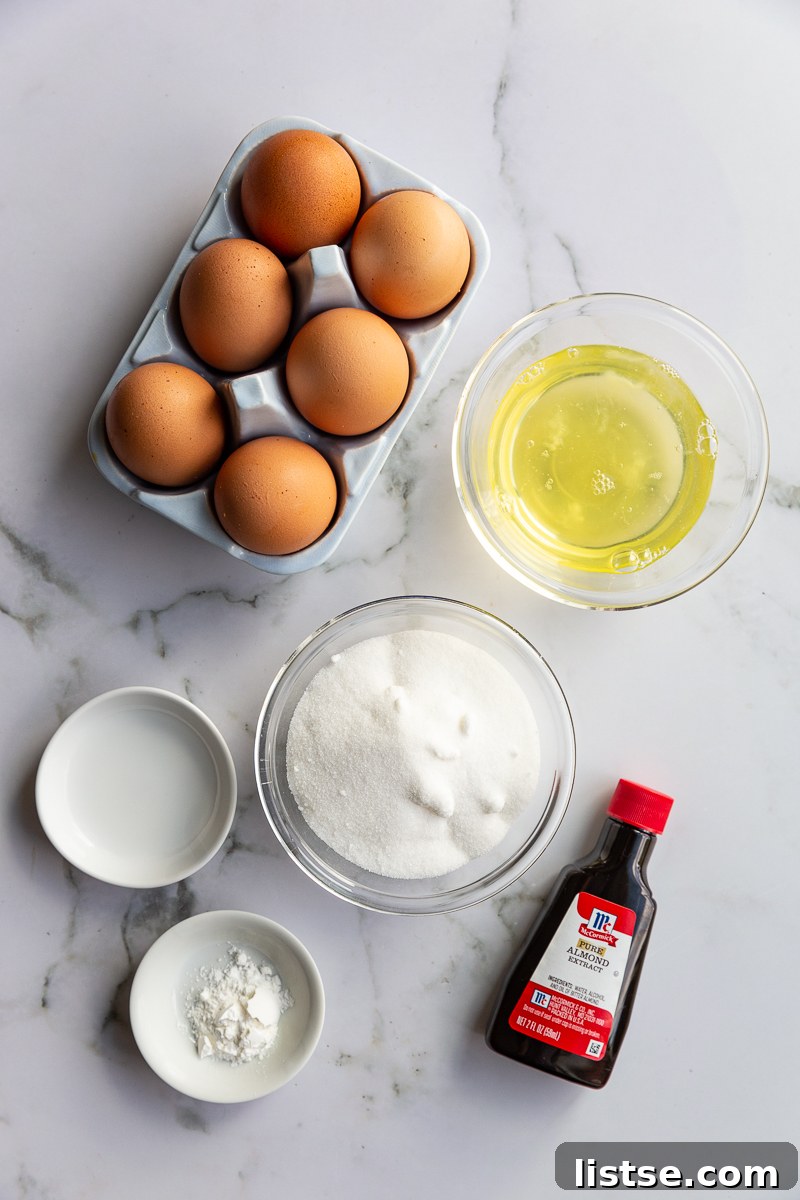
- Egg Whites: The foundation of any great meringue. You’ll need 3 large egg whites, ideally separated from whole eggs (not from a carton, as these often contain additives that hinder whipping). For optimal volume and stability, ensure your egg whites are at room temperature. This allows them to whip faster and achieve a much more robust structure, leading to a higher, more stable meringue.
- Granulated Sugar: Not just for sweetness, sugar is crucial for stabilizing the egg whites and creating that beautiful glossy sheen. It dissolves into the egg whites, forming a strong, stable meringue that bakes up perfectly. Gradually adding the sugar is key to ensuring it fully incorporates and creates a smooth, firm mixture.
- Vanilla Extract: A touch of pure vanilla extract adds a warm, aromatic depth to the Pavlova, complementing the sweetness of the meringue and cream beautifully. For an even more intense flavor, consider using vanilla bean paste.
- White Vinegar: This acidic ingredient is the unsung hero, helping the egg whites hold air more effectively and contributing to the desirable crisp exterior and soft interior. The acidity helps to denature the proteins in the egg whites, strengthening the meringue structure.
- Cornstarch: A small amount of cornstarch is the secret to achieving that signature texture – a wonderfully crisp, almost crackly outer shell with a distinctly soft, chewy, marshmallow-like center. It acts as a stabilizer, preventing the meringue from collapsing too much and enhancing its unique chewiness.
- Whipped Cream: A generous topping of freshly whipped cream provides a luxurious, creamy contrast to the crisp meringue and tangy fruit. Make sure to use heavy cream or whipping cream for the best results. You can sweeten it lightly with powdered sugar and a dash of vanilla.
- Fresh Fruit: The vibrant crown of your Pavlova! The options are truly limitless, but classic choices like blueberries, raspberries, and sliced strawberries offer a delightful burst of color, sweetness, and acidity that perfectly balances the rich cream and sweet meringue. Consider what’s in season for the freshest, most flavorful experience.
Creative Variations and Customization Ideas
While the classic Pavlova with mixed berries is undeniably delicious, this versatile dessert lends itself beautifully to creative twists and seasonal variations. Don’t hesitate to experiment with different flavor profiles and toppings to suit your taste or the occasion:
- Acidic Alternatives: If white vinegar isn’t readily available, an equal amount of fresh lemon juice or even cream of tartar can be used as a substitute. Both provide the necessary acidity to stabilize the egg whites and contribute to the meringue’s structure.
- Elevated Whipped Cream: While classic whipped cream is fantastic, consider infusing it with other flavors. A hint of almond extract, a spoonful of espresso powder, or a swirl of citrus zest can add an intriguing layer of taste. For an extra rich and decadent cream, try folding in some mascarpone cheese. For a truly irresistible experience, I highly recommend exploring a homemade whipped cream recipe – often, it takes even less time to prepare than the Pavlova itself and makes a world of difference.
- Diverse Toppings Galore: The possibilities for fruit toppings are endless! Beyond the classic berries, venture into tropical delights like sliced kiwi, juicy mango, or passion fruit pulp. Stone fruits such as peaches, nectarines, or plums, lightly roasted or fresh, add wonderful sweetness. Pomegranate arils provide a beautiful pop of color and a tart crunch. For an indulgent touch, drizzle your finished Pavlova with homemade caramel sauce, rich chocolate ganache, or a vibrant fruit coulis. A sprinkle of toasted nuts or shaved chocolate can also add extra texture and flavor.
- Meringue Flavorings: Get creative with the meringue itself! A teaspoon of cocoa powder can create a chocolate Pavlova, while citrus zest (lemon, orange, or lime) can add a bright, fragrant note to the meringue. A pinch of finely ground pistachios or almonds could also be folded in for a subtle nutty flavor.
Crafting Your Homemade Pavlova: A Step-by-Step Guide
Making Pavlova might seem intimidating at first glance due to its delicate nature, but with careful attention to a few essential steps, you’ll achieve a stunning dessert every time. This detailed guide will walk you through the process, ensuring you master the art of the perfect meringue. Get ready to create your new favorite sweet treat!
Begin by preparing your equipment. Ensure your mixing bowl (preferably metal or glass) and whisk attachments are immaculately clean and completely free of any grease or oil, as even a tiny trace can prevent egg whites from whipping properly. Preheat your oven to 250°F (120°C) and line a large baking sheet with parchment paper. If you have an insulated baking sheet, it can help prevent excessive browning and cracking. Next, in your very clean large mixing bowl, beat the room-temperature egg whites. Start on medium speed, gradually increasing to medium-high until they become frothy and begin to form very soft peaks. These peaks should barely hold their shape when you lift the whisk.
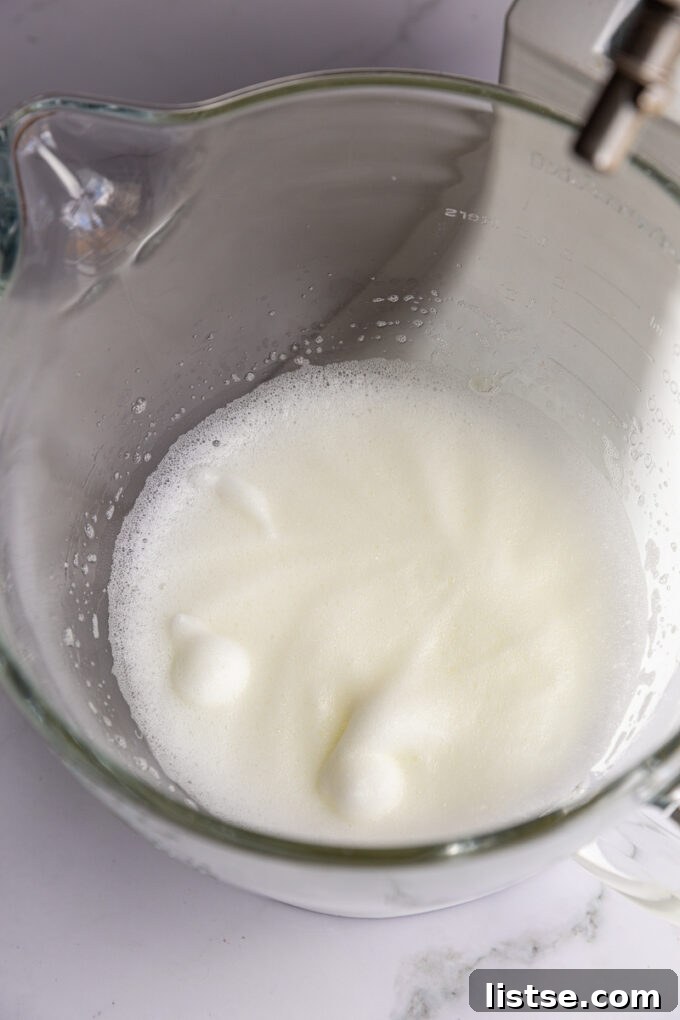
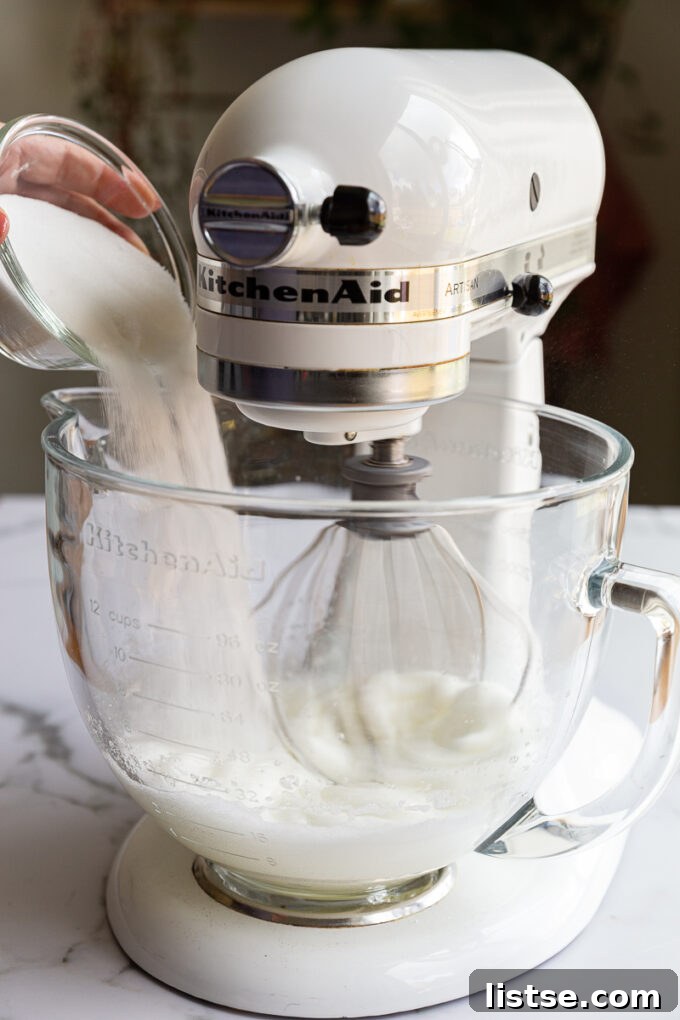
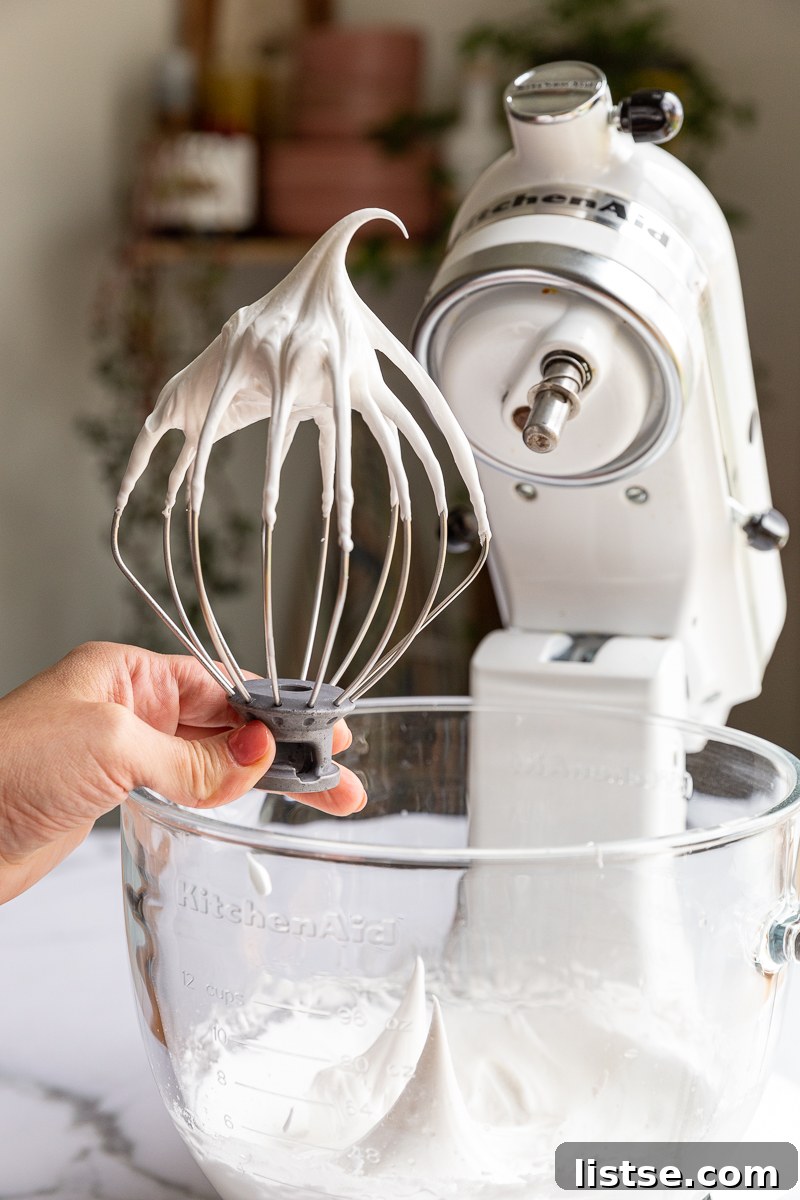
Once your egg whites have reached the soft peak stage, it’s time to add the sugar. This is a critical step for a stable meringue. Gradually pour in the granulated sugar, one tablespoon at a time, while the mixer continues to beat on medium-high speed. Do not rush this process; slow addition allows the sugar to dissolve completely, resulting in a smooth, glossy, and stable meringue. Continue beating for 5-8 minutes, or until the mixture is thick, shiny, and forms stiff, upright peaks. When you rub a small amount of meringue between your fingers, it should feel completely smooth, without any grainy sugar crystals.
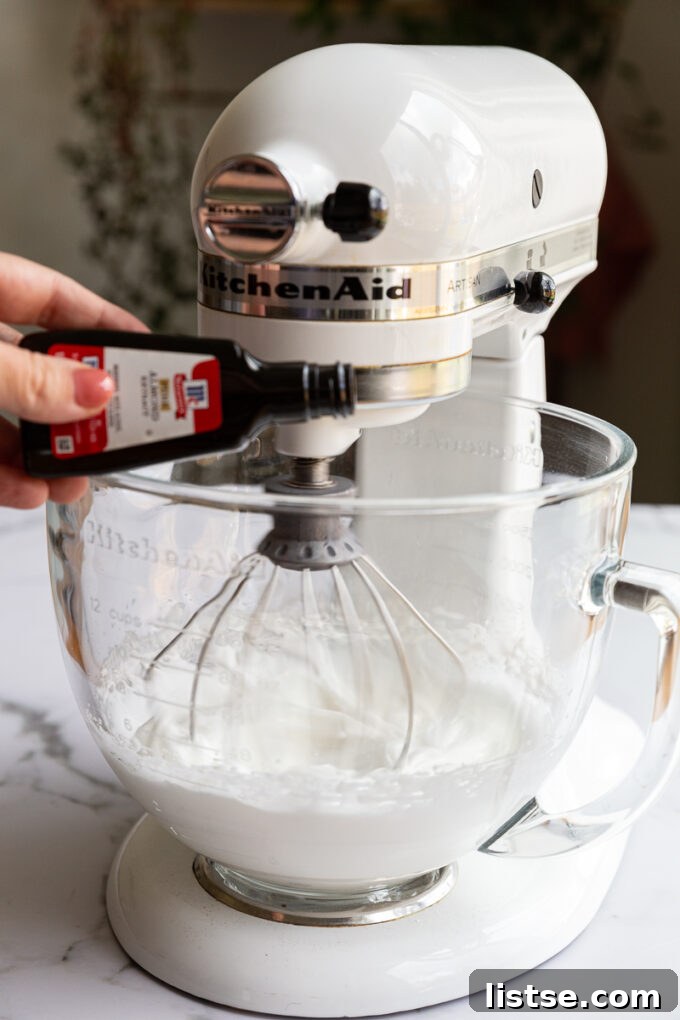
Now, gently incorporate the remaining ingredients. Add the vanilla extract, cornstarch, and white vinegar to the stiff meringue. Beat on low speed for just about 30 seconds, or until they are barely combined. Overmixing at this stage can deflate the meringue, so be quick and gentle. The cornstarch and vinegar will work their magic during baking to give the Pavlova its characteristic crisp exterior and soft, chewy center.
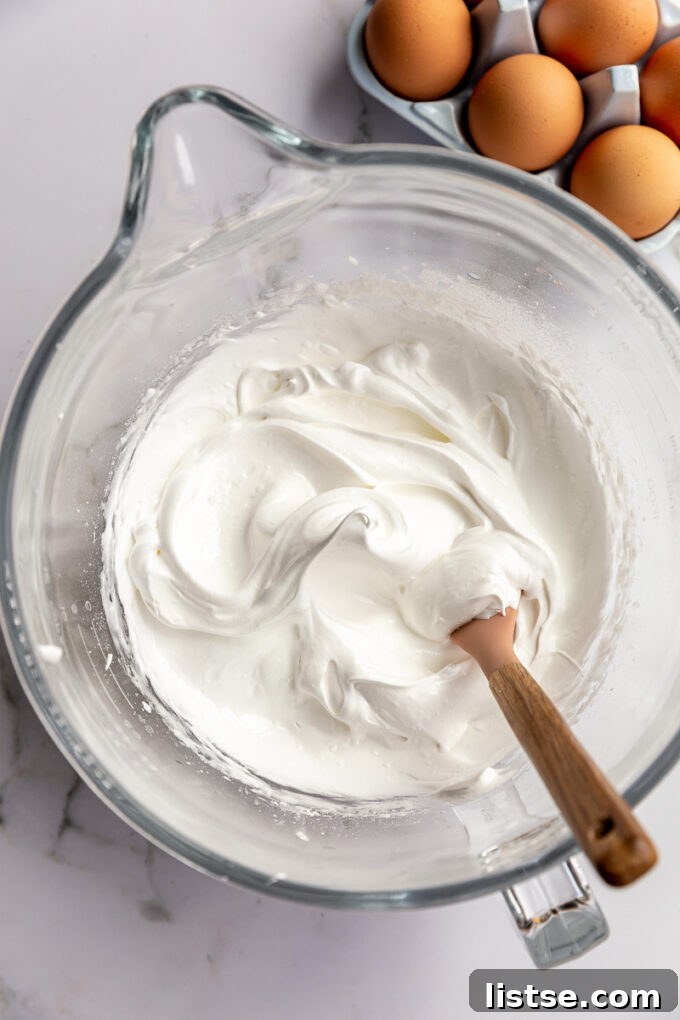
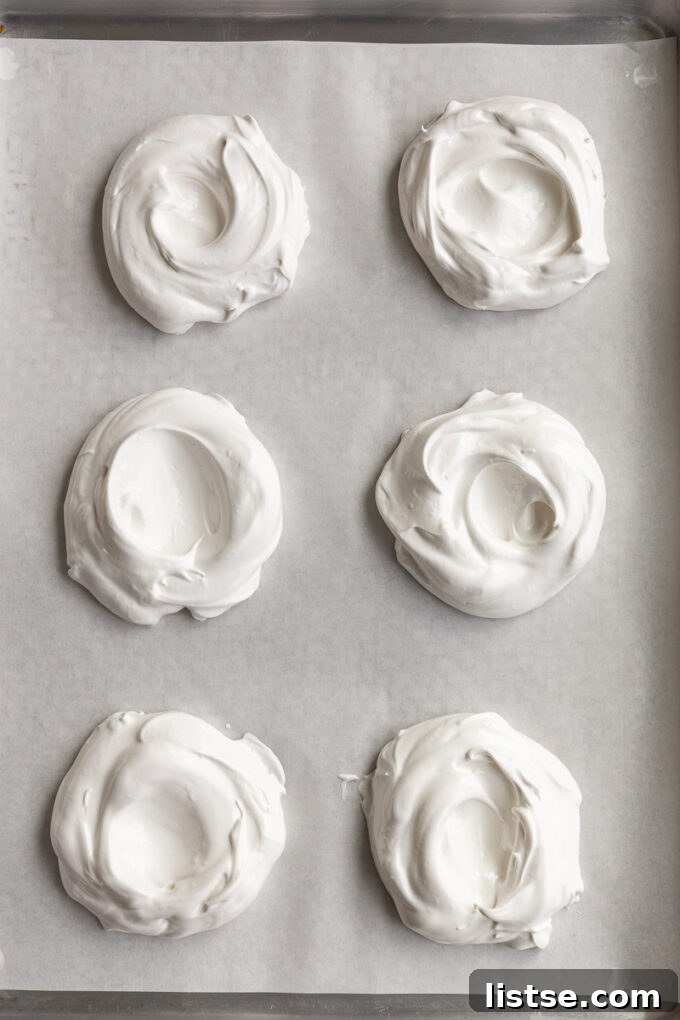
The image below provides an excellent visual reference for what your meringue should look like at this stage: firm, glossy, and holding its shape beautifully in stiff peaks. This indicates that the sugar has fully dissolved and the meringue is stable and ready for baking.
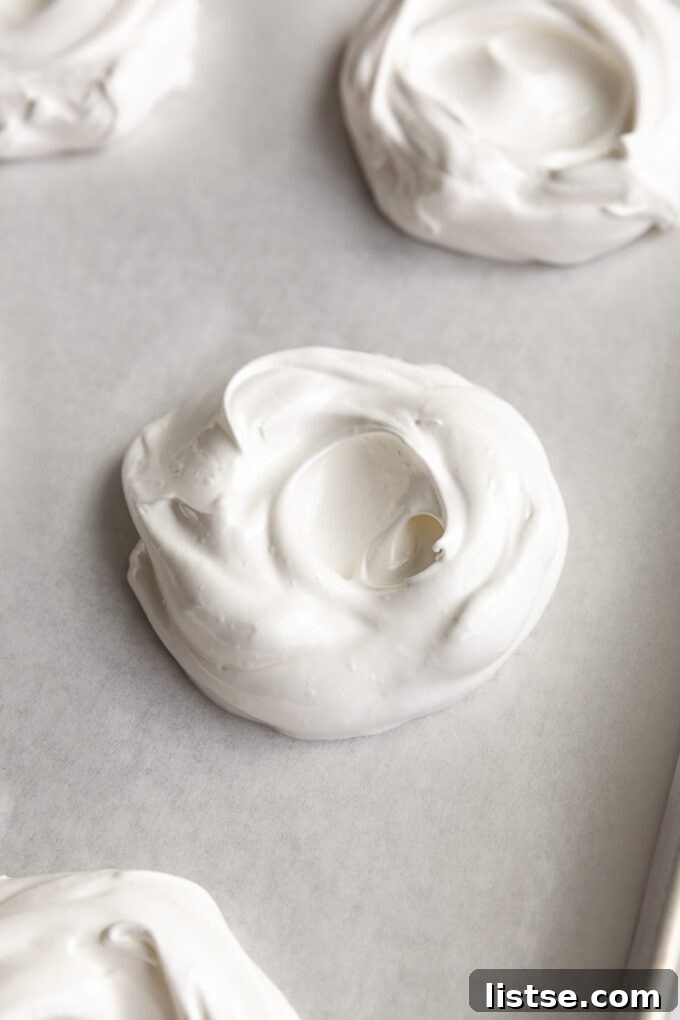
On your parchment-lined baking sheet, carefully spoon the meringue mixture into circles of your desired size. You can create one magnificent, large Pavlova (about 8-10 inches in diameter, like a cake) or, as we often do for easier serving, opt for individual mini Pavlovas, typically 5-7 inches wide. Using the back of a spoon or an offset spatula, shape the meringue into a round, forming a slight well or indentation in the center of each. This ‘well’ is where the glorious whipped cream and an abundance of fresh fruit will nestle later, creating a picture-perfect presentation.
Transfer the baking sheet to your preheated oven and bake for one hour and 15 minutes. It’s crucial not to open the oven door during this time. Once the baking time is complete, turn off the oven but leave the Pavlovas inside. Crack the oven door slightly (you can use a wooden spoon to keep it ajar) and allow them to cool completely in the gradually cooling oven for at least another hour, or even longer, until the oven is completely cold. This slow cooling process is vital as it helps to prevent the Pavlovas from cracking excessively, ensures a perfectly crisp shell, and allows the interior to set to that desired marshmallowy texture.
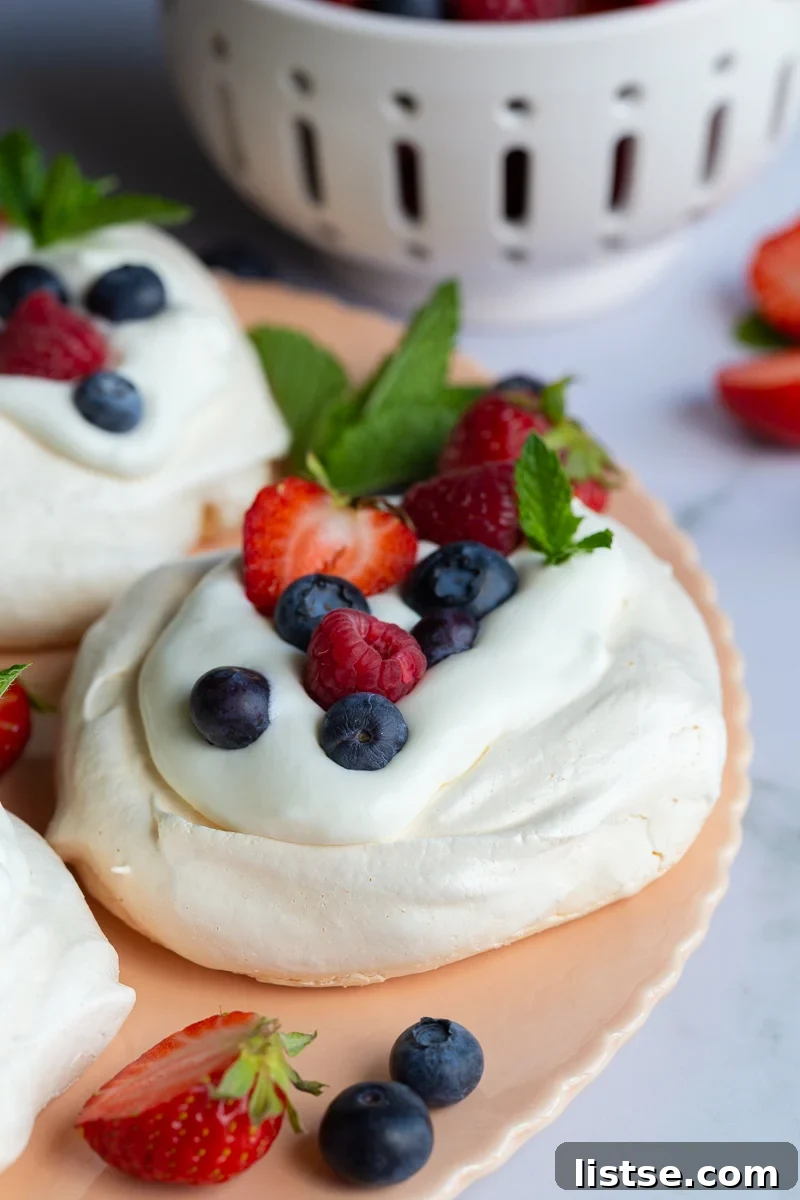
Once your Pavlova shells are completely cool, they are ready for their grand finale. Just before serving, generously pile on the freshly whipped cream into the created wells. Then, artfully arrange an assortment of fresh berries or your chosen fruit toppings. The combination of the sweet, crisp meringue, the smooth cream, and the juicy fruit creates an unforgettable dessert experience. Serve immediately and savor every delightful bite!
Expert Tips for Pavlova Perfection
Achieving a beautiful and delicious Pavlova is easier than you think, especially with these insider tips and tricks. Follow these guidelines to ensure your meringue turns out perfectly crisp on the outside and wonderfully soft on the inside, every single time:
- Mastering Egg Separation: It’s generally easiest to separate egg yolks from whites when the eggs are cold, straight from the refrigerator. Cold yolks are firmer and less likely to break, preventing any fat from contaminating the whites. However, for optimal whipping volume and stability, allow the separated egg whites to come to room temperature on the counter for about 30 minutes to an hour before beating. Room temperature whites incorporate air much more efficiently and create a more stable meringue.
- The Secret to Preventing Cracks: A common concern with Pavlovas is cracking. The best way to minimize this is through a controlled cooling process. After the Pavlova has finished baking, turn off the oven completely. Prop the oven door open slightly (a wooden spoon works perfectly) and allow the Pavlova to cool down slowly inside the oven for at least one hour, or even longer until the oven is completely cold. This gradual temperature change helps the meringue stabilize and significantly reduces cracking.
- Opt for Mini Pavlovas: While a single grand Pavlova cake makes a stunning centerpiece, individual mini Pavlovas are incredibly charming and practical, especially for entertaining. They’re ideal for potlucks, parties, and holiday gatherings, allowing each guest to enjoy their own perfectly sized treat. Plus, mini versions offer the opportunity for guests to customize their toppings, adding a fun, interactive element to your dessert bar.
- Strategic Make-Ahead Planning: Pavlova shells are fantastic for preparing in advance, making them an ideal dessert for events. Once the baked Pavlova shells are completely cool, gently transfer them to an airtight container. Store them at room temperature in a cool, dry place for up to 2-3 days. This allows you to tackle the most time-consuming part of the dessert ahead of time. Just before you’re ready to serve, simply whip the cream and add your fresh fruit toppings, assembling them for maximum freshness and visual appeal.
- Humidity Matters: Meringue can be sensitive to humidity. On very humid days, meringue can become sticky or “weep” sugar syrup. If possible, try to make Pavlova on a dry day. Ensure your kitchen isn’t overly steamy during the baking and cooling process.
- Cleanliness is Key: Any trace of fat (from egg yolks, oily hands, or dirty bowls/whisks) can prevent egg whites from whipping up properly. Always use impeccably clean, dry bowls and beaters. You can wipe your bowl and whisk with a paper towel dampened with lemon juice or vinegar to ensure they are grease-free.
Frequently Asked Questions About Pavlova
What exactly is a Pavlova?
Pavlova is an exquisite meringue-based dessert, famously light and airy. It can be prepared as one large, impressive cake or as several charming mini cakes, as demonstrated in this recipe. Its origins are a delightful culinary dispute between Australia and New Zealand, both claiming its creation in the early 20th century. The dessert was named in honor of the renowned Russian ballerina Anna Pavlova, who toured both countries in the 1920s, reflecting its elegant and graceful appearance.
What does Pavlova taste and feel like?
A true Pavlova offers a captivating textural contrast that is central to its appeal. The exterior boasts a delicate, crisp, and slightly fragile shell that shatters beautifully with each bite. Beneath this crisp layer lies a truly unique interior: a soft, chewy, and airy marshmallow-like center that is sweet and melts in your mouth. The added whipped cream contributes a smooth, rich coolness, while fresh fruits introduce a burst of tanginess and juiciness, creating a perfectly balanced and refreshing flavor profile.
How should Pavlova feel when it’s perfectly cooked?
When a Pavlova is perfectly baked, its outer shell should feel dry and firm to the touch, often with a slight crackle, indicating its crispness. The color should be a pristine white or a very light cream, depending on the oven and the degree of caramelization. Critically, the interior, when you slice into it, should reveal a distinctly soft, chewy, and somewhat gooey consistency, much like a gourmet marshmallow. If it’s completely dry and brittle throughout, it might be overbaked; if it’s too wet or collapses, it might need more baking time or a slower cooling process.
Can I prepare Pavlova ahead of time?
Absolutely! The meringue shells can be baked up to 2-3 days in advance. Once fully cooled in the oven, carefully remove them and store them in an airtight container at room temperature, away from any humidity. Avoid refrigerating the plain meringue shells, as the moisture can make them sticky. Assemble with whipped cream and fresh fruit just before serving to maintain the perfect crispness of the meringue.
What causes Pavlova to crack or weep?
Cracking is often caused by a sudden temperature change during or after baking; hence the importance of cooling slowly in the turned-off oven. Weeping (where sugar syrup leaks from the meringue) can occur if the sugar isn’t fully dissolved in the egg whites before baking, or if the meringue is exposed to high humidity. Ensure you beat the meringue until it’s glossy and no sugar crystals are detectable when rubbed between your fingers.
Storing Your Delicious Pavlova
For the absolute best experience, Pavlova is at its peak of freshness and texture the day it’s made and served. The delicate balance of crisp meringue, creamy topping, and fresh fruit is best enjoyed shortly after assembly. However, if you happen to have some delightful leftovers, or if you’ve made the meringue shells ahead of time, here’s how to store them:
- Unassembled Meringue Shells: Once completely cool, transfer the baked Pavlova shells to an airtight container. Store them at room temperature in a cool, dry place for up to 2-3 days. Humidity is the enemy of crisp meringue, so avoid refrigeration, which can introduce moisture and make them sticky.
- Assembled Pavlova Leftovers: If your Pavlova is already topped with whipped cream and fruit, storage becomes a bit trickier. The moisture from the cream and fruit will quickly start to soften the meringue. For this reason, leftovers are best stored in an airtight container in the refrigerator and consumed within a day or two. While the meringue will lose some of its crispness, the flavors will still be delicious.
- Refreshing Softened Pavlova: If your assembled Pavlova has softened overnight, you can sometimes crisp up the meringue by placing it in a very low oven (around 200°F / 95°C) for 10-15 minutes, if the toppings allow. However, it will never quite regain its initial crispness.
Explore More Irresistible Desserts
If you loved creating and enjoying this Pavlova, you’ll surely enjoy these other delightful sweet treats from our kitchen. Perfect for any craving or occasion, these recipes are tried-and-true favorites that are sure to impress!
- Vibrant Rainbow Cookies
- Creamy Easy Fruit Dip
- Indulgent Homemade Twix Bars
- Classic Peanut Butter Bars
A Final Sweet Thought
Thank you for embarking on this delightful culinary journey to create the perfect Pavlova. This dessert is not just a treat for the palate, but a feast for the eyes, promising elegance and incredible flavor with every bite. We truly love seeing your delicious creations and sharing the joy of cooking. So, if you make this Pavlova recipe and absolutely adore it, please remember to share your photos and tag us on Instagram @foodwithfeeling! We can’t wait to see your stunning Pavlovas and hear your feedback. Happy baking! 🙂
Pavlova Recipe
Brita Britnell
10 mins
2 hrs
2 hrs 10 mins
6 servings
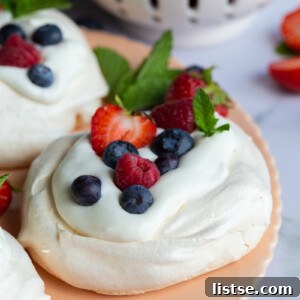
Steal the show with this gorgeous Pavlova dessert! It has a light and crispy texture on the outside with a wonderfully soft inside. Top with whipped cream and fresh berries for a sweet treat that’s perfect for any occasion or celebration!
Ingredients
- 3 large egg whites, room temperature
- ¾ cup granulated sugar
- ½ teaspoon vanilla extract
- ½ teaspoon white vinegar
- 1 teaspoon cornstarch
- 1.5 cups (approx.) fresh whipped cream, for topping
- Fresh fruit of your choice (e.g., blueberries, raspberries, strawberries), for topping
Instructions
- Preheat your oven to 250°F (120°C). Line a large baking sheet with parchment paper.
- In a very clean large bowl, beat the room-temperature egg whites on medium speed until they are frothy and begin to form very soft peaks.
- Gradually add the granulated sugar, one tablespoon at a time, while continuing to beat on medium-high speed. Continue beating for 5-8 minutes, or until the meringue is thick, glossy, and forms stiff, upright peaks. It should feel smooth between your fingers, with no grainy sugar crystals.
- Gently add the vanilla extract, cornstarch, and white vinegar. Beat on low speed for just 30 seconds, or until barely combined, to avoid deflating the meringue.
- On the parchment-lined baking sheet, spoon the meringue mixture into circles of your desired size (approximately 5-7 inches round for mini Pavlovas, or one large 8-10 inch circle). Use the back of a spoon to create a slight well in the center of each Pavlova.
- Bake for 1 hour and 15 minutes. Once baking is complete, turn off the oven. Prop the oven door open slightly and allow the Pavlovas to cool completely inside the oven for at least another hour, or until the oven is cold. This slow cooling prevents cracking.
- Once completely cool and just before serving, generously top with fresh whipped cream and an assortment of fresh fruit. Enjoy immediately!
Notes
Pavlova tastes best when assembled and served the same day it’s made. If you have leftover assembled Pavlova, store it in an airtight container in the refrigerator and consume within 1-2 days. The meringue will soften over time but will still be delicious. Unassembled meringue shells can be stored at room temperature in an airtight container for up to 3 days.
Tried this recipe? We’d love to see your creations! Mention @foodwithfeeling or tag #foodwithfeeling on Instagram.