
Mastering Green Smoothies: The Ultimate Guide to Freezing Greens for Zero Waste & Effortless Health
Are you ready to transform your approach to healthy eating and make nutrient-packed green smoothies a seamless part of your daily routine? Like many health enthusiasts, I’ve found myself completely captivated by the power of green smoothies. They are an incredible way to pack a concentrated dose of vitamins, minerals, and fiber into your day, offering a quick energy boost and supporting overall well-being. My blender has certainly earned its place as a kitchen MVP, constantly churning out delicious concoctions. In fact, I have several fantastic green smoothie recipes waiting to be shared with you, all perfected during a recent creative burst!
Demystifying the Blender Myth: High-Power Not Required
Before we dive into the magical world of freezing greens, let’s address a common misconception: you absolutely do not need an expensive, high-powered blender to become a green smoothie connoisseur. My own trusty blender is a rather humble hand-me-down, predating even my marriage! It has consistently proven its worth, effortlessly tackling spinach, kale, and various fruits to create perfectly smooth beverages. If you’ve been hesitant to jump on the smoothie bandwagon due to perceived equipment costs, let this be your reassurance: a basic, reliable blender is more than sufficient. Mine is very similar to this model, and I have no plans to upgrade anytime soon. Focus on the ingredients and the process, not just the gear!
The Challenge of Fresh Greens: Battling Food Waste
A recent acquisition of a Costco membership – which I absolutely adore, by the way – brought with it an abundance of fresh produce. While the jumbo bags of spinach and kale offer incredible value, they also present a unique challenge for a household of just two. Realistically, consuming such vast quantities of greens before they spoil felt like an impossible task. In the first month alone, a significant portion ended up in the compost bin or, in a rather optimistic attempt, offered to my chickens (who, much to my surprise, turned their beaks up at it!). This common struggle with fresh produce going bad is a leading cause of food waste in many kitchens, and it’s precisely what led me to seek a sustainable, effective solution.
The Ingenious Solution: Embracing Frozen Greens for Smoothies
The answer to my fresh greens dilemma was staring me in the face, a concept I’d encountered before but never fully explored: freezing greens! This simple yet revolutionary method has transformed my smoothie routine and significantly reduced food waste. By preparing and freezing greens in advance, you ensure a consistent supply of nutrient-dense ingredients always on hand. No more watching precious spinach wilt in the back of the fridge. This strategy is not just about preventing waste; it’s about making healthy eating more convenient, more affordable, and truly effortless. Let’s delve into how you can adopt this game-changing practice for your own kitchen.
Step-by-Step Guide: How to Perfectly Freeze Greens for Your Smoothies
Freezing greens for smoothies is a straightforward process that requires minimal effort but yields maximum benefits. Follow these detailed tips and tricks to ensure your frozen green cubes are perfectly prepared for your next blend.
1. Timely Freezing: Don’t Wait Until It’s Too Late
The golden rule for freezing greens is to act promptly. Pay close attention to your greens as they begin to show signs of wilting or nearing their expiration date. Don’t procrastinate until they’re on the verge of spoiling. If you anticipate not using all your fresh greens within a few days, it’s time to freeze them. Freezing them in batches is often necessary, especially if you’re dealing with large quantities from bulk purchases. Unless you have an abundance of ice cube trays, you’ll likely need to process them in several rounds, so starting early prevents a last-minute scramble.
2. Master the Blend: Use Minimal Liquid for Concentrated Green Power
The key to effective green freezing is using as little liquid as possible to create a highly concentrated green paste. Begin by loosely filling your blender about halfway with your chosen greens (spinach, kale, collards, etc.). Add just a few tablespoons of liquid – water is usually best, but plant-based milk or coconut water also work – and start blending. The goal is to liquefy the greens without diluting their nutritional potency. If the blades struggle, add another tablespoon of liquid, and then another, until the mixture starts to move freely. Once this first batch is mostly liquefied, even with a few small green chunks remaining, add another few handfuls of fresh greens. You typically won’t need much, if any, additional liquid for subsequent additions as the initial blend provides enough moisture. Continue this process until your blender is full or all your greens are processed, ensuring a smooth, thick green concentrate.
3. Smart Storage: Molds to Freezer Bags for Efficiency
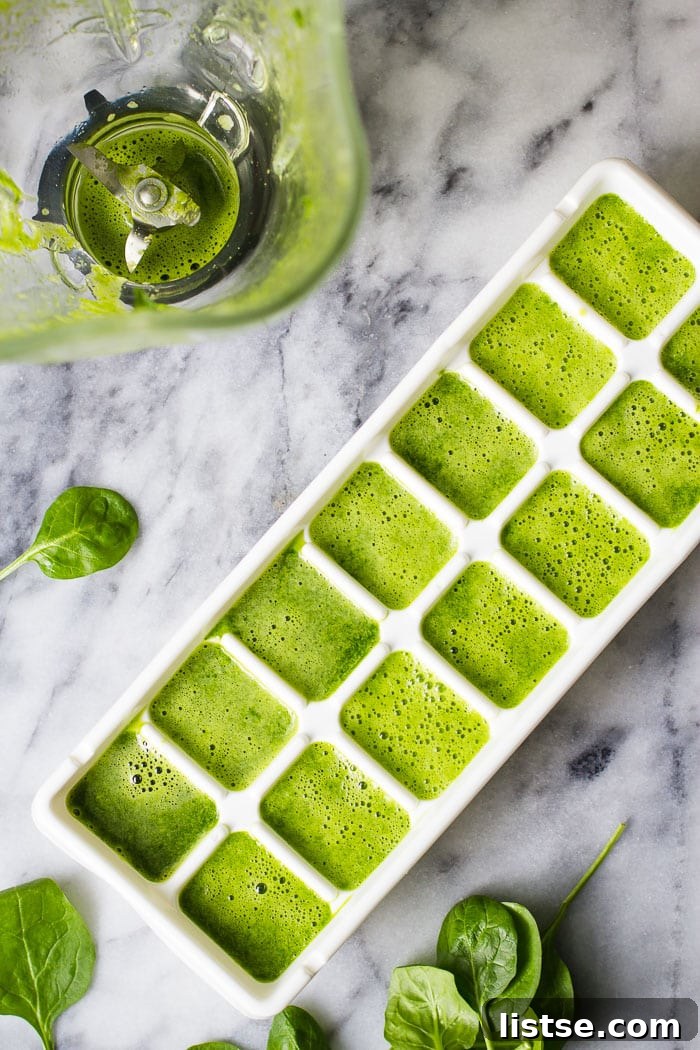
Once your greens are blended into a liquid concentrate, it’s time to portion and freeze them. Pour the green mixture into ice cube molds, mini muffin tins, or any suitable small containers. It’s important to remember that these green cubes take longer to freeze solid than plain water, so allow at least 6 hours, or ideally overnight, for them to fully set. Once completely solid, gently remove the frozen green cubes from their molds. Transfer them into large, airtight freezer bags. This step is crucial for two reasons: it saves valuable freezer space by allowing you to stack the cubes compactly, and it frees up your molds for future batches of frozen greens.
4. Get Creative with Containers: Beyond Standard Ice Trays
Don’t limit yourself to just ice cube trays! For larger batches or different portion sizes, you can get quite creative with your freezing vessels. Muffin trays (both regular and mini sizes) are excellent for creating larger pucks of frozen greens. Small coffee mugs, filled about a quarter of the way, can also work for individual servings. For those truly aiming for maximum efficiency, you can even pour the liquid greens directly into freezer-safe baggies, flattening them before freezing to create thin, breakable sheets. Just ensure whatever container you choose is freezer-safe and easy to retrieve the frozen portions from.
5. Mix and Match: Optimize Your Green Blend
There’s no rule saying you have to freeze your greens separately. Feel free to mix different varieties together – combine kale and spinach, add some Swiss chard, or whatever leafy greens you have on hand. This creates a balanced nutrient profile and a more complex flavor for your smoothies. You can even incorporate fresh herbs like parsley or cilantro into your green blend before freezing. A touch of parsley, for instance, adds a wonderfully fresh and vibrant note to many smoothie recipes, enhancing both flavor and health benefits.
6. Adjust Liquid Ratios: Factor in Your Frozen Cubes
When you use frozen green cubes in your smoothies, remember that they contribute to the overall liquid content. This means you’ll need to adjust the amount of other liquids (like water, milk, or juice) you add to your smoothie recipe. Start with slightly less liquid than you normally would and add more gradually until you achieve your desired consistency. This prevents your smoothies from becoming too thin or watery.
7. Boost Your Cubes: Incorporate Fruit for Added Flavor and Nutrition
Take your frozen green cubes to the next level by mixing in fruit! If you have bananas, berries, or other fruits that are nearing their peak ripeness and need to be used, simply toss them into the blender with your greens. Essentially, you’ll be making a very concentrated, fruit-and-green smoothie base that you can then freeze into cubes. This creates convenient, pre-portioned smoothie packs that are ready to blend with just a bit more liquid, saving even more time and adding delicious natural sweetness and extra nutrients.
8. The Test Run: Discover Your Ideal Cube Count
Since ice cube molds and other freezing containers come in various sizes, it’s highly recommended to perform a test run. Blend a small batch of greens with minimal liquid (refer to tip #2). Pour this mixture into your chosen molds and count how many cubes it yields. This simple experiment will give you an accurate idea of how many frozen green cubes you’ll want to use per smoothie recipe to achieve your preferred green intensity and consistency. For example, in my average-sized ice molds, I typically use about 7 green cubes for a smoothie recipe that makes two servings.
Enhancing Your Green Smoothie Journey
Beyond simply freezing your greens, there’s a whole world of green smoothie knowledge to explore. For those eager to delve deeper into the art and science of green smoothies, I highly recommend checking out Simple Green Smoothies. Their website is a treasure trove of information, tips, and recipes. They’ve also published a fantastic book filled with invaluable insights and inspiring recipes that can take your smoothie game to the next level.
Of course, don’t forget to explore my continually expanding archive of smoothie recipes for even more delicious and healthy ideas to incorporate your perfectly frozen greens!
Frozen Greens for Green Smoothies
By: Brita Britnell
Prep Time: 5 mins
Freeze Time: 6 hrs
Total Time: 6 hrs 5 mins
Yields: Approximately 30 servings (individual cubes)
Learn how to easily freeze your greens for consistently fresh and nutritious smoothies, drastically reducing food waste!
Ingredients
- 8 handfuls of greens (e.g., spinach, kale, collard greens)
- ¼ cup of liquid (water is recommended, but milk or coconut water can also be used)
Instructions
- Start by adding approximately 2 handfuls of greens to your blender, along with a few tablespoons of liquid. Blend until the mixture is mostly liquefied. If the greens aren’t blending smoothly, add more liquid, one tablespoon at a time, until a thick liquid forms.
- Continue blending until the mixture is well-liquefied. It’s acceptable if there are still a few small green chunks present at this stage.
- Add another 2 handfuls of greens to the blender and continue blending until thoroughly liquefied. Add additional liquid only if absolutely necessary, one tablespoon at a time, to maintain a concentrated mixture.
- Repeat this process, adding greens in batches, until all your greens are liquified. Ensure the blender runs long enough to achieve a smooth consistency with no large chunks of green remaining.
- Carefully pour the liquid green mixture into ice cube molds, muffin trays, or other preferred freezer-safe containers. Arrange them on a flat surface in your freezer.
- Allow the greens to freeze completely for at least 6 hours, or preferably overnight, to ensure they are solid.
- Once frozen solid, remove the green cubes from their molds and transfer them to a large, airtight freezer-safe bag. Store the bag in the freezer until you are ready to use the cubes in your smoothies.
- Enjoy countless healthy green smoothies, knowing you’ve effectively prevented food waste and have a convenient supply of fresh-frozen greens!
Notes
This “recipe” serves as a flexible guideline. Adjust the quantities of greens and liquid based on how much produce you have and the size of your molds. Remember that this will produce a concentrated green mixture; the serving size of 30 refers to individual cubes, with each smoothie typically using multiple cubes.
Wondering how many cubes per smoothie? Refer to “The Test Run” (point #8) in the main article above. For my standard ice cube tray, I usually use about 7 green cubes for a smoothie recipe that yields two servings.
Nutrition Information (Approximate per cube)
- Calories: 0.1 kcal
- Carbohydrates: 0.02g
- Protein: 0.004g
- Fat: 0.001g
- Saturated Fat: 0g
- Polyunsaturated Fat: 0g
- Sodium: 0.2mg
- Potassium: 1mg
- Fiber: 0.01g
- Sugar: 0.002g
- Vitamin A: 31 IU
- Vitamin C: 0.2mg
- Calcium: 1mg
- Iron: 0.003mg
Nutrition information is an automatic calculation and should be used only as an approximation.