
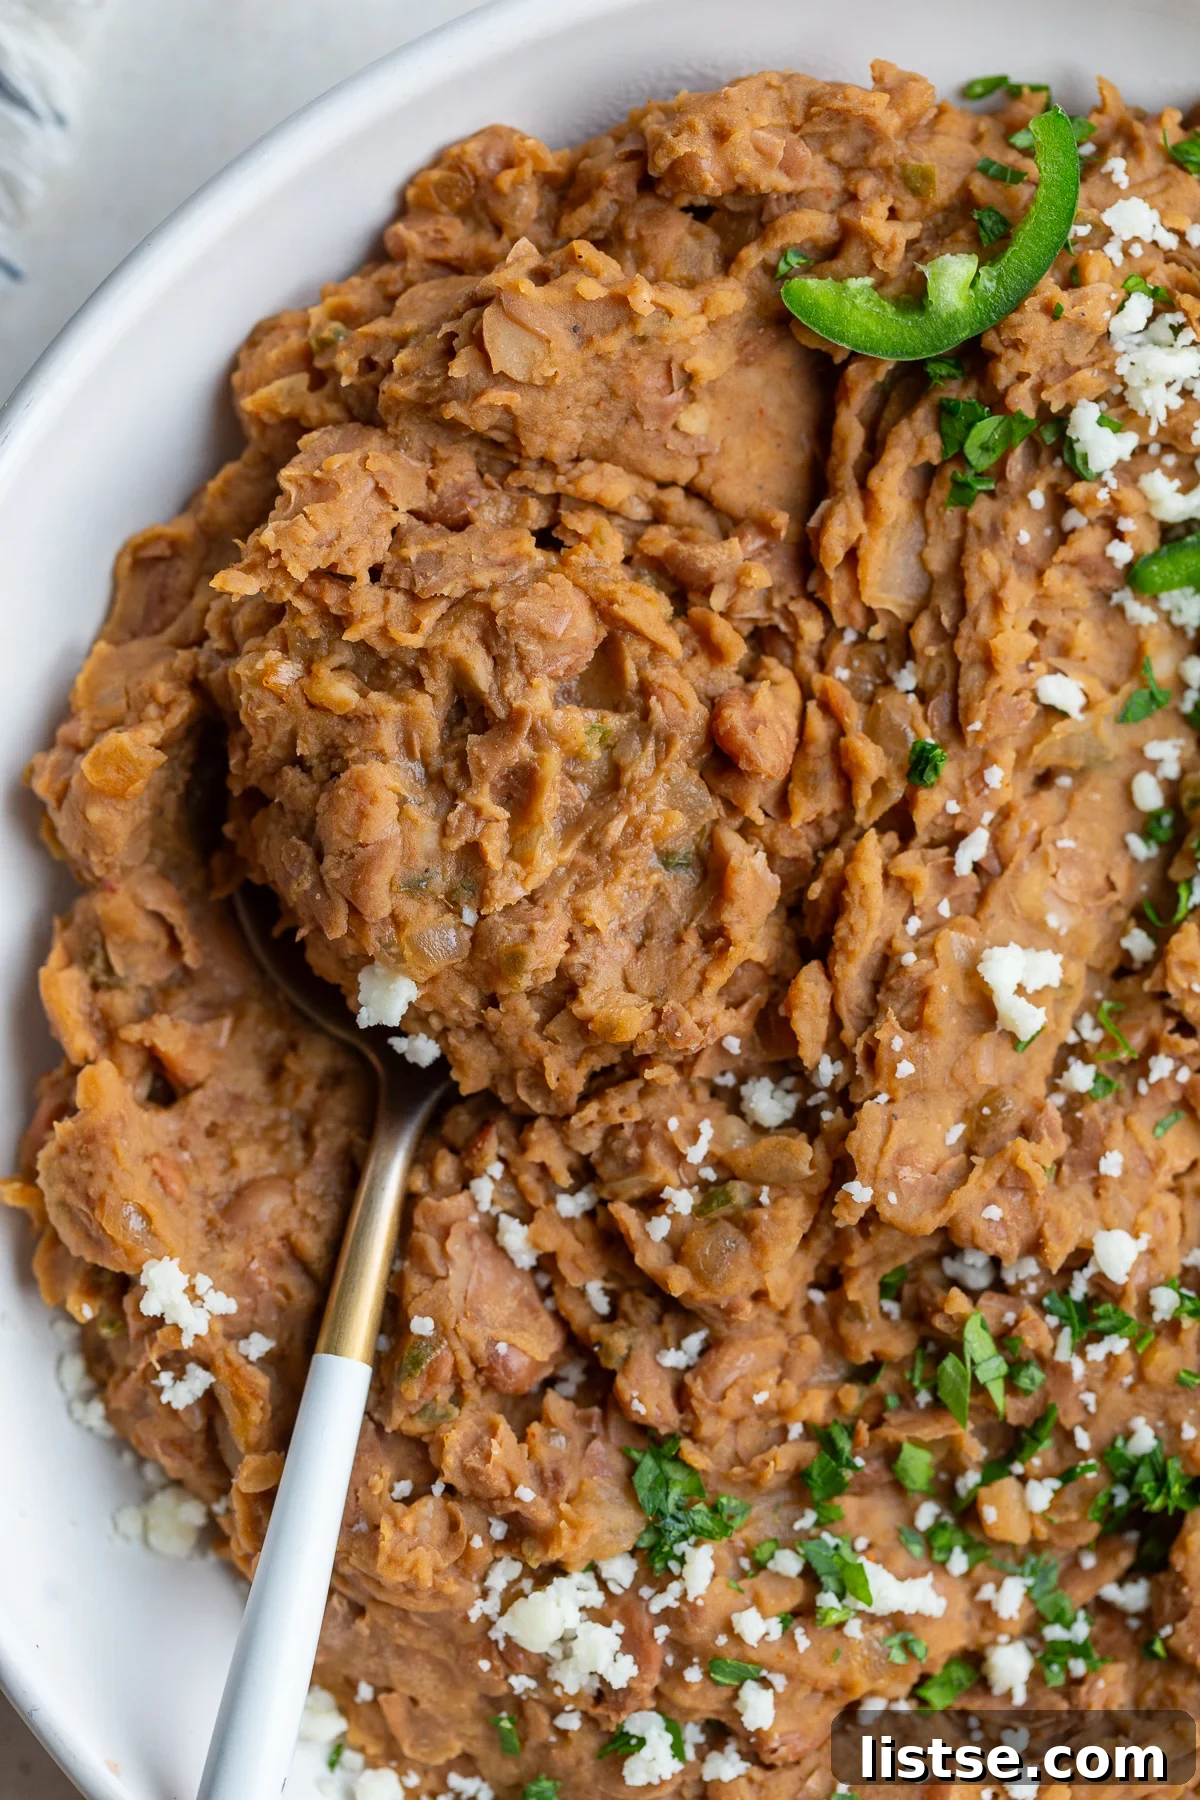
Unlock the secret to incredibly delicious and wholesome Homemade Refried Beans (Frijoles Refritos) with this incredibly easy-to-follow recipe! Whether you prefer the depth of flavor from dried beans or the speed of canned, our method guarantees a creamy, vegetarian, and endlessly versatile dish that will become a staple in your kitchen. Say goodbye to bland, store-bought options and hello to fresh, authentic taste!
Looking for the perfect pairings for your newly made refried beans? We heartily recommend using them to build epic Loaded Vegetarian Nachos, stuffing them into our comforting Vegetarian Enchiladas, or making an unforgettable Easy Crunchwrap!
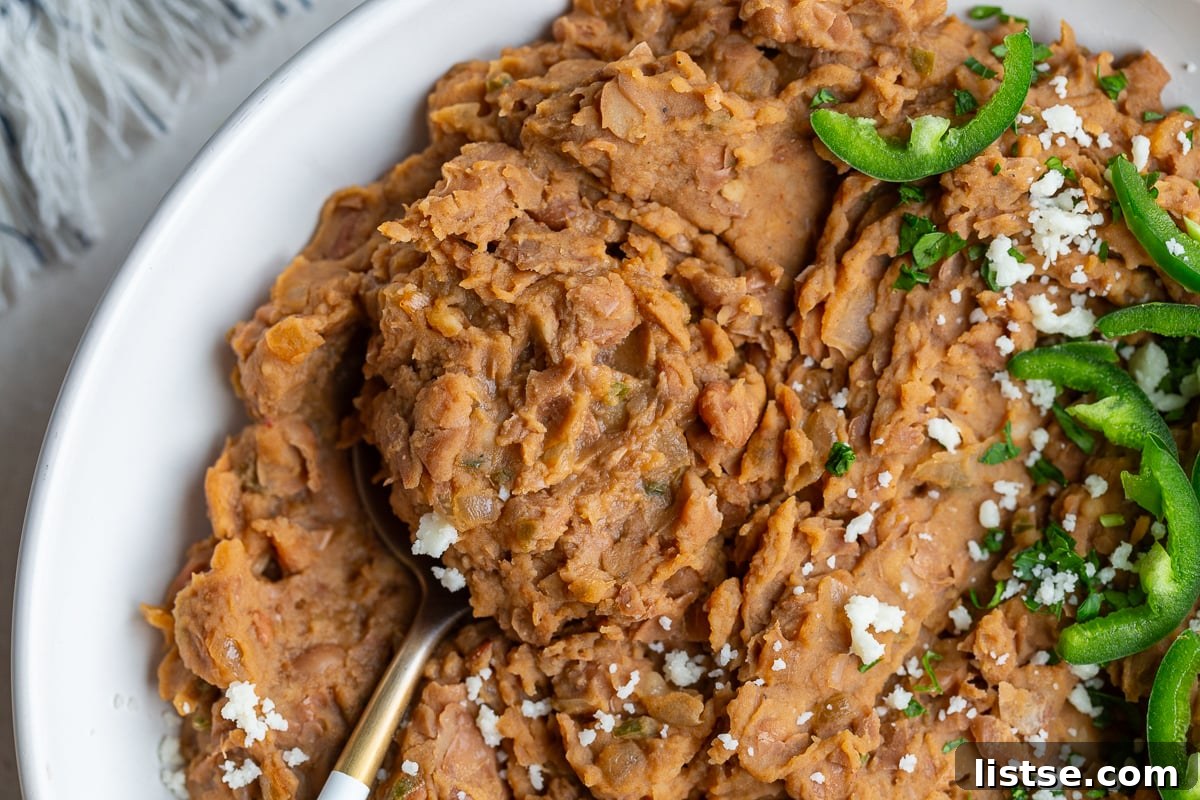
Discover the Best Homemade Refried Beans: Easy, Creamy, & Vegetarian!

Dive into the rich, authentic flavors of homemade refried beans, also known as frijoles refritos. Often perceived as a complex culinary endeavor, this staple Mexican dish is surprisingly simple and incredibly adaptable. Whether you’re starting with dried beans for maximum flavor and cost-effectiveness or opting for the sheer convenience of canned beans, this comprehensive guide will show you how to achieve the same irresistibly creamy texture and deeply satisfying taste. Forget the store-bought versions laden with questionable ingredients or undesirable fats like lard; our vegetarian recipe is proudly made without it, making it a healthier and more conscious choice for your family and guests.
There’s nothing quite like a warm bowl of these perfectly seasoned beans, perhaps topped with a sprinkle of melty cheese and served with crispy tortilla chips as a delightful bean dip. It’s a culinary experience that brings comfort and joy to any meal, transforming simple ingredients into something extraordinary. This recipe is a testament to how easy it is to elevate everyday dishes with a homemade touch.
Here’s why our Easy Homemade Refried Beans recipe will quickly become your new kitchen favorite:
- Flexible & Convenient: Master making refried beans from scratch using either budget-friendly dried beans or time-saving canned beans, tailoring the process to your schedule.
- Wholesome & Vegetarian: Enjoy a truly authentic flavor without any lard, making it a perfect plant-based (and easily vegan if you skip the cheese) option for everyone.
- Unbelievably Creamy: Achieve that silky, smooth consistency that store-bought varieties often lack, with customizable texture options to suit your preference.
- Pantry-Friendly Ingredients: Crafted from readily available staples you likely already have on hand, minimizing trips to the grocery store.
- Endlessly Versatile: The ultimate foundation for an array of Mexican-inspired dishes – from robust tacos and hearty burritos to vibrant bowls, loaded nachos, cheesy quesadillas, and delightful dips!
- Superior Flavor & Texture: Experience a depth of flavor and a fresh, comforting texture that far surpasses anything you’ll find in a can, making every bite a delight.
In This Post: Your Guide to Perfect Homemade Refried Beans
- The Secret to Truly Creamy Refried Beans
- Essential Ingredients for Authentic Flavor
- Step-by-Step Guide: How to Make It
- Pro Tips for Flawless Refried Beans
- Serving Suggestions & Variations
- Frequently Asked Questions
- Easy Homemade Refried Beans Recipe Card
The Secret to Truly Creamy Refried Beans
Achieving that coveted smooth and creamy texture in refried beans is simpler than you might think, and it largely comes down to two key factors: proper cooking of the beans and the mashing process. For unparalleled creaminess and depth of flavor, cooking dried beans from scratch is often preferred as it allows you to control the tenderness and retain valuable cooking liquid, which is absolutely crucial for thinning the beans to the perfect consistency. This starchy, flavorful liquid contributes significantly to the overall mouthfeel and taste, giving your refried beans an authentic edge.
However, even with the convenience of canned beans, you can still yield fantastic results. Careful rinsing of canned beans to remove excess sodium and preservatives, followed by the addition of a good quality vegetable or chicken broth, can mimic the richness of bean cooking liquid. The true art lies in the mashing – whether you prefer them perfectly smooth or with delightful textural variations, the aim is to create a cohesive, spreadable consistency.
The term “refried” is actually a bit misleading to English speakers. In Spanish, “frijoles refritos” literally translates to “well-fried beans,” not “fried twice.” This refers to the traditional Mexican culinary process of simmering beans until very tender, mashing them into a paste (sometimes chunky), and then frying them with aromatic ingredients like onion, garlic, and spices to develop their distinctive, rich flavor and creamy texture. Our recipe embraces this traditional method, ensuring every spoonful is savory, comforting, and wonderfully creamy, making them the ultimate addition to your Mexican-inspired meals.
Essential Ingredients for Authentic Flavor
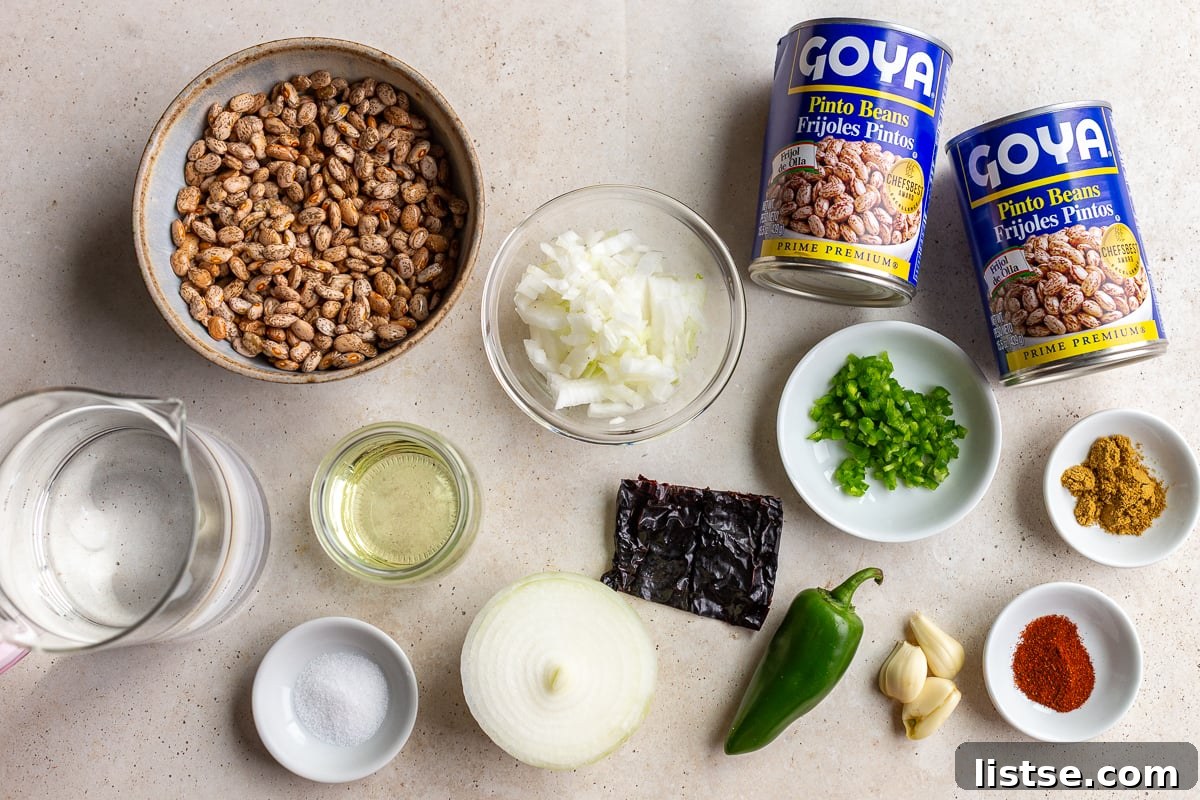
Crafting delicious refried beans begins with a selection of fresh, high-quality ingredients. Our recipe prioritizes pantry staples that deliver maximum flavor without unnecessary fuss, keeping it simple yet incredibly impactful. Below is a detailed look at what you’ll need, along with helpful notes and substitution ideas to help you customize your perfect batch:
- Pinto Beans or Black Beans: These legumes form the comforting heart of our recipe. Pinto beans offer a classic, earthy flavor profile and traditional light-brown color, which is characteristic of most frijoles refritos. Black beans, on the other hand, provide a deeper, darker hue and a slightly richer, more robust taste. Both varieties work exceptionally well, so choose based on your preference or what you have on hand. This versatile recipe is designed for both dried beans (approximately 8 oz, which yields roughly 3 cups cooked) and conveniently canned beans (two 15-oz cans, thoroughly rinsed). If you’re working with dried pinto beans and own an Instant Pot, our Pressure Cooker Pinto Beans recipe can significantly cut down on the cooking time for this initial step!
- Dried Chipotle Peppers (Optional): For those who love a distinctive smoky kick, dried chipotle peppers are a fantastic addition during the initial bean cooking phase. They infuse the beans with a subtle, complex heat that deepens the overall flavor. If chipotles aren’t available, other dried chili peppers can be used, or you can simply omit them for a milder, more classic refried bean flavor.
- White Onion: We utilize the humble white onion in a sophisticated two-stage approach to build layered flavor. Half an onion is added whole to the pot during the initial simmering of the beans, gently infusing them with a mild, sweet onion essence. Later, a quarter cup of finely minced onion is sautéed in oil, forming a robust aromatic base for the final “frying” process, adding a sharper, more pronounced onion flavor.
- Fresh Garlic Cloves: Similar to the onion, whole garlic cloves are simmered with the dried beans for a delicate, background infusion. Then, three cloves of minced garlic are sautéed with the onion and jalapeño, adding a pungent freshness that brightens and enriches the overall profile of the refried beans.
- Jalapeño (Optional & Adjustable): For a touch of fresh, vibrant heat, finely minced jalapeño is sautéed with the aromatics. You can easily adjust the amount based on your heat tolerance. If you’re serving a spice-sensitive crowd (my 8-year-old daughter enjoys these beans without finding them too spicy!), feel free to reduce the quantity or completely omit it. For less heat, make sure to remove all the seeds and white membranes from the jalapeño before mincing.
- Canola Oil: A neutral-flavored oil is traditional and recommended for sautéing the aromatics and “refrying” the mashed beans. Its mild taste won’t overpower the delicate bean flavors. Avocado oil or standard vegetable oil are excellent and equally effective alternatives if you prefer.
- Classic Spice Blend: This simple yet powerful trio of spices is what gives refried beans their signature taste:
- Chili Powder: Contributes a warm, earthy, and slightly smoky undertone, essential for that comforting Mexican flavor profile.
- Cumin: Absolutely essential for that distinctive savory, slightly peppery, and earthy flavor that defines authentic refried beans.
- Paprika: Adds a mild sweetness, a hint of smokiness (especially if using smoked paprika), and a beautiful reddish hue to the finished dish.
- Salt and Pepper: These are not just seasonings but flavor enhancers. Salt is crucial for bringing out all the other flavors. Remember to adjust to taste at the very end – the right amount of salt elevates the entire dish, while pepper adds a subtle warmth.
- Reserved Bean Cooking Liquid or Broth: This starchy, flavorful liquid is the secret to achieving your desired creamy and smooth consistency. If you’re using canned beans and don’t have bean cooking liquid, a good quality vegetable or chicken broth works wonderfully as a substitute, providing moisture and flavor.
Step-by-Step Guide: How to Make It
Making homemade refried beans is a straightforward process that yields incredibly rewarding results. Whether you choose to start with dried beans for maximum flavor or canned beans for quick convenience, the steps are designed to be easy to follow and consistently delicious. While the full, printable recipe card with precise measurements is available below, here’s a visual and detailed walkthrough to guide you through each stage of preparation, ensuring your refried beans turn out perfect every time.
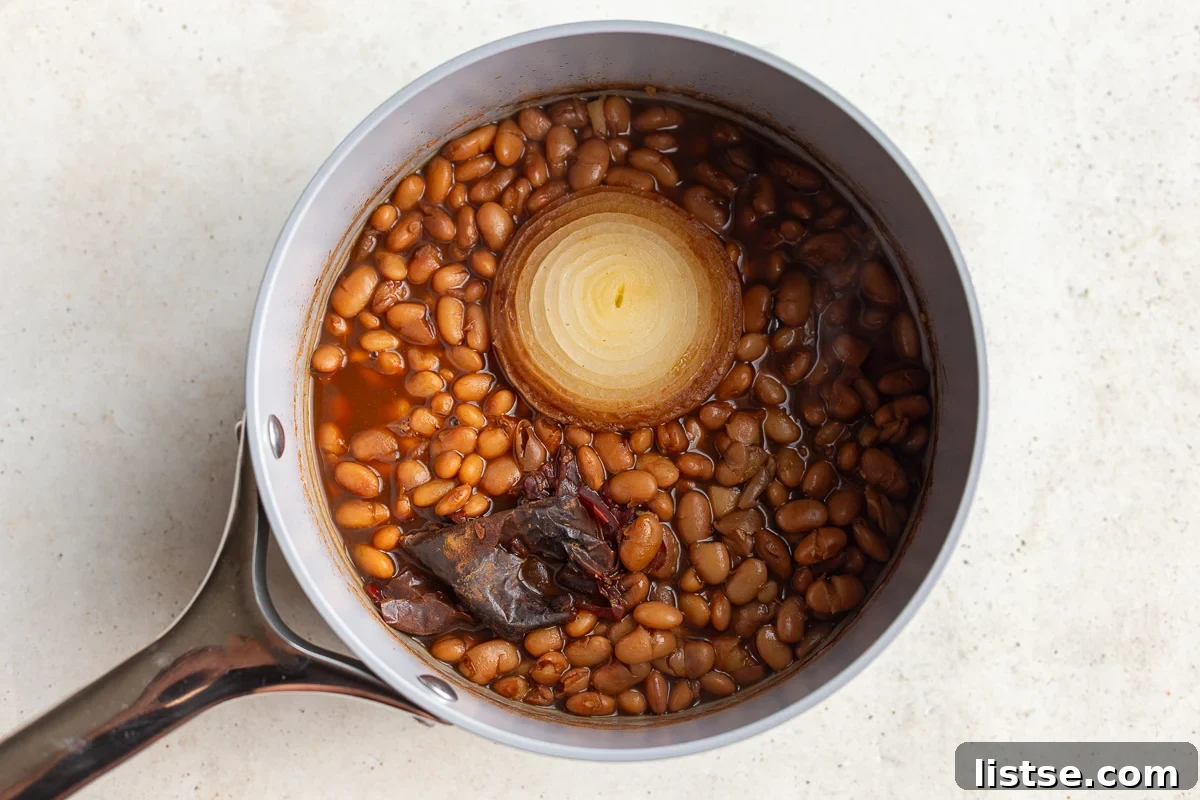
- Cook the Beans (If Using Dried): This crucial first step lays the essential foundation for both flavor and texture. If you’re opting for the sheer convenience of canned pinto beans, you can simply skip this entire section and jump directly to “Part 2: To Make the Refried Beans.” For those embarking on the journey with dried beans, begin by thoroughly rinsing them under cold water in a colander, carefully inspecting for any small debris or broken pieces, and removing them. Transfer the cleaned beans into a medium-sized pot. Add three cups of fresh water, along with half an onion (peeled), three whole garlic cloves, and your optional dried chipotle peppers. Bring this mixture to a rolling boil for approximately 10 minutes to help tenderize the beans. Afterward, reduce the heat to a gentle simmer, cover the pot with the lid slightly ajar to allow for some steam release, and let the beans cook for about 1.5 hours, or until they are perfectly tender and creamy when squeezed. Throughout this simmering period, periodically check the water level; add hot water (from a kettle is ideal) if the beans start to dry out – I typically add about ¾ cup of hot water to maintain optimal cooking conditions.
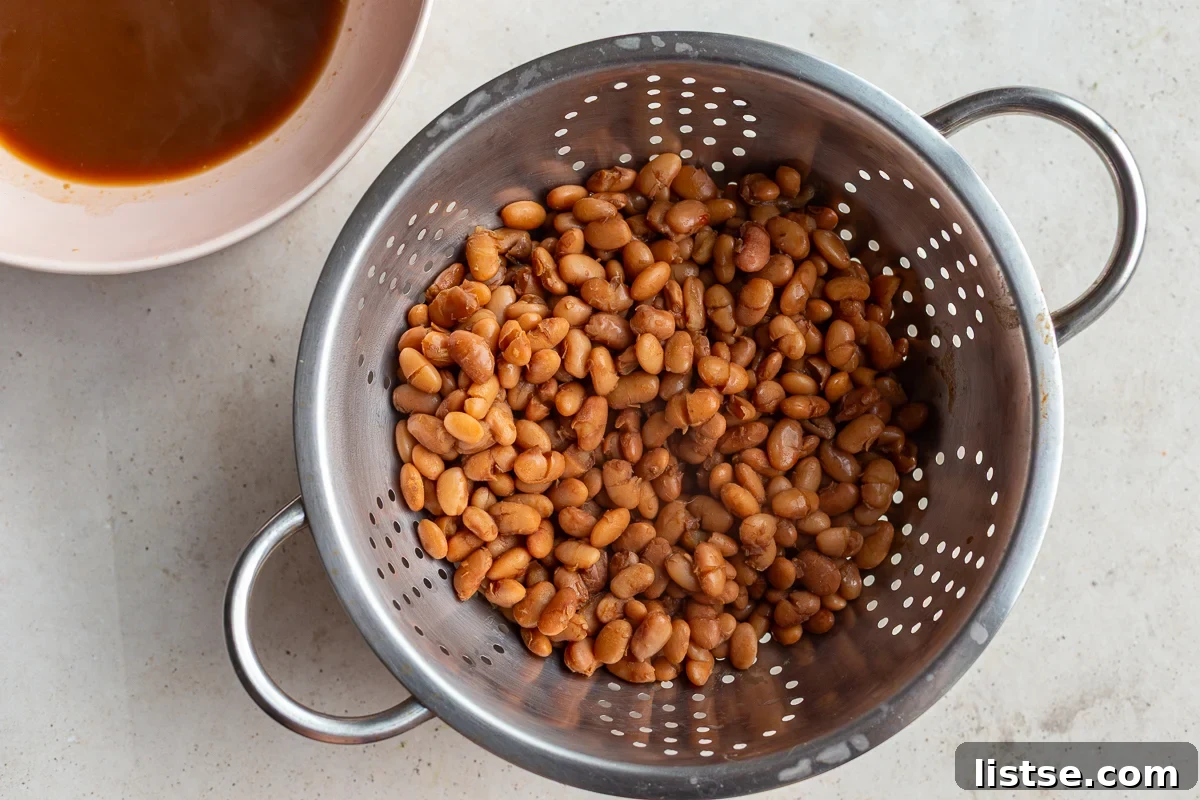
- Drain and Reserve Liquid: Once your dried beans are fully cooked, tender, and ready, carefully drain them using a colander. *This step is crucial*: ensure you place a heatproof bowl directly underneath the colander to collect the rich, flavorful bean cooking liquid. This liquid is culinary gold and will be indispensable later for achieving the ideal creamy consistency for your refried beans. At this point, you can discard the cooked onion half, garlic cloves, and any chipotle peppers; their flavors have already thoroughly infused the beans. If you are using canned beans, simply rinse them very well under cold water and have vegetable or chicken broth ready as your thinning liquid.
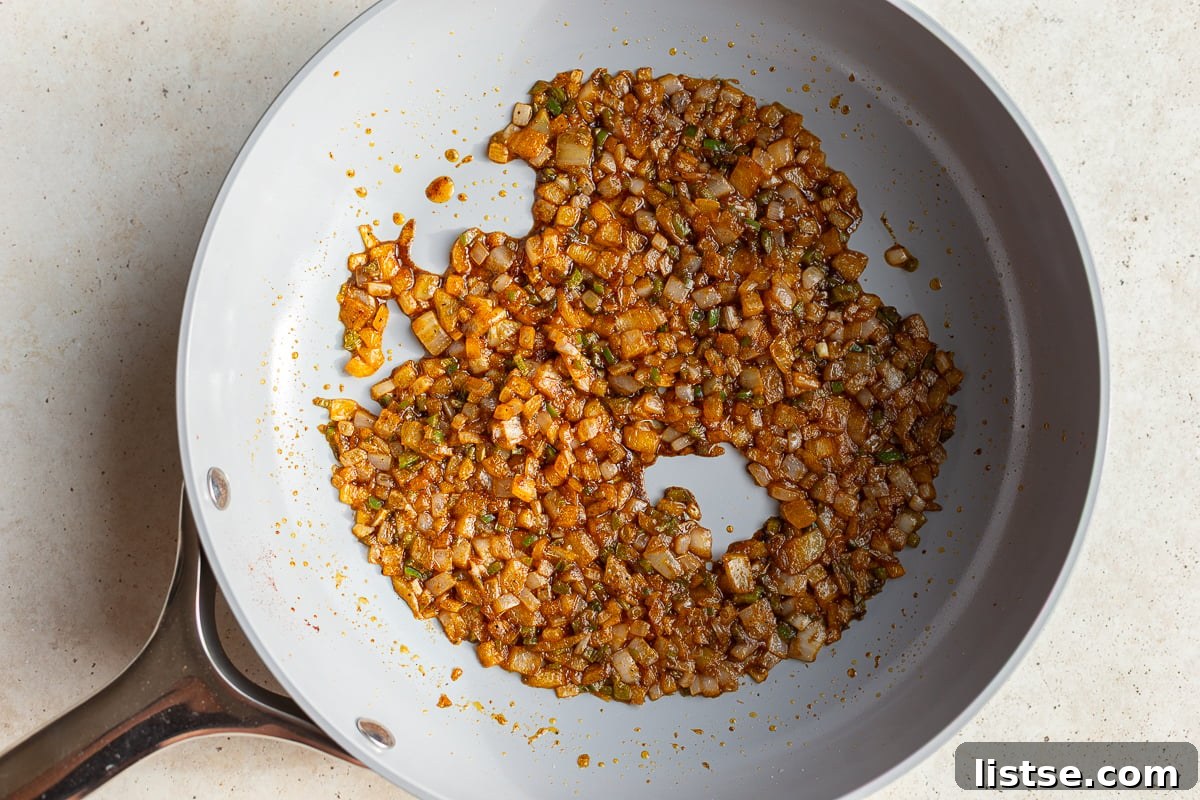
- Sauté Aromatics and Spices: In a large, sturdy skillet (a cast-iron skillet works wonderfully here for even heat distribution), heat two tablespoons of canola oil over medium-low heat. Add the finely minced white onion, the minced jalapeño (if you’re including it), chili powder, paprika, and cumin. Sauté this aromatic mixture, stirring occasionally to prevent sticking, for approximately 5 minutes. The key here is to soften the vegetables until they are translucent and allow the spices to “bloom” – meaning they release their full fragrance and flavor into the oil. Be very careful not to burn or blacken the aromatics or spices, as this can introduce a bitter taste to your refried beans.
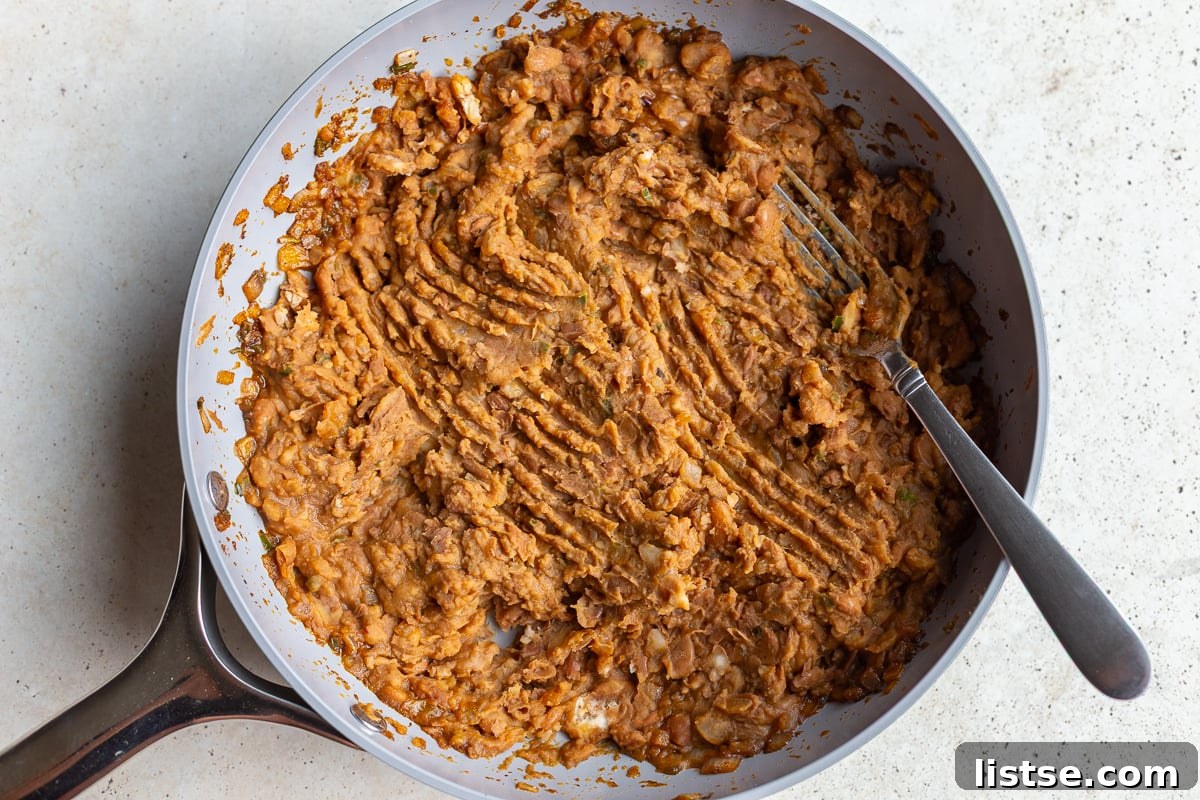
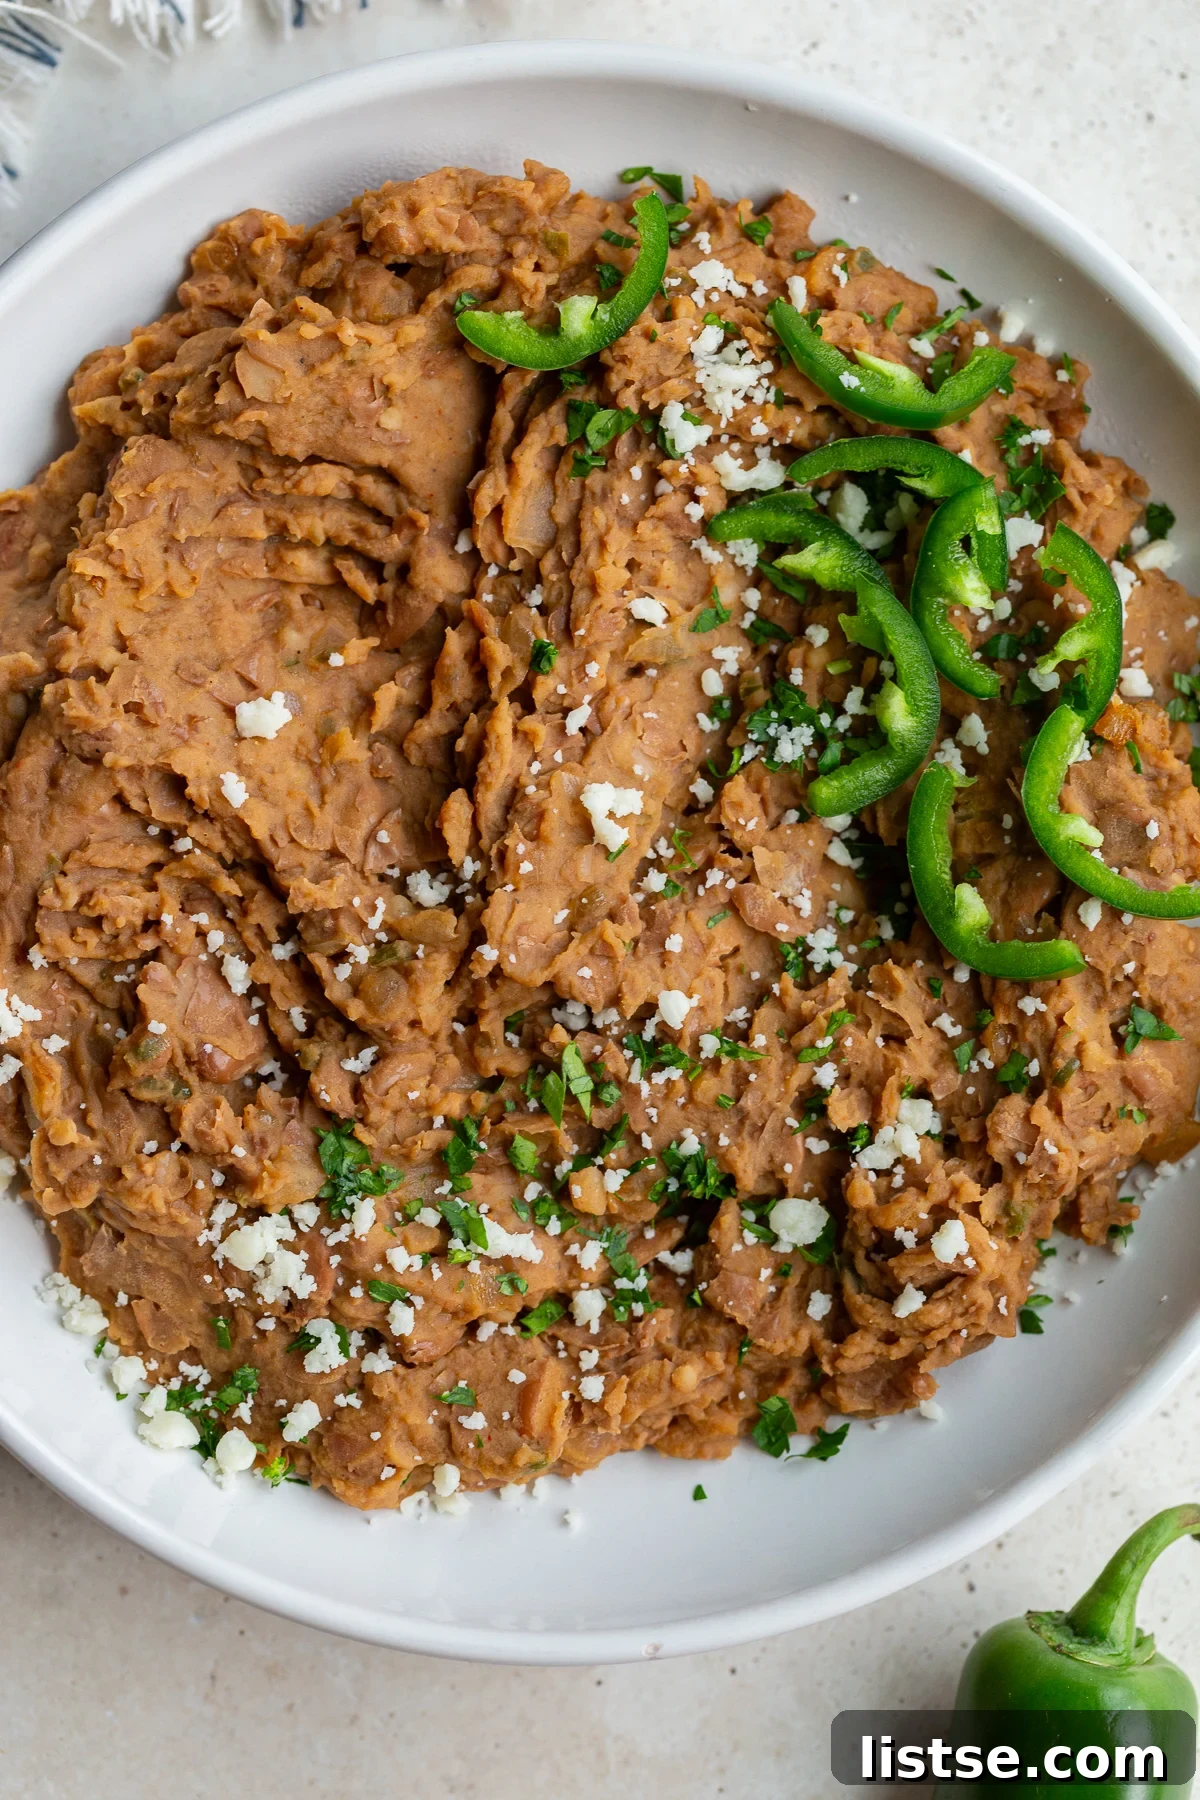
- Combine, Mash, and Season: Now, add your cooked beans (either your freshly prepared dried beans or the well-rinsed canned beans) to the skillet with the beautifully sautéed aromatics. Pour in approximately ¼ cup of the reserved bean cooking liquid (if you used dried beans) or ¼ cup of vegetable/chicken broth (if you opted for canned beans). Add ½ teaspoon of salt to begin building the flavor. Using a sturdy potato masher, a strong fork, or even the back of a wooden spoon, begin to mash the beans directly in the skillet. Mash until you reach your desired consistency – some prefer them perfectly smooth for spreading, while others enjoy a chunkier texture with a few whole beans remaining for added character. Mix everything thoroughly as you mash, ensuring the spices and aromatics are well incorporated. Allow the beans to gently simmer, stirring occasionally, for about 3 minutes, which helps the flavors to deeply meld and deepen.
Once you’ve achieved your desired consistency, remove the skillet from the heat. Stir in an additional ¼ cup of reserved bean water or broth; this final splash of liquid helps loosen the beans slightly and ensures they remain wonderfully creamy and spreadable as they cool. Finally, and most importantly, taste the refried beans and adjust the seasoning as needed with extra salt and a pinch of freshly ground black pepper. The final seasoning step is absolutely crucial for balancing all the complex flavors and truly making your homemade refried beans sing! Serve them warm and prepare to impress.
Pro Tips for Flawless Homemade Refried Beans
Achieving restaurant-quality refried beans at home is easily within reach with these expert tips and tricks, designed to guide you to perfect creamy, flavorful results every single time:
- Achieve the Creamiest Texture: Don’t be afraid to keep your beans slightly looser than you might initially think is perfect. Remember, refried beans have a natural tendency to thicken considerably as they cool. Adding a little extra bean liquid or broth at the end, just before serving or storing, ensures they maintain a wonderfully creamy, scoopable consistency even after sitting, making them ideal for dips or spreads.
- Rinse Canned Beans Thoroughly: If you’re opting for the undeniable convenience of canned beans, a thorough rinse under cold running water is absolutely essential. This crucial step not only removes excess sodium (which can make your final dish overly salty) but also helps eliminate some of the starchy, often slightly metallic-tasting liquid that can diminish the fresh flavor of canned beans.
- The Best Mashing Tools: A heavy-duty potato masher is truly your best friend for creating that ideal texture – whether you prefer your refried beans perfectly smooth or with delightful, rustic chunks. For an even smoother consistency, you can also use an immersion blender directly in the pot or carefully pulse them in a food processor, adding liquid as needed to reach your desired creaminess. If you don’t have a dedicated masher, the back of a sturdy fork or a robust wooden spoon will also do the trick, though it might require a bit more elbow grease.
- Experiment with Bean Varieties: While traditional pinto beans are undeniably delicious and give that classic appearance, don’t hesitate to experiment with other bean varieties! Black beans offer a richer, darker refried bean with a slightly different, often earthier flavor profile. A creative mix of both pinto and black beans can also create an interesting depth of flavor and visual appeal that’s unique.
- Seasoning is Key – Taste as You Go: This is perhaps the most critical tip for any successful chef. Beans can absorb a surprising amount of salt, but it’s always easier to add more seasoning than to correct an overly salty dish. Taste your beans at various stages – after simmering, after mashing, and just before the final serve. Adjust the salt and pepper to your precise preference, and never underestimate how a final pinch of high-quality salt can truly make all the flavors pop and harmonize.
- Don’t Skimp on Aromatics: The sautéed onion, garlic, and jalapeño (if using) are what truly transform plain cooked beans into the fragrant, flavorful refried beans you crave. Ensure these aromatics are softened and wonderfully fragrant before you add the beans; this initial flavor building is fundamental to the dish’s success.
- Control the Heat: Customizing the spice level is simple. If you prefer a spicier bean, feel free to leave some seeds and membranes in the jalapeño. For milder beans, meticulously remove all seeds and membranes, or omit the jalapeño entirely. A dash of your favorite hot sauce or a pinch of cayenne pepper stirred in at the very end can also customize individual servings to perfection.
- Consider a Touch of Acidity: A small squeeze of fresh lime juice at the end can brighten the overall flavors of your refried beans beautifully, adding a zesty counterpoint to their richness.

Serving Suggestions and Variations
Homemade refried beans are an incredibly versatile staple that can elevate almost any meal, making them a fantastic addition to your culinary repertoire. Their creamy texture and savory flavor make them perfect for a wide array of Mexican-inspired dishes and beyond. Here are some of our favorite ways to enjoy them, along with creative variations to keep things exciting and customized to your taste:
Classic Serving Ideas:
- Taco & Burrito Filler: The ultimate base for your favorite soft or hard-shell tacos, hearty burritos, and comforting enchiladas. Their creamy texture provides a wonderful contrast to crunchy toppings and wraps, ensuring a satisfying bite every time. Don’t forget to pair them with our Vegetarian Enchiladas for a truly fulfilling meal!
- Nachos & Tostadas: Spread a generous, warm layer of refried beans onto crispy tortilla chips for amazing nachos, or onto flat fried tortillas for delicious tostadas. They provide a flavorful, stable base for all your favorite toppings. You’ll love them with our Loaded Vegetarian Nachos!
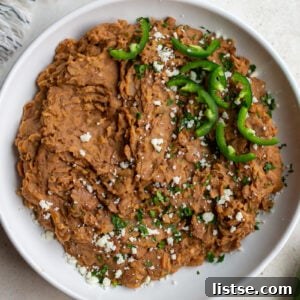
- Irresistible Bean Dip: Serve your homemade refried beans warm in a bowl, perhaps with a sprinkle of crumbled cojita cheese or shredded Monterey Jack, a handful of fresh chopped cilantro, and a side of robust tortilla chips for an irresistible appetizer or snack that will disappear quickly.
- Perfect Side Dish: These beans are a natural accompaniment to virtually any Mexican-inspired meal, from cheesy quesadillas and sizzling fajitas to hearty rice bowls and grilled chicken or vegetables.
- Elevated Crunchwraps: Take your homemade Easy Crunchwraps to the next level by including a rich, creamy layer of these refried beans, adding depth and substance.
- Delicious Breakfast Addition: Incorporate them into breakfast burritos, serve them alongside scrambled eggs, or enjoy them with a dollop of salsa and warm tortillas for a hearty and flavorful start to your day.
Creative Variations to Explore:
- Cheesy Refried Beans: For an extra decadent treat, stir in a handful of shredded Monterey Jack, sharp cheddar, a Mexican cheese blend, or even some queso fresco right at the very end of the cooking process, allowing it to melt beautifully into the warm, creamy beans.
- Spicier Kick: If you crave more heat, don’t shy away from adding an extra pinch of cayenne pepper, a dash of your favorite hot sauce, or even a finely minced serrano pepper along with the jalapeño. For individual servings, a drizzle of chili oil works wonders.
- Herbaceous Freshness: Stir in a generous amount of fresh chopped cilantro or parsley just before serving for a vibrant burst of fresh, aromatic flavor that truly brightens the dish.
- Citrus Brightness: A small squeeze of fresh lime juice at the end can do wonders to brighten the overall flavors, adding a zesty tang that balances the richness of the beans.
- Smoky Depth: For an even deeper smoky flavor, consider adding a tiny amount of liquid smoke (a few drops) or a pinch of smoked paprika to the spice blend.
- Vegan Option: Our recipe is already naturally vegetarian! To make it completely vegan, simply ensure that if you opt to use canned beans, your chosen broth is vegetable-based, and omit any dairy-based toppings like cheese.
Frequently Asked Questions About Homemade Refried Beans
Yes, absolutely! Our versatile recipe provides clear, detailed instructions for preparing refried beans using both dried beans (for a truly from-scratch experience) and convenient canned beans. This flexibility allows you to choose the method that best fits your time constraints and preferences. If opting for canned beans, remember the crucial step of rinsing them thoroughly under cold water before adding them to the skillet. This helps remove excess sodium and any starchy liquid, resulting in a cleaner, fresher flavor.
No, unfortunately, they are not always vegetarian. While many homemade versions like ours are, a significant number of traditional refried bean recipes, especially those found in restaurants or certain regional cuisines, incorporate lard (pork fat) for frying. Lard contributes a distinct flavor and richness that some prefer. However, this specific recipe is carefully crafted to be completely vegetarian, using a neutral vegetable oil like canola, making it a delicious and ethical choice for those following a plant-based diet. If you ensure your broth (if using canned beans) is vegetable-based and omit any cheese toppings, it’s also entirely vegan.
This is a very common and understandable misconception, stemming from the English translation! The name “refried” comes from the Spanish term frijoles refritos, which actually translates more accurately to “well-fried” or “thoroughly fried,” rather than “fried a second time.” The process involves simmering the beans until they are incredibly tender, then mashing them to a desired consistency, and finally frying them just once with aromatics (like onion and garlic) and spices in oil to develop their signature rich flavor and creamy, appealing texture. So, despite the name, there’s only one frying step involved!
Pinto beans are overwhelmingly the most traditional and widely used choice for refried beans. They are prized for their mild, earthy flavor, and their ability to become incredibly creamy and smooth when mashed, which is ideal for the classic refried bean texture. However, black beans are also an excellent and popular option, offering a deeper color and a slightly richer, more robust, and sometimes subtly sweeter flavor profile. Both varieties yield absolutely delicious results with this recipe, so feel free to choose based on your personal preference or what you happen to have in your pantry.
Yes, absolutely! Homemade refried beans freeze beautifully, making them an excellent candidate for meal prepping. To freeze them, allow the refried beans to cool completely to room temperature. Then, transfer them to an airtight, freezer-safe container or heavy-duty freezer bags, ensuring you leave about an inch of headspace at the top for expansion. They can be safely stored in the freezer for up to 3 months without compromising quality. When you’re ready to enjoy them, simply thaw the beans overnight in the refrigerator, then reheat gently on the stovetop or in the microwave, adding a splash of water or broth to restore their wonderfully creamy consistency.
When stored properly in an airtight container, homemade refried beans will maintain their freshness and delicious flavor for up to 5 days in the refrigerator. Their flavor often deepens slightly over time, making them a fantastic and convenient option for meal prepping throughout the week. Just ensure they are kept in a well-sealed container to prevent drying out and absorb any unwanted fridge odors.
Easy Homemade Refried Beans Recipe
Brita Britnell
15 minutes
1 hour
45 minutes
2 hours
4
servings
Ingredients
Part 1: To Cook the Pinto Beans (if using dried)
- 8 oz. dry pinto beans or black beans
- 3 cups of water
- 1-2 dried chipotle peppers, optional, for smoky heat
- ½ small white onion, peeled and halved
- 3 cloves garlic, whole
Part 2: For the Refried Beans
- 1 batch of cooked pinto beans, from Part 1, or 2 (15-oz) cans of pinto beans (rinsed & drained)
- ¼ cup white onion, finely minced
- 3 cloves garlic, minced or pressed
- 2 tablespoons canola oil (or avocado or vegetable oil)
- ½ jalapeno, minced (remove seeds/membranes for less heat, optional)
- ½ teaspoon chili powder
- 1 teaspoon cumin
- ½ teaspoon paprika
- Salt to taste
- Reserved bean cooking liquid (or 1/2 cup vegetable or chicken broth if using canned beans)
Instructions
Part 1: To Cook the Pinto Beans (if using dried)
-
Preparation: If you are using canned beans for convenience, you can entirely skip this section and proceed directly to “Part 2: To Make the Refried Beans.” If starting with dried beans, begin by cutting your white onion in half and meticulously removing any dry outer skin. Thoroughly rinse your pinto or black beans in a colander under cool running water, carefully inspecting for and removing any small debris or broken pieces.
-
Simmering: Place the rinsed dried beans into a medium-sized pot. Add 3 cups of fresh water, the three whole garlic cloves, the optional dried chipotle peppers (if using), and one half of the prepared white onion. Bring the mixture to a brisk boil for 10 minutes. After this initial boil, reduce the heat significantly to a gentle simmer. Cover the pot with a lid, leaving it slightly ajar to allow some steam to escape. Let the beans simmer for approximately 1.5 hours, or until they are very tender and easily mashable. During this simmering time, it’s important to monitor the water level; if it gets too low, add about ¾ cup of hot water (from a kettle is ideal) to keep the beans submerged and prevent them from drying out or sticking.
-
Drain & Reserve: Once the beans are fully cooked and tender, carefully drain them using a colander. *This is a crucial step*: position a heatproof bowl directly underneath the colander to collect the rich, flavorful bean cooking liquid. This reserved liquid will be vital later for achieving the perfect creamy consistency for your refried beans. At this point, you can discard the cooked onion half, garlic cloves, and any chipotle peppers; their essence has already thoroughly infused the beans.
Part 2: To Make the Refried Beans
-
Sauté Aromatics: Heat 2 tablespoons of canola oil in a large skillet (a cast-iron skillet is highly recommended for its even heat distribution) over medium heat. Add the finely minced white onion, the minced jalapeño (if you’re including it), chili powder, paprika, and cumin. Sauté this aromatic mixture, stirring frequently to prevent sticking, for about 5 minutes. The goal here is to soften the vegetables until they are translucent and to allow the spices to “bloom,” releasing their full fragrance and flavor into the oil. Be very watchful to prevent any burning or blackening, as this can introduce a bitter taste to your refried beans.
-
Combine & Mash: Add your cooked beans (either your freshly prepared batch from Part 1 or the well-rinsed canned beans) to the skillet with the sautéed aromatics. Stir in ¼ cup of the reserved bean water (if you used dried beans) or ¼ cup of vegetable/chicken broth (if you opted for canned beans). Add ½ teaspoon of salt to begin building the flavor. Using a sturdy potato masher or a strong fork, begin to mash the beans directly in the skillet. Mash until you reach your desired consistency – whether you prefer them mostly smooth for spreading, or with delightful textural chunks for added character. Continue to stir and mash until all ingredients are well combined and the beans are thoroughly broken down.
-
Simmer & Adjust Consistency: Allow the mashed beans to simmer gently, stirring occasionally, for about 3 minutes. This step allows the flavors to deeply meld and deepen. During this time, the beans will naturally thicken. If you desire a thinner, creamier consistency, gradually add more of the reserved bean liquid or broth, one tablespoon at a time, stirring well after each addition until you achieve your ideal texture. Conversely, if the beans are too thin, simply simmer them a bit longer, allowing some of the excess liquid to evaporate, until they reach your preferred thickness.
-
Final Seasoning: Remove the skillet from the heat. Stir in an additional ¼ cup of reserved bean water or broth; this helps ensure the beans stay creamy and prevents them from becoming too stiff as they cool. Taste the refried beans and adjust the seasoning as needed with extra salt and a pinch of freshly ground black pepper. The final seasoning step is absolutely crucial for balancing all the complex flavors and truly making your homemade refried beans sing! Serve them warm and prepare to impress everyone.
Notes
Store any leftover homemade refried beans in an airtight container in the refrigerator for up to 5 days. To reheat, gently warm them on the stovetop over low heat or in the microwave, adding a splash of water or broth to loosen and restore their creamy texture to perfection.
Freezing Instructions:
For longer storage, allow the refried beans to cool completely to room temperature. Transfer them to freezer-safe containers or heavy-duty freezer bags, leaving about an inch of headspace at the top to allow for expansion. Freeze for up to 3 months for optimal freshness. Thaw overnight in the refrigerator before reheating and adjusting consistency with liquid as needed.
Nutrition
Carbohydrates: 41g,
Protein: 13g,
Fat: 8g,
Saturated Fat: 1g,
Polyunsaturated Fat: 2g,
Monounsaturated Fat: 5g,
Trans Fat: 0.03g,
Sodium: 55mg,
Potassium: 858mg,
Fiber: 10g,
Sugar: 3g,
Vitamin A: 236IU,
Vitamin C: 7mg,
Calcium: 88mg,
Iron: 3mg
Nutrition information is automatically calculated, so should only be used as an approximation.
Tried this recipe?Mention @foodwithfeeling or tag #foodwithfeeling!