
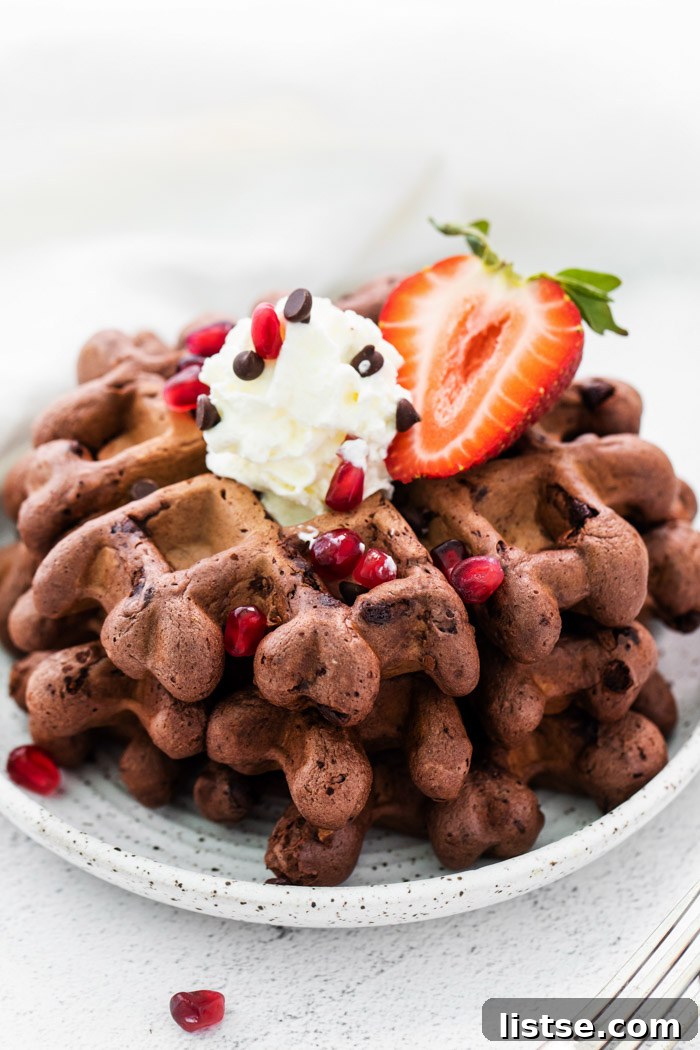
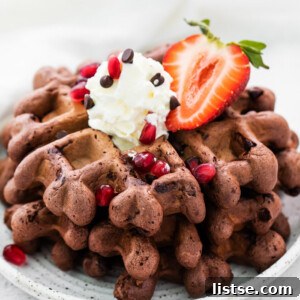
Get ready to transform your breakfast routine from ordinary to extraordinary with these unbelievably fluffy and utterly delectable Chocolate Waffles! Say goodbye to breakfast ruts and hello to a gourmet experience right in your own kitchen. This isn’t just another waffle recipe; it’s a celebration of rich chocolate flavor, encased in a perfectly crisp exterior and a tender, soft interior. Easy to whip up and destined to become your new favorite weekend tradition, these chocolate waffles are a game-changer for any meal of the day.
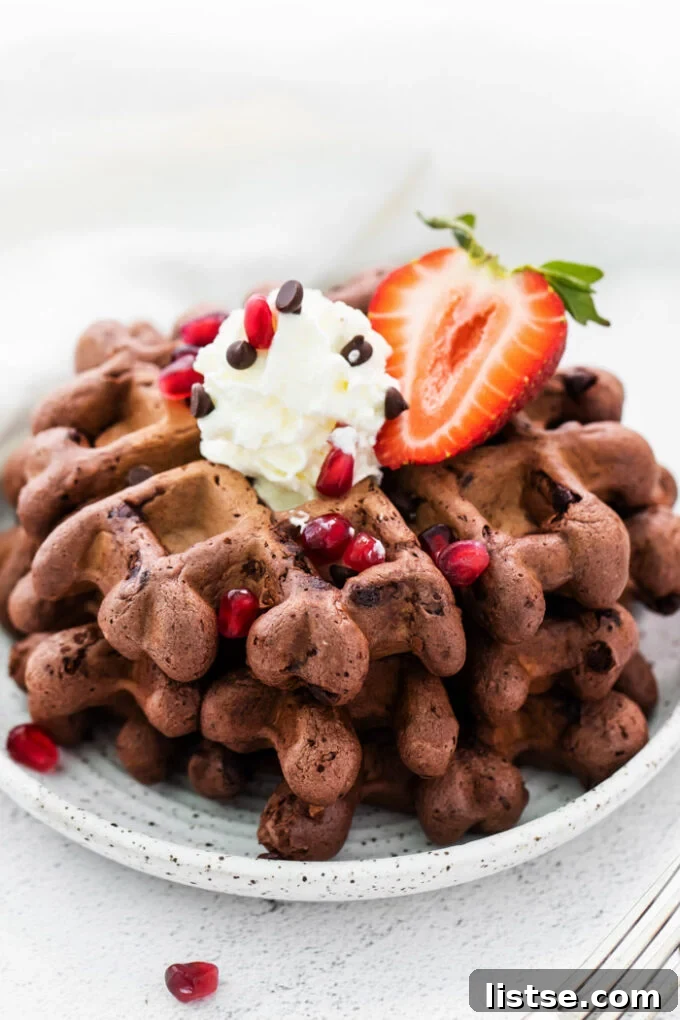
Weekends are a precious commodity, meant for leisurely mornings, indulging in an extra cup (or two) of coffee, and crafting a truly special breakfast from scratch. Forget about relying on pre-made waffle mixes when you have this incredible chocolate waffle recipe at your fingertips. What makes it even better? It’s entirely vegan and incredibly simple to prepare, proving that wholesome, delicious food doesn’t have to be complicated.
Why You’ll Fall in Love with These Vegan Chocolate Waffles
Beyond their undeniable taste, there are so many reasons these chocolate waffles deserve a permanent spot in your recipe collection. They strike the perfect balance between indulgence and simplicity, making them suitable for both everyday enjoyment and special occasions. Here’s what makes them truly exceptional:
- Unbeatable Texture: Imagine a waffle that’s delightfully crisp on the outside, offering a satisfying crunch with every bite, yet incredibly soft and airy on the inside. That’s precisely what you get with this recipe – the ideal contrast that defines a truly great waffle.
- Rich Chocolate Flavor: Made with high-quality cocoa powder, these waffles deliver a deep, satisfying chocolate taste that’s not overly sweet. It’s robust enough to satisfy your chocolate cravings without being overwhelming, creating a harmonious blend that appeals to all ages.
- Effortlessly Vegan: No dairy, no eggs, yet all the classic waffle goodness! This recipe cleverly uses flax eggs and a dairy-free buttermilk substitute to achieve the perfect texture and flavor, making it suitable for those with dietary restrictions or anyone looking to incorporate more plant-based meals into their diet.
- Incredibly Easy to Make: Don’t let the “from scratch” part intimidate you. With straightforward steps and common pantry ingredients, you’ll have a batch of these glorious waffles ready in no time. It’s proof that homemade breakfasts can be both impressive and accessible.
- Family Favorite: Just like our beloved vegan cinnamon rolls, vegan French toast, and chocolate donuts, these chocolate waffles are guaranteed to be a hit with everyone at the breakfast table. They’re so delicious, even the pickiest eaters won’t be able to resist!
If you’re looking for a traditional vegan waffle recipe without the chocolate, you’ll adore these light and fluffy vegan waffles for their classic appeal and perfect texture.
The Magic Behind Perfect Chocolate Waffles: Key Ingredients
One of the beauties of this chocolate waffle recipe is that it relies on readily available ingredients, many of which you likely already have stashed in your pantry. Each component plays a vital role in creating the optimal flavor and texture. Here’s a closer look at what you’ll need and why it matters:
- Flaxseeds + Warm Water (for Flax Egg): This dynamic duo forms a “flax egg,” an essential vegan binder that replaces traditional eggs. When ground flaxseeds are mixed with warm water, they create a gelatinous consistency that mimics an egg, holding the batter together and contributing to the waffle’s tender crumb. You’ll need 1 tablespoon of ground flaxseeds combined with 2 tablespoons of warm water for this flax egg substitute.
- Dairy-Free Milk + Lemon Juice (for Vegan Buttermilk): For that coveted buttermilk tang and a wonderfully tender texture, we create a dairy-free alternative by mixing dairy-free milk with fresh lemon juice. The acid from the lemon juice reacts with the plant-based milk, causing it to curdle slightly, much like traditional buttermilk, which helps activate the baking powder and create a lighter, fluffier waffle.
- All-Purpose Flour: This is the foundation of our waffles, providing structure and body. While various flours exist, regular all-purpose flour is recommended for the best, most consistent texture in this recipe. If you need a gluten-free option, a high-quality gluten-free all-purpose flour blend (containing xanthan gum) can be substituted for similar results.
- Cocoa Powder: The star of the show! High-quality cocoa powder is crucial for imparting that rich, deep chocolate flavor that makes these waffles so irresistible. Use unsweetened cocoa powder to control the sweetness of the final product.
- Baking Powder: This leavening agent is critical for giving the waffles their characteristic rise and airy texture. It reacts with the acidic “buttermilk” to create carbon dioxide bubbles, which expand during cooking, resulting in a light and fluffy interior.
- Brown Sugar: Beyond just sweetness, brown sugar contributes to a more moist waffle with a subtle caramel note. Its molasses content also helps create those perfectly crisp edges when cooked.
- Cinnamon + Vanilla Extract: These aren’t just optional add-ins; they are flavor enhancers that elevate the overall profile of the chocolate. Cinnamon adds warmth and a hint of spice, complementing the cocoa, while vanilla extract deepens the chocolate flavor and adds a touch of aromatic sweetness. They are truly necessary for any outstanding pancake or waffle recipe!
- Vegan Butter: Melted vegan butter serves multiple purposes: it adds richness, contributes to the crispness of the waffle’s exterior, and ensures a tender, moist crumb inside. Any favorite brand of vegan butter will work beautifully.
- Mini Chocolate Chips (Optional): For an extra burst of chocolatey goodness, mini chocolate chips can be folded into the batter. They melt slightly during cooking, creating pockets of warm, gooey chocolate that take these waffles to an even more decadent level.
Step-by-Step Guide: How to Make Fluffy Chocolate Waffles
Making these chocolate waffles is a surprisingly simple process, even for novice cooks. Grab your waffle iron, gather your ingredients, and let’s create some breakfast magic!
- Prepare the Flax Egg: In a small bowl, combine 1 tablespoon of ground flaxseeds with 2 tablespoons of warm water. Stir well and set it aside for 5-10 minutes. This allows the mixture to thicken into a gel-like consistency, acting as your vegan egg binder.
- Create the Vegan Buttermilk: In another small bowl, whisk together 2 cups of dairy-free milk and 2 tablespoons of fresh lemon juice. Let this sit for five minutes. You’ll notice the milk beginning to curdle slightly, which is exactly what we want for that tender waffle texture.
- Combine Dry Ingredients: In a large mixing bowl, whisk together all the dry ingredients: the all-purpose flour, cocoa powder, baking powder, brown sugar, and ground cinnamon. Ensure they are thoroughly combined to distribute the leavening and flavor evenly.
- Mix Wet Ingredients: To the bowl with your prepared flax egg and vegan buttermilk, add the 4 tablespoons of melted vegan butter and 1 tablespoon of vanilla extract. Whisk these wet ingredients together until well combined.
- Combine Wet and Dry: Pour the wet ingredient mixture into the large bowl containing the dry ingredients. Stir gently with a spoon or spatula until just combined. The key here is to avoid over-mixing, which can lead to tough waffles. A few small lumps in the batter are perfectly fine and often indicate a light, tender final product. If using, gently fold in the optional mini chocolate chips.
- Cook the Waffles: Preheat your waffle iron according to the manufacturer’s instructions. Once hot, lightly spray the cooking plates with nonstick spray. Pour enough batter into the center of the waffle iron to fill it, leaving about a 1-inch border around the edges to allow for expansion. For an 8-inch waffle iron, approximately 1 cup of batter is usually ideal. Close the lid and cook until the waffle is golden brown and crisp around the edges, typically about 3 minutes.
- Serve and Savor: Carefully remove the cooked waffle from the iron. Transfer it to a plate and immediately add your favorite toppings. We highly recommend a generous drizzle of maple syrup, a handful of fresh berries (strawberries, blueberries, raspberries), and a dollop of non-dairy whipped cream for an ultimate breakfast treat!
Expert Tips for Waffle Perfection
While making waffles isn’t overly complicated, a few insider tips can elevate your results from good to absolutely perfect every single time. Follow these recommendations to ensure your chocolate waffles are consistently fluffy, crispy, and delicious.
- Do NOT Over-Mix the Batter: This is arguably the most crucial tip for any waffle or pancake recipe. Over-mixing develops the gluten in the flour too much, leading to tough, dense waffles instead of light and airy ones. Stir the wet and dry ingredients together just until they are combined. A few small lumps are not only acceptable but often a good sign that your waffles will have a wonderfully tender texture. For more information on why over-mixing is detrimental, resources like Food52 offer excellent insights.
- Preheat Your Waffle Iron Properly: A thoroughly preheated waffle iron is essential for achieving that desirable crispy exterior. If your iron isn’t hot enough, the waffles will steam rather than crisp, resulting in a soft, soggy texture. Always allow your waffle iron to reach its full operating temperature before adding the batter. Most irons have an indicator light that signals when it’s ready.
- Watch for Steam: A reliable indicator that your waffles are cooked is when the steam stops coming from the sides of the waffle maker. This usually takes around 3 minutes, but it can vary. For an extra crispy waffle, you can leave them cooking for an additional minute or two after the steam subsides. If you don’t yet own a waffle iron, now’s the time to invest! This full-size waffle iron is a fantastic choice, and I also frequently use and adore this convenient mini waffle maker.
- Keep Waffles Warm: If you’re making a large batch and want to serve them all warm, preheat your oven to 225ºF (107ºC). Place a large baking sheet inside. As each waffle finishes cooking, transfer it directly to the warm sheet pan in the oven. This method keeps them toasty and slightly crisp until everyone is ready to eat.
- Understand Your Waffle Maker: Not all waffle makers are created equal. Cooking times and specific instructions can vary significantly between brands and models. Always take a moment to read the manufacturer’s recommendations that came with your waffle iron for optimal results. Some irons have adjustable browning settings, allowing you to customize the crispiness.
- Don’t Overfill: While it’s tempting to add a lot of batter to ensure a full waffle, overfilling can cause batter to spill out the sides and make a mess. Start with the recommended amount (e.g., 1 cup for an 8-inch iron) and adjust slightly if needed. Leaving a 1-inch gap around the edge allows the batter to expand naturally without overflowing.
Creative Topping Ideas to Elevate Your Waffles
While these chocolate waffles are absolutely delicious on their own, a thoughtful selection of toppings can transform them into an even more decadent and personalized culinary creation. Here are some of our favorite additions, categorized to inspire your next waffle masterpiece:
- Syrups & Sauces:
- Maple Syrup: The classic choice, its rich, sweet notes perfectly complement the chocolate.
- Chocolate Syrup/Sauce: Double down on the chocolate for an extra indulgent experience.
- Caramel Sauce: Adds a luscious, buttery sweetness that pairs beautifully with cocoa.
- Fruit Syrups: Raspberry, strawberry, or cherry syrups provide a fruity tang that cuts through the richness of the chocolate.
- Fresh Fruit:
- Berries: Strawberries, raspberries, blueberries, and blackberries add vibrant color, fresh sweetness, and a touch of acidity that brightens the chocolate flavor.
- Sliced Banana: A natural pairing with chocolate, offering creamy texture and mellow sweetness.
- Stone Fruits: Sliced peaches or apricots (especially when in season) can add a juicy, sweet-tart contrast.
- Pomegranate Seeds: For a burst of jewel-toned color and tart crunch.
- Creamy Delights:
- Non-Dairy Whipped Cream: A light and airy cloud that melts delightfully over warm waffles.
- Vegan Yogurt: A dollop of plain or vanilla non-dairy yogurt offers a creamy, slightly tangy counterpoint.
- Vegan Ice Cream: For a truly dessert-like experience, a scoop of vanilla or chocolate vegan ice cream is divine.
- Nuts & Seeds:
- Chopped Almonds, Pecans, or Walnuts: Add a satisfying crunch and nutty flavor that complements chocolate beautifully.
- Macadamia Nuts: For a buttery, rich texture and unique flavor.
- Shredded Coconut: Toasted or untoasted, it adds a tropical hint and textural interest.
- Nut Butters & Spreads:
- Nutella (Vegan Version): Hazelnut chocolate spread for an extra layer of decadence.
- Almond Butter or Peanut Butter: Creamy, savory-sweet goodness that creates a wonderful flavor combination with chocolate.
- Other Indulgences:
- Extra Chocolate Chips: Sprinkle more on top for melty pockets of chocolate.
- Powdered Sugar: A simple dusting adds a touch of sweetness and an elegant finish.
- Sprinkles: For a fun, festive touch, especially if serving to kids (or the young at heart!).
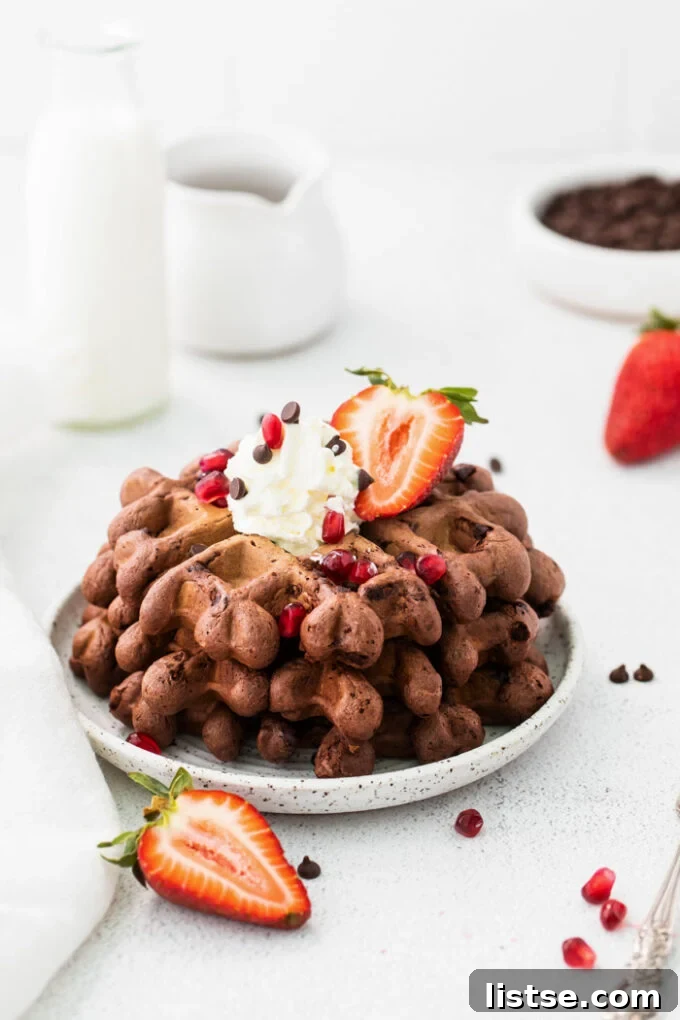
What to Serve with Your Chocolate Waffles
While these chocolate waffles are certainly hearty and satisfying enough to be a meal on their own, they also pair beautifully with a variety of breakfast and brunch sides. Creating a balanced spread with both sweet and savory elements can elevate your meal even further. Here are some of my favorite accompaniments:
- Savory Sides:
- Hash Browns or Breakfast Potatoes: The crispy, salty goodness of potatoes provides a wonderful contrast to the sweet waffles. A flavorful breakfast hash with veggies and spices would be an incredible addition.
- Plant-Based Sausage or Bacon: For those who love the classic sweet and savory breakfast combination, plant-based sausages or crispy vegan bacon slices offer a satisfying, protein-rich counterpoint.
- Tofu Scramble: A light and fluffy tofu scramble seasoned with nutritional yeast for a cheesy flavor makes a great protein boost alongside the waffles.
- Fresh and Light Additions:
- Fresh Fruit or Fruit Salad: A simple bowl of mixed berries, sliced melon, or a vibrant fruit salad adds freshness, vitamins, and natural sweetness that complements the rich chocolate without overpowering it.
- Yogurt: A serving of plain or vanilla dairy-free yogurt can be served on the side as a lighter option or dolloped directly on top of the waffles for added creaminess and a slight tang.
- Beverages:
- Coffee or Tea: A classic pairing, especially if you’re enjoying these waffles for a leisurely weekend breakfast.
- Plant-Based Milk: A glass of almond, soy, or oat milk can be a refreshing accompaniment.
- Fresh Orange Juice: The bright acidity of orange juice provides a lovely palate cleanser alongside the rich waffles.
Storing & Reheating Leftover Waffles Like a Pro
Having leftover chocolate waffles is a treat, whether for a quick breakfast on a busy weekday or a sweet snack. Knowing how to properly store and reheat them ensures they maintain their delicious flavor and desirable texture. These waffles are excellent for meal prep!
- Refrigeration: Once your chocolate waffles have cooled completely to room temperature, they can be stored in an airtight container in the refrigerator for up to 5 days. Ensure they are completely cool before storing to prevent them from becoming soggy.
- Reheating for Best Results: For the crispiest, most delicious reheated waffles, a toaster or a toaster oven is your best friend. Pop a cooled waffle directly into your toaster on a medium setting, or place them on a baking sheet in an oven preheated to 350ºF (175ºC) for about 5-7 minutes, or until heated through and crisp. This method helps restore their original texture.
- Microwave Reheating (Quick Option): While convenient, reheating waffles in the microwave will make them soft rather than crisp. If you’re short on time and don’t mind a softer waffle, microwave them for 30-60 seconds, or until warm.
Can You Freeze Chocolate Waffles? Absolutely!
Homemade chocolate waffles freeze exceptionally well, making them an ideal candidate for meal prepping. Doubling the recipe and freezing the extra waffles can save you valuable time on busy mornings, providing a quick, delicious breakfast whenever you need it.
- Freezing Instructions: Allow the cooked waffles to cool completely on a wire rack. Once fully cooled, place them in a single layer on a baking sheet and freeze for about 30 minutes, or until firm. This prevents them from sticking together. Once firm, transfer the waffles to freezer bags or another freezer-safe airtight container. Remove as much air as possible from the bags to prevent freezer burn. They will keep well in the freezer for up to three months.
- Reheating from Frozen: The beauty of frozen waffles is that there’s no need to thaw them! You can reheat them directly from the freezer.
- Toaster/Toaster Oven: Place a frozen waffle in your toaster on a medium-high setting, or bake in a preheated oven at 350°F (175°C) for 10-12 minutes, or until thoroughly heated and crispy. This is the preferred method for maintaining crispness.
- Microwave: While not recommended for crispiness, you can microwave frozen waffles for 1-2 minutes until warm if softness isn’t an issue.
Frequently Asked Questions (FAQs) About Chocolate Waffles
- Can I make these chocolate waffles gluten-free?
Yes! Simply substitute the all-purpose flour with a 1:1 gluten-free all-purpose flour blend that contains xanthan gum. The rest of the recipe can remain the same. The texture may be slightly different, but they will still be delicious. - What kind of dairy-free milk works best?
Unsweetened almond milk, soy milk, or oat milk are all excellent choices for this recipe. They are neutral enough in flavor not to compete with the chocolate and curdle well with lemon juice to create the vegan buttermilk. Avoid highly flavored milks. - Can I use regular eggs and dairy butter/milk if I’m not vegan?
While this recipe is specifically formulated to be vegan, you can adapt it. For the flax egg, you could use 1 large chicken egg. For the vegan buttermilk, use 2 cups of regular milk and 2 tablespoons of lemon juice. For the vegan butter, use regular melted butter. However, the exact texture might vary slightly from the intended vegan result. - My waffles aren’t crispy, what went wrong?
There are a few common reasons: your waffle iron might not have been hot enough before adding the batter, you might have opened the iron too early, or you may have undercooked them. Ensure the iron is fully preheated, don’t peek too soon, and cook until steam stops coming out and they are golden brown. Using enough fat (vegan butter) in the batter and cooking oil on the iron also helps with crispiness. - Can I add other mix-ins to the batter?
Absolutely! Besides mini chocolate chips, you could try a sprinkle of chopped nuts (pecans, walnuts), shredded coconut, or even a dash of espresso powder to deepen the chocolate flavor. Just be mindful not to overcrowd the batter.
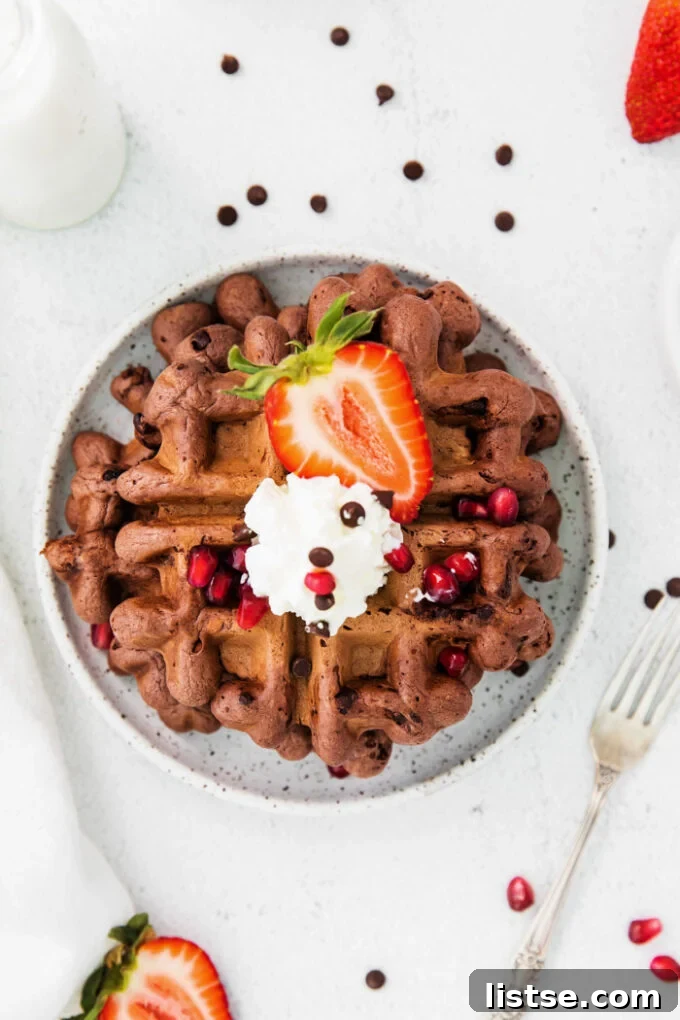
As always, I absolutely love hearing from you! PLEASE let me know if you make this incredible chocolate waffle recipe and share how much you enjoyed it. You can come back here and leave a comment below, or better yet, tag me on Instagram (@foodwithfeeling). Your culinary creations inspire me!
Chocolate Waffles
Print Recipe
Ingredients
For the Flax Egg Substitute:
- 1 tablespoon flax seed meal / ground flaxseed
- 2 tablespoons warm water
For the Vegan Buttermilk Substitute:
- 2 cups dairy free milk
- 2 tablespoons lemon juice
Additional Ingredients:
- 2 cups all-purpose flour
- ¼ cup of cocoa powder
- 1 tablespoon baking powder
- ¼ cup brown sugar
- 1 teaspoon ground cinnamon
- 4 tablespoons vegan butter, melted
- 1 tablespoon vanilla extract
- Optional: ¼ cup of mini chocolate chips
Instructions
- Make the Flax Egg: Combine the ground flax seeds and water in a small bowl and set it aside until ready to use (about 5-10 minutes).
- Make the Vegan Buttermilk: Combine the milk and lemon juice in a small bowl and set it aside for five minutes to curdle slightly.
- Prepare Waffle Iron: Preheat your waffle iron according to the manufacturer’s directions.
- Mix Dry Ingredients: In a large bowl, whisk together the flour, cocoa powder, baking powder, brown sugar, and cinnamon.
- Mix Wet Ingredients: In a separate small bowl, whisk together the flax egg, vegan buttermilk, melted butter, and vanilla extract.
- Combine Wet and Dry: Add the wet ingredients to the bowl with the dry ingredients and stir until just combined – make sure not to over-mix! A few small lumps are okay. Fold in optional chocolate chips.
- Cook Waffles: Spray your waffle iron with nonstick spray and add enough batter to fill the waffle iron, leaving about 1” around the edge. (For an 8” waffle iron, use approximately 1 cup of batter.) Cook until the waffle is golden brown and crisp around the edges – about 3 minutes, or until steam stops escaping.
- Serve: Repeat with the remaining batter. Serve immediately with your favorite toppings.
Notes
- See notes in the post about storing and freezing the waffles for future enjoyment.
- Nutritional information provided below does not include optional chocolate chips or toppings.
Nutrition
Nutrition information is automatically calculated, so should only be used as an approximation.
Tried this recipe?
Mention @foodwithfeeling or tag #foodwithfeeling!