
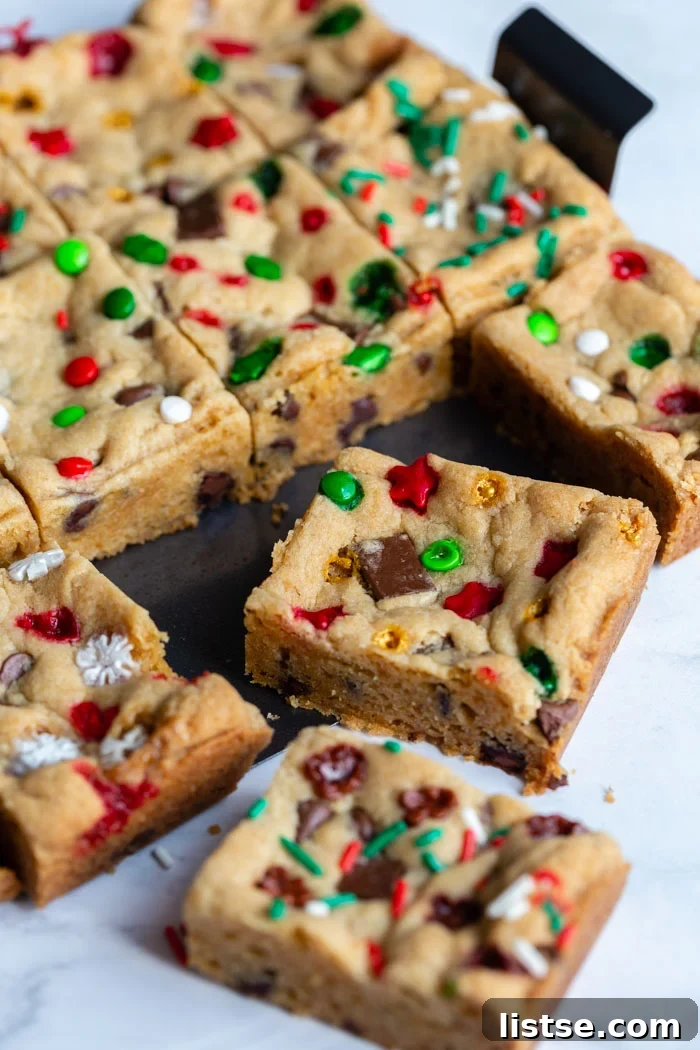
As the holiday season draws near, the aroma of freshly baked treats fills our homes, creating a cozy and inviting atmosphere. There’s truly nothing quite like a warm, homemade dessert to bring smiles to faces, and these Chocolate Chip Cookie Bars are designed to do just that – and more! Combining classic comfort with festive cheer, this recipe offers a delightful and incredibly easy way to satisfy your sweet cravings during this magical time of year.
I’m thrilled to share this exceptional recipe with you, made even simpler and more enjoyable thanks to my long-time partners at Chicago Metallic. Their dedication to quality bakeware has made them a staple in my kitchen, and frankly, a significant portion of my baking arsenal proudly bears their name. It’s an honor to collaborate with brands that not only produce outstanding products but also enable “Food with Feeling” to continue bringing delicious recipes to your table. Your support for these brands directly contributes to the content you love!
Elevate Your Holiday Baking with the Chicago Metallic Slice Solution Pan
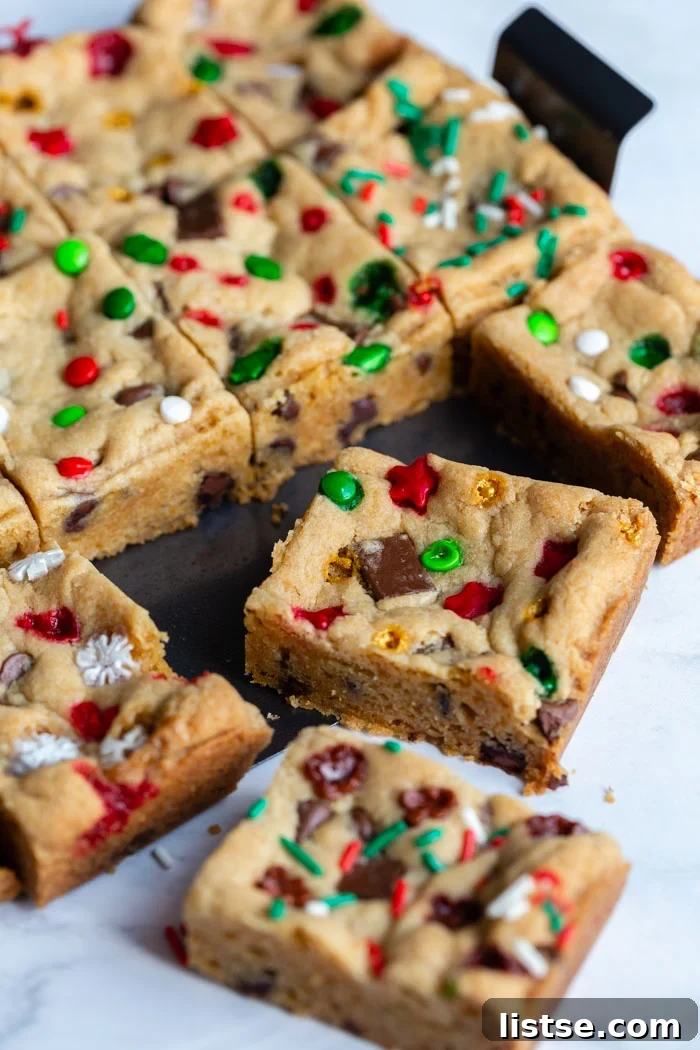
For this recipe, I’ve had the pleasure of putting Chicago Metallic’s innovative Slice Solution Pan to the test, and I must confess, my initial skepticism quickly turned into absolute adoration. This isn’t just another baking pan; it’s a game-changer, especially for anyone who loves baking bars or brownies but dreads the messy, uneven slicing process. The thoughtful design of this pan transforms what can often be a frustrating step into a remarkably easy and satisfying one, ensuring every single bar comes out perfectly portioned and impeccably neat.
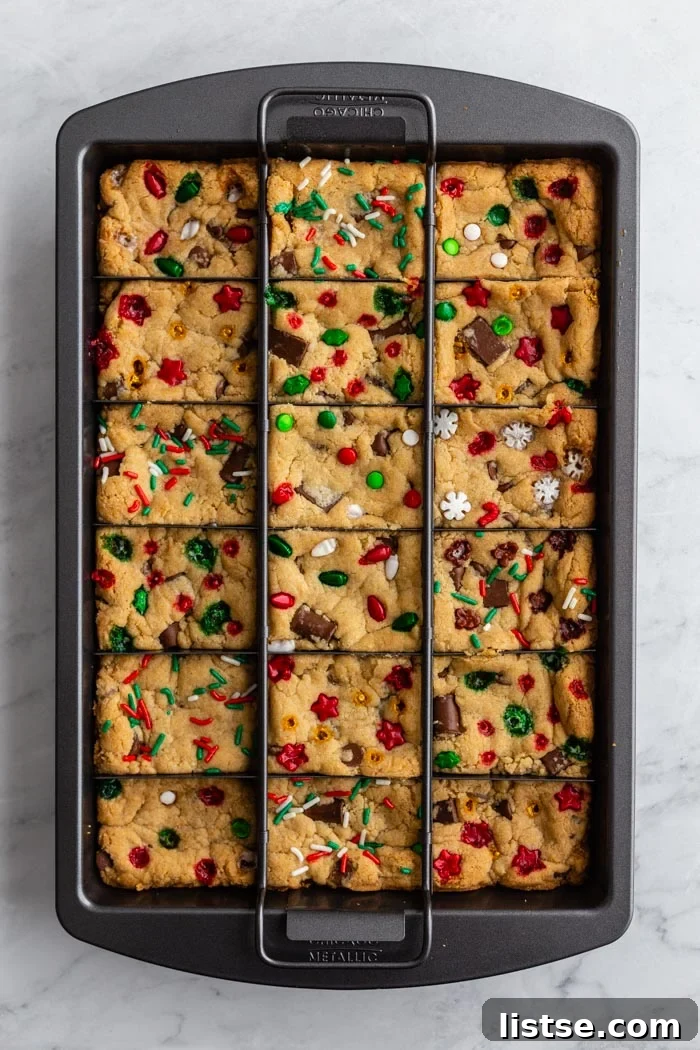
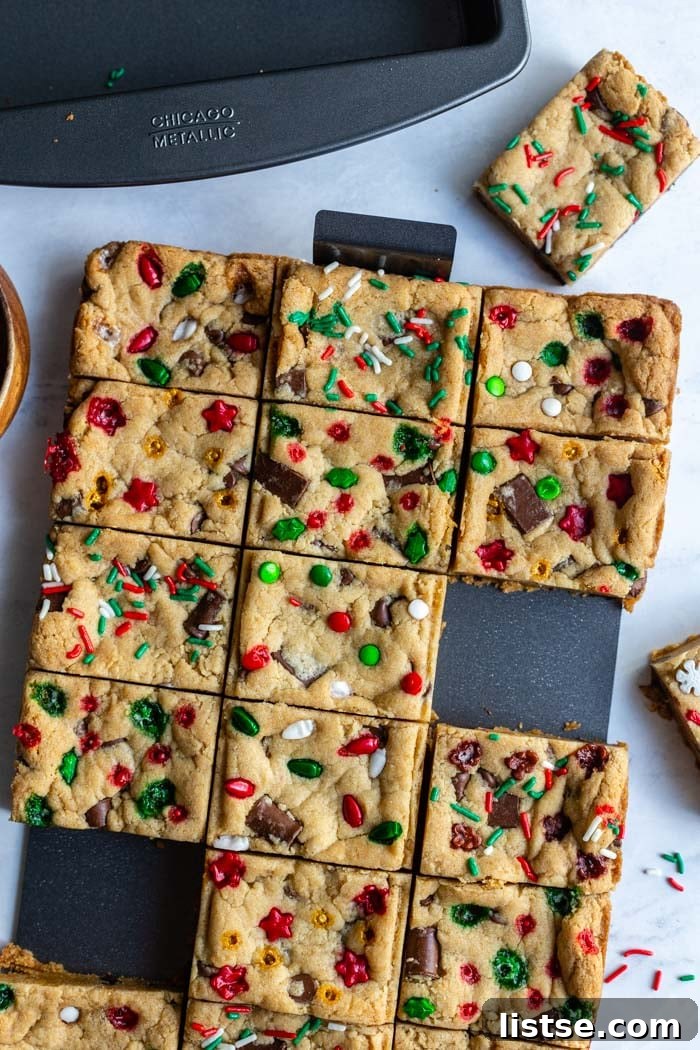
While this versatile pan is often lauded as a brownie pan, its true potential extends far beyond. These Chocolate Chip Cookie Bars are a testament to its flexibility, proving that it’s perfect for any bar-style dessert. The magic truly lies in two key features: the integrated slicing grid and the ingenious lift-out tray. The grid ensures that each piece is uniformly cut, eliminating the guesswork and creating presentation-ready squares every time. But what truly sets it apart is the removable tray. This feature allows you to effortlessly lift the entire batch of bars out of the pan, making serving an absolute breeze. No more struggling with spatulas or worrying about sticking; the bars slide out cleanly and beautifully, preserving their perfect shape and texture. It’s a lifesaver, especially when preparing treats for holiday gatherings where presentation matters.
Why These Chocolate Chip Cookie Bars Will Become Your New Favorite
These cookie bars are more than just a sweet treat; they’re an experience. They embody everything you love about classic chocolate chip cookies but in a convenient, shareable bar form, perfect for any occasion. Here’s why they’re destined to become a staple in your recipe collection:
- Effortlessly Simple: Forget complicated steps or lengthy chilling times. This recipe is designed for ease, coming together quickly in a single bowl. It’s perfect for busy bakers or those just starting their culinary journey.
- Perfectly Portable: The bar format makes these treats incredibly easy to transport to holiday parties, potlucks, or simply to pack in lunchboxes.
- Customizable Fun: While delicious on their own, these bars are a fantastic canvas for customization. Add holiday sprinkles, different types of chocolate, nuts, or even a drizzle of caramel to make them uniquely yours.
- Crowd-Pleasing Flavor: Who can resist the timeless appeal of a soft, chewy chocolate chip cookie? These bars deliver that beloved flavor in every bite, making them a universal favorite among all ages.
- Vegan-Friendly Deliciousness: Crafted with vegan ingredients, these cookie bars prove that plant-based baking can be just as decadent and satisfying as traditional recipes, without compromising on taste or texture.
Whether you’re looking for a quick weeknight dessert, a festive addition to your holiday spread, or a delightful gift for friends and family, these Chocolate Chip Cookie Bars are an unbeatable choice.
Crafting the Perfect Cookie Bar: A Simple Guide
One of the best aspects of this recipe is its straightforward preparation. You won’t need any fancy techniques or an extensive list of tools. The entire process is designed to be user-friendly, allowing you to whip up a batch of these delectable bars with minimal fuss. Everything comes together beautifully in the bowl of a stand mixer, though a hand mixer works just as well if that’s what you have on hand.
The beauty of these cookie bars lies in their simplicity. There’s no need to chill the dough, which means you can go from craving to indulging in a fraction of the time. You simply combine the wet ingredients until creamy, gradually incorporate the dry ingredients, and then fold in those glorious chocolate chips. Once your dough is ready, it’s a simple matter of pressing it evenly into your greased Chicago Metallic Slice Solution Pan and baking for approximately 20-25 minutes. The result? Golden-brown, perfectly soft, and chewy cookie bars bursting with chocolatey goodness.
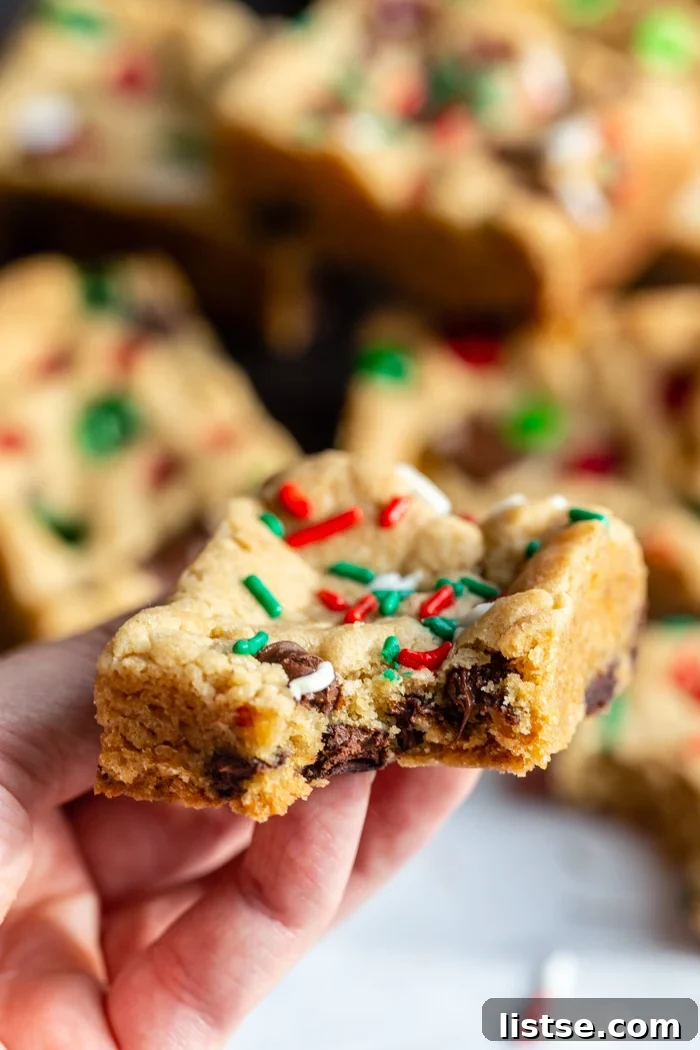
Chocolate Chip Cookie Bars
By: Brita Britnell
Prep Time: 10 mins
Cook Time: 20 mins
Total Time: 30 mins
Servings: 18 bars
Print Recipe
Fun and festive holiday cookie bars that are easy to make and so delicious!
Ingredients
- ¾ cup of vegan butter, 8 tablespoons, softened*
- ¾ cup of light brown sugar, packed
- ¾ cup of white sugar
- ⅓ cup of plant-based milk, at room temperature
- 1 ½ teaspoon of vanilla extract
- 3 cups of all-purpose flour*
- 2 ½ teaspoons of baking powder
- ¾ teaspoon of baking soda
- 1 teaspoon of salt
- 1 cup of vegan chocolate chips, additional for topping (For this recipe, a combo of chips and chunks works wonderfully!)
Instructions
- Pre-heat your oven to 350 degrees F (175 C). Lightly grease a 9×13 inch baking pan with vegan butter or cooking spray. If you’re using the Chicago Metallic Slice Solution Pan, ensure the grid is properly in place.
- In the bowl of a stand mixer fitted with the paddle attachment (or a large bowl with a hand mixer), cream together the softened vegan butter, light brown sugar, and white sugar until light and fluffy. This usually takes about 2-3 minutes.
- Once the sugars and butter are well combined, add in the plant-based milk and vanilla extract. Mix until just incorporated. Don’t worry if the mixture appears slightly curdled at this stage; it’s perfectly normal and will smooth out.
- In a separate bowl, whisk together the all-purpose flour, baking powder, baking soda, and salt. Gradually add the dry ingredients to the wet ingredients in the mixer, mixing on low speed until just combined. Be careful not to overmix, as this can lead to tough cookie bars.
- Gently fold in the vegan chocolate chips by hand until they are evenly distributed throughout the dough. The dough will be thick and slightly sticky, but it shouldn’t stick excessively to your hands. If it’s too sticky, you can mix in an additional tablespoon or two of flour.
- Press the dough evenly into your prepared 9×13 inch baking pan. Make sure it’s spread from edge to edge for uniform thickness. For an extra festive touch, you can sprinkle additional chocolate chips or holiday sprinkles on top before baking.
- Bake for 20-25 minutes, or until the edges are golden brown and puffed up, and the center is set. The bars might still look slightly soft in the middle, but they will continue to firm up as they cool. Avoid overbaking to keep them delightfully chewy.
- Remove the pan from the oven and let the cookie bars cool completely on a wire rack before attempting to slice. If using the Chicago Metallic Slice Solution Pan, once cool, lift out the tray and then easily separate your perfectly portioned bars.
Notes
- Softened Vegan Butter: The vegan butter doesn’t need to be at exact room temperature, but it should be soft enough to cream easily with the sugars. I’ve found that butter slightly cooler than room temperature often yields the best results.
- Gluten-Free Option: If you’re looking for a gluten-free alternative, I’ve had great success using a gluten-free 1-to-1 baking flour blend. My favorite brands for this are Bob’s Red Mill and Cup4Cup, which provide an excellent texture comparable to traditional flour.
Tried this recipe? Mention @foodwithfeeling or tag #foodwithfeeling!
Tips for Cookie Bar Perfection & Customization
Achieving bakery-quality cookie bars at home is entirely possible with a few simple tips and tricks:
- Ingredient Temperature Matters: Ensure your vegan butter is softened (but not melted) and your plant-based milk is at room temperature. This helps ingredients emulsify properly, leading to a smoother dough and better texture.
- Measure Flour Accurately: For optimal results, use the spoon-and-level method for measuring flour. Spoon the flour into your measuring cup and then level it off with a straight edge. Scooping directly from the bag can compact the flour, leading to too much dry ingredient and a denser bar.
- Don’t Overmix: Once you add the dry ingredients, mix only until they are just combined. Overmixing develops the gluten in the flour, which can result in tough, dry cookie bars.
- Even Spreading is Key: Press the dough firmly and evenly into the pan. This ensures uniform baking and helps prevent some parts from being overcooked while others are undercooked.
- Know Your Oven: Ovens can vary. Keep an eye on your cookie bars towards the end of the baking time. They are done when the edges are lightly golden, and the center appears mostly set but still slightly soft. A slight wobble in the middle is usually a good sign that they will be perfectly chewy once cooled.
- Cool Completely: Patience is a virtue here! Allow the bars to cool completely in the pan before slicing. This allows them to fully set, making for cleaner cuts and preventing crumbling.
- Storage: Store leftover cookie bars in an airtight container at room temperature for up to 3-4 days, or in the refrigerator for up to a week. They can also be frozen for longer storage; wrap them individually in plastic wrap and then place them in a freezer-safe bag for up to 2-3 months.
Flavor Variations to Inspire You:
- Chocolate Galore: Experiment with different types of vegan chocolate chips or chunks, such as dark chocolate, white chocolate, or even a mix of all three.
- Nutty Add-ins: Fold in chopped walnuts, pecans, or almonds for added texture and flavor.
- Fruity Twist: Dried cranberries or cherries can add a delightful chewiness and tart contrast to the sweet chocolate.
- Extra Indulgence: A sprinkle of sea salt flakes on top before baking enhances the chocolate flavor beautifully. For a truly decadent treat, consider drizzling with vegan caramel or a simple powdered sugar glaze after cooling.
These simple adjustments can transform your cookie bars into a new favorite creation every time!
Make It a Holiday Tradition!
There’s an undeniable joy that comes from baking and sharing homemade treats, especially during the festive season. These Chocolate Chip Cookie Bars are not just a delicious dessert; they’re an invitation to create warm memories, share smiles, and bring a little extra sweetness to your celebrations. Their ease of preparation means you can spend less time in the kitchen and more time enjoying the company of loved ones, which is what the holidays are all about.
I genuinely hope these cookie bars find a special place in your holiday baking repertoire this year. If you whip up a batch, please don’t hesitate to share your culinary creations! Snap a photo and tag me on Instagram @foodwithfeeling. I absolutely adore seeing what you’re making from the blog and celebrating your baking successes.
Happy baking, and may your holidays be filled with warmth, joy, and plenty of delicious food!