
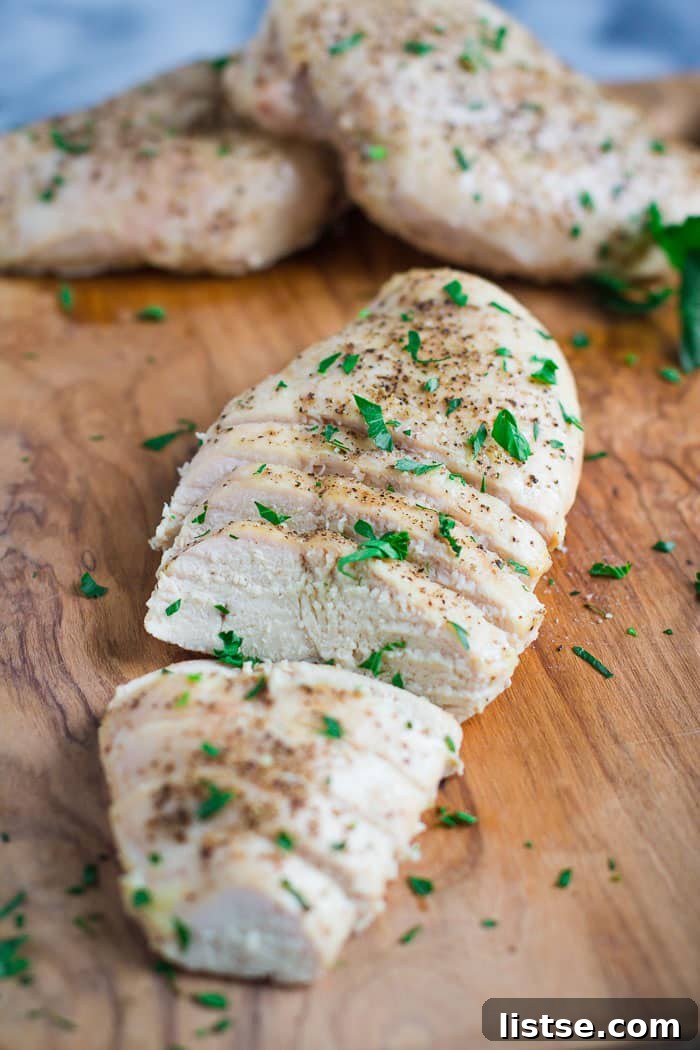
Unlock the Secret to Perfectly Baked Chicken Breast: Juicy, Tender, and Flavorful Every Time
For years, cooking chicken breast felt like a culinary gamble. Would it be dry? Rubber-like? Or would I miraculously achieve that elusive juicy tenderness? More often than not, my attempts resulted in an overcooked, bland piece of protein that required a generous drowning in sauce or cheese to be palatable. This struggle is surprisingly common, turning what should be a simple, healthy meal into a constant source of frustration for many home cooks.
My own journey to mastering baked chicken breast was paved with similar mishaps, sometimes even humorous ones. Just yesterday, a chaotic incident involving a rogue egg from my pet chickens, a work coat, and a conference room carpet reminded me of the unexpected twists life can bring – much like the unpredictable outcomes of under or overcooking chicken. Yes, it might seem peculiar to recount a story about a smashed egg in a post dedicated to cooking chicken, but such is the unique dynamic of being a chicken enthusiast who also enjoys eating chicken. It’s a constant, amusing paradox that underscores the importance of precision, whether it’s collecting eggs or preparing a meal.
The Game-Changer: Why a Meat Thermometer is Your Kitchen MVP
The truth is, achieving perfectly baked chicken breast doesn’t require Michelin-star chef skills or a secret family recipe. It boils down to one simple, yet often overlooked, kitchen tool: **a meat thermometer**. For far too long, I relied on guesswork – cutting into the chicken to “check for pinkness” – a method that almost always led to an overcooked, dry result. This old habit not only ruined countless chicken breasts but also instilled a fear of undercooking, leading me to err on the side of caution, which ironically, was the cause of the dryness.
Investing in a reliable meat thermometer was a pivotal moment in my cooking journey. It’s an incredibly affordable tool, often costing around $10-$15, yet its impact on the quality of your cooked meats is profound. It removes all the guesswork, ensuring your chicken is cooked to the ideal temperature without becoming tough or chewy. Think of it as your secret weapon for consistently juicy, tender, and safe chicken. I highly recommend a good instant-read thermometer; it’s a small investment that yields huge dividends in your culinary confidence and the deliciousness of your meals.
The Golden Rule: Cook to 165°F and Why It Matters
The single most important fact to remember when cooking chicken is its internal temperature. Poultry, including chicken breast, needs to reach an internal temperature of **165 degrees Fahrenheit (74 degrees Celsius)** to be safe for consumption. This isn’t just a guideline; it’s a food safety standard that guarantees any harmful bacteria are eliminated. Before I embraced the meat thermometer, I’d often cook chicken until I *thought* it was done, based on visual cues. This typically meant cooking it until it was completely white throughout, sacrificing all its moisture and flavor in the process. The result was often dry, fibrous, and utterly unappetizing chicken.
By using a thermometer, you remove the subjective “doneness” test. You simply cook until the thermometer registers 165°F in the thickest part of the breast, avoiding bone. This precision prevents overcooking, preserving the natural juices and ensuring a tender texture. Furthermore, understanding the concept of “carryover cooking” is crucial. When you remove chicken from the oven, it continues to cook for a few minutes as its internal temperature rises slightly. For this reason, many chefs recommend pulling chicken breasts out when they reach around 160°F (71°C) and letting them rest, covered, to allow them to reach the ideal 165°F while retaining maximum juiciness.
Mastering the Art of Juicy Baked Chicken Breast: A Simple Guide
So, how do we harness this knowledge to consistently bake simple, yet incredibly juicy and delicious chicken breast? My preferred method involves baking at a high temperature for a shorter duration. This technique locks in moisture and creates a beautifully tender texture without drying out the meat. Forget long, slow roasts that can leach out all the flavor; a quick, hot bake is the way to go for breasts.
Step-by-Step Preparation for Perfect Results:
Start by preheating your oven to a robust 450 degrees Fahrenheit (230 degrees Celsius). This high heat is key to achieving that tender interior and slightly golden exterior quickly. While the oven is heating, prepare your chicken. It’s best to use chicken breasts of roughly similar size and thickness to ensure they cook evenly. If you have particularly thick breasts or pieces of varying sizes, you can gently pound the thicker parts with a meat mallet or rolling pin until they are uniform. This simple step is vital for consistent cooking throughout the batch.
Next, pour about 2 tablespoons of your chosen oil into a large baking dish or rimmed baking sheet. Olive oil is a fantastic choice for its flavor and healthy fats, but avocado oil or even melted butter can also work beautifully. Place the chicken breasts into the dish and turn them over a few times, ensuring each piece is thoroughly coated. This oil coating not only prevents sticking but also helps to crisp the exterior and lock in moisture, contributing significantly to the juiciness. A light coating is all you need; avoid excessive oil, which can make the chicken greasy rather than just moist.
Now for the seasoning. At its simplest, good quality salt and freshly ground black pepper are all you need to enhance the chicken’s natural flavor. Don’t be shy with the seasoning – a generous sprinkle on both sides will make a noticeable difference. Beyond salt and pepper, this is where you can get creative. Depending on the meal you’re planning, consider adding garlic powder, onion powder, paprika, dried herbs like oregano or thyme, or a dash of chili powder for a little kick. You can also drizzle with lemon juice or a light sauce before baking. The versatility of this basic method allows for endless flavor combinations, keeping your meals exciting and fresh.
Baking and Resting for Optimum Juiciness:
Once seasoned, the chicken is ready for the oven. Bake for approximately **18 to 25 minutes** in your preheated 450°F oven. The exact cooking time will depend on the thickness of your chicken breasts and the calibration of your oven. This is where your meat thermometer becomes indispensable. Around the 18-minute mark, begin checking the internal temperature of the thickest part of the largest chicken breast. You’re aiming for that magical 165°F. If it hasn’t reached it, continue baking, checking every 2-3 minutes until it’s there. Remember the carryover cooking principle: if you prefer, you can remove the chicken at 160°F, cover it loosely with foil, and let it rest for 5-10 minutes. During this rest, the temperature will rise to 165°F, and the juices will redistribute throughout the meat, resulting in an even more tender and flavorful chicken.
The resting period is non-negotiable for juicy chicken. Cutting into the chicken immediately after baking allows all the precious juices to escape, leaving you with dry meat. By allowing it to rest, the muscle fibers relax and reabsorb those juices, ensuring every bite is succulent. After resting, slice, shred, or serve your perfectly baked chicken breast whole. This simple yet effective method guarantees a delicious outcome every time.
Endless Possibilities: Serving and Customizing Your Baked Chicken
One of the greatest advantages of mastering this basic baked chicken breast recipe is its incredible versatility. Once you have a perfectly cooked foundation, the possibilities for customization are truly endless. For a quick weeknight meal, a sprinkle of fresh parmesan cheese or a dollop of marinara sauce can transform it. You could also spoon salsa, pesto, or a creamy mushroom sauce over the top for different flavor profiles. Serve it alongside roasted vegetables, a fresh salad, or your favorite grain for a complete and wholesome meal.
For meal prep, bake a larger batch of chicken breasts, then slice or shred them to use throughout the week in salads, sandwiches, wraps, tacos, pasta dishes, or stir-fries. Experiment with different spice blends – think smoky paprika and cumin for a Tex-Mex twist, or rosemary and garlic for a Mediterranean feel. Don’t be afraid to try new things; this foundational recipe is robust enough to handle a wide range of flavor additions, ensuring your baked chicken never becomes boring. Enjoy the confidence that comes with knowing you can consistently produce tender, juicy chicken that’s both delicious and safe.
**This post contains affiliate links for the meat thermometers which means that I’ll make a small portion of the sale (at no extra cost to you) if you buy one. Don’t worry, I’ll use the money on something good like a bottle of Bailey’s or yet another pair of yoga pants.
Baked Chicken Breast
Brita Britnell
5 minutes
20 minutes
25 minutes
4
Ingredients
-
4
medium chicken breasts,
trimmed -
2
tablespoons
of oil,
any kind of oil will work here. I typically use olive oil -
1
teaspoon
of salt -
1
teaspoon
of freshly ground black pepper - optional: herb of choice
Instructions
-
Pre-heat the oven to 450 degrees F (230°C).
-
Pour 2 tablespoons of oil into a large baking tray. Place all 4 pieces of chicken breast into the tray and flip them over a few times so that they’re evenly coated in the oil. If breasts are uneven, lightly pound thicker parts to ensure uniform thickness.
-
Sprinkle each chicken breast evenly with the salt and pepper (and any other desired spices or herbs).
-
Bake for 18 minutes. At the 18-minute mark, check the internal temperature of the chicken with a meat thermometer. Insert the thermometer into the thickest part of the breast, avoiding bone. You want the chicken to reach 165 degrees F (74°C). Continue to cook (if needed), checking the temperature every few minutes until it is reached.
-
Once the chicken reaches 165 degrees F, remove it from the oven. Tent it loosely with foil and allow it to rest for 5-10 minutes before serving or cutting. This crucial step helps redistribute the juices, ensuring a tender and moist result.
-
Enjoy your perfectly baked, juicy chicken breast!
Tried this recipe?
Mention @foodwithfeeling or tag #foodwithfeeling!