
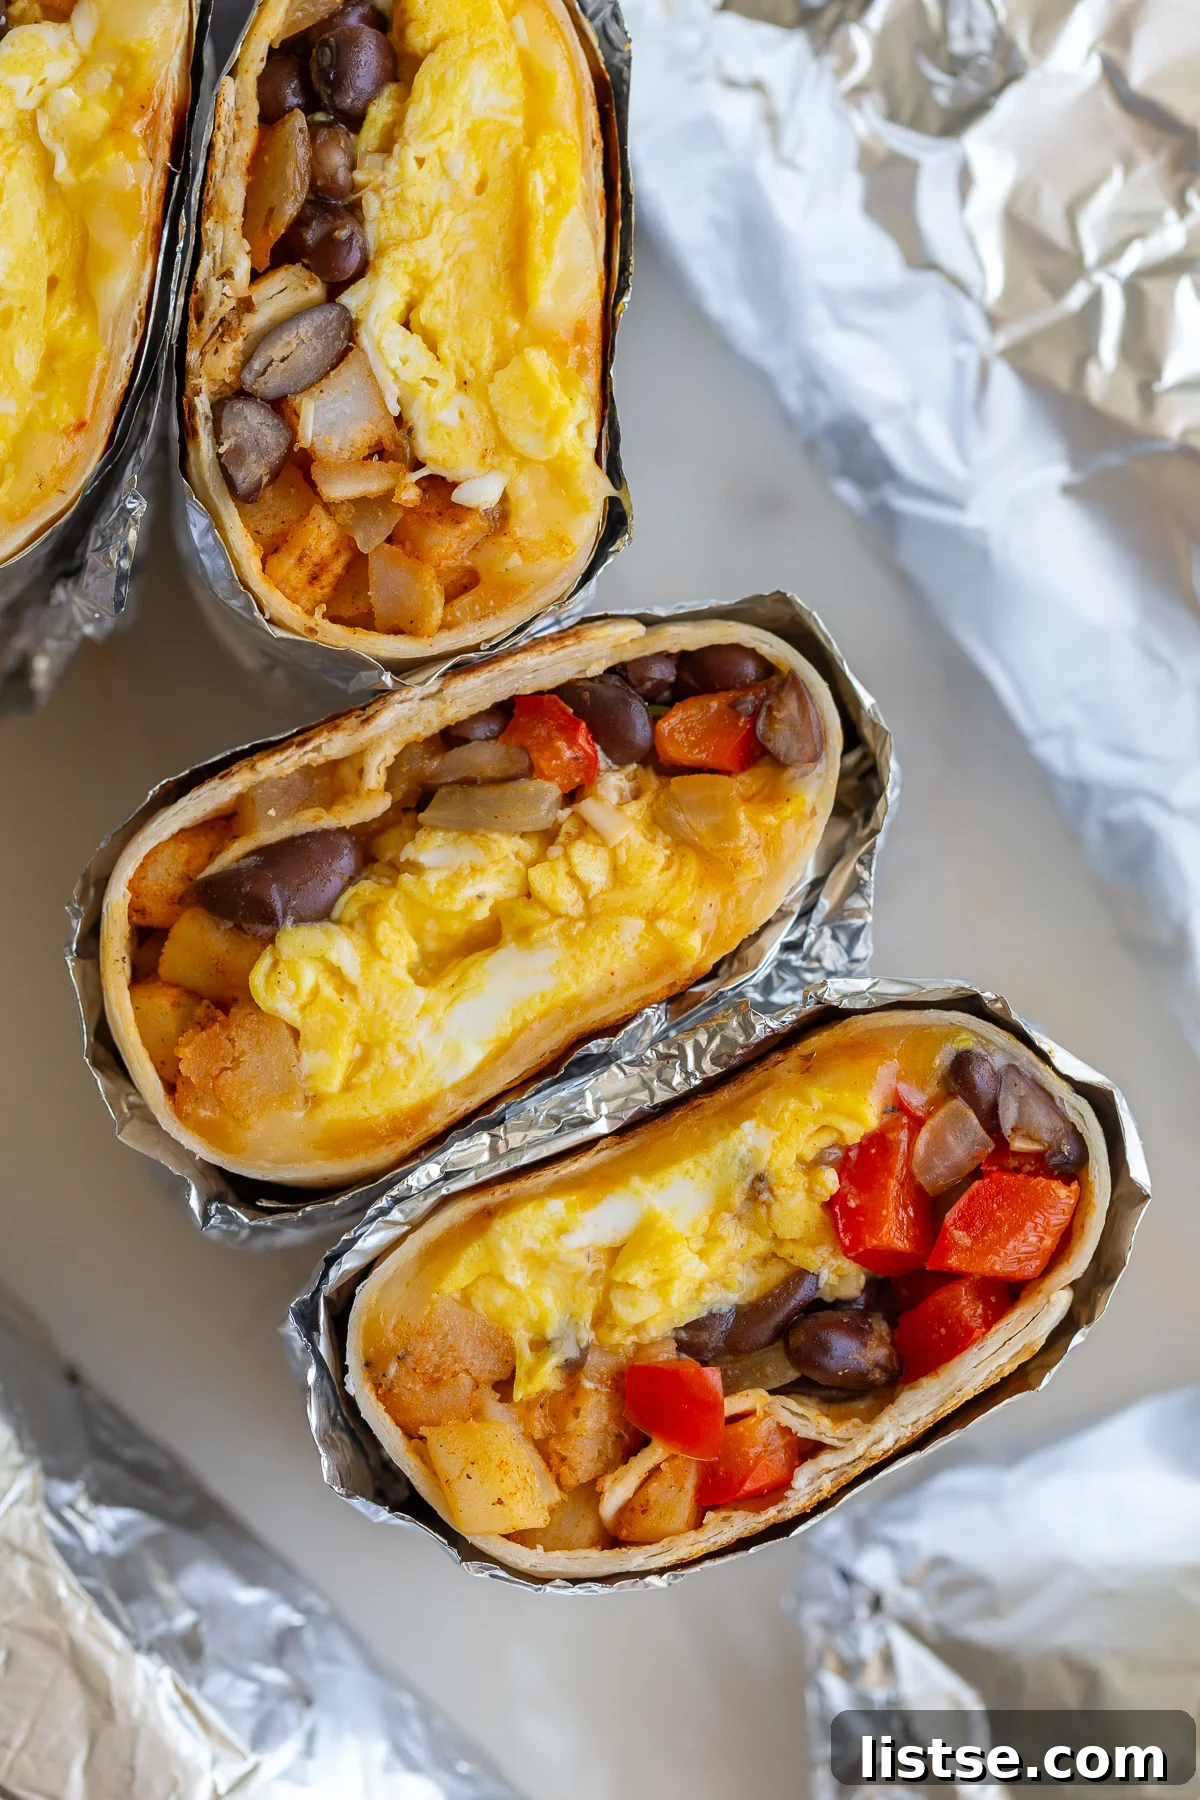
Delicious Make-Ahead Vegetarian Breakfast Burritos: Your Ultimate Freezer-Friendly Meal Prep Guide

In today’s hectic world, finding time for a nutritious and fulfilling breakfast can often feel like a luxury. If your mornings, much like mine, tend to lead to quick, sweet, and often nutrient-light choices, then get ready for a game-changer! These high-protein, flavor-packed vegetarian breakfast burritos are designed to be your go-to solution for effortless, wholesome meals. Having a stash of these ready in your freezer will transform your morning routine, ensuring you kickstart your day with sustained energy and deliciousness.
Here’s why these convenient breakfast burritos will quickly become a staple in your meal prep:
- They are incredibly quick to prepare when you’re craving a meal and remarkably easy to assemble for future enjoyment.
- Each bite is bursting with robust flavors and loaded with satiating protein and fiber, keeping you feeling full and energized.
- The perfect choice for efficient meal prep, helping you reclaim valuable time during your busiest weeks.
- They are supremely freezer-friendly, making them an ideal option for new parents, busy professionals, students, or anyone looking to simplify cooking without compromising on quality or taste.
In This Post: Your Complete Guide to Freezer-Friendly Breakfast Burritos
- Why Meal Prep Breakfast Burritos?
- Essential Ingredients & Versatile Customization
- Step-by-Step Guide: Crafting Your Delicious Burritos
- Expert Tips for Burrito Success
- Mastering Freezing & Reheating for Convenience
- Creative Customization and Flavor Variations
- Frequently Asked Questions
- Easy Vegetarian Breakfast Burritos (Freezer-Friendly!) Recipe
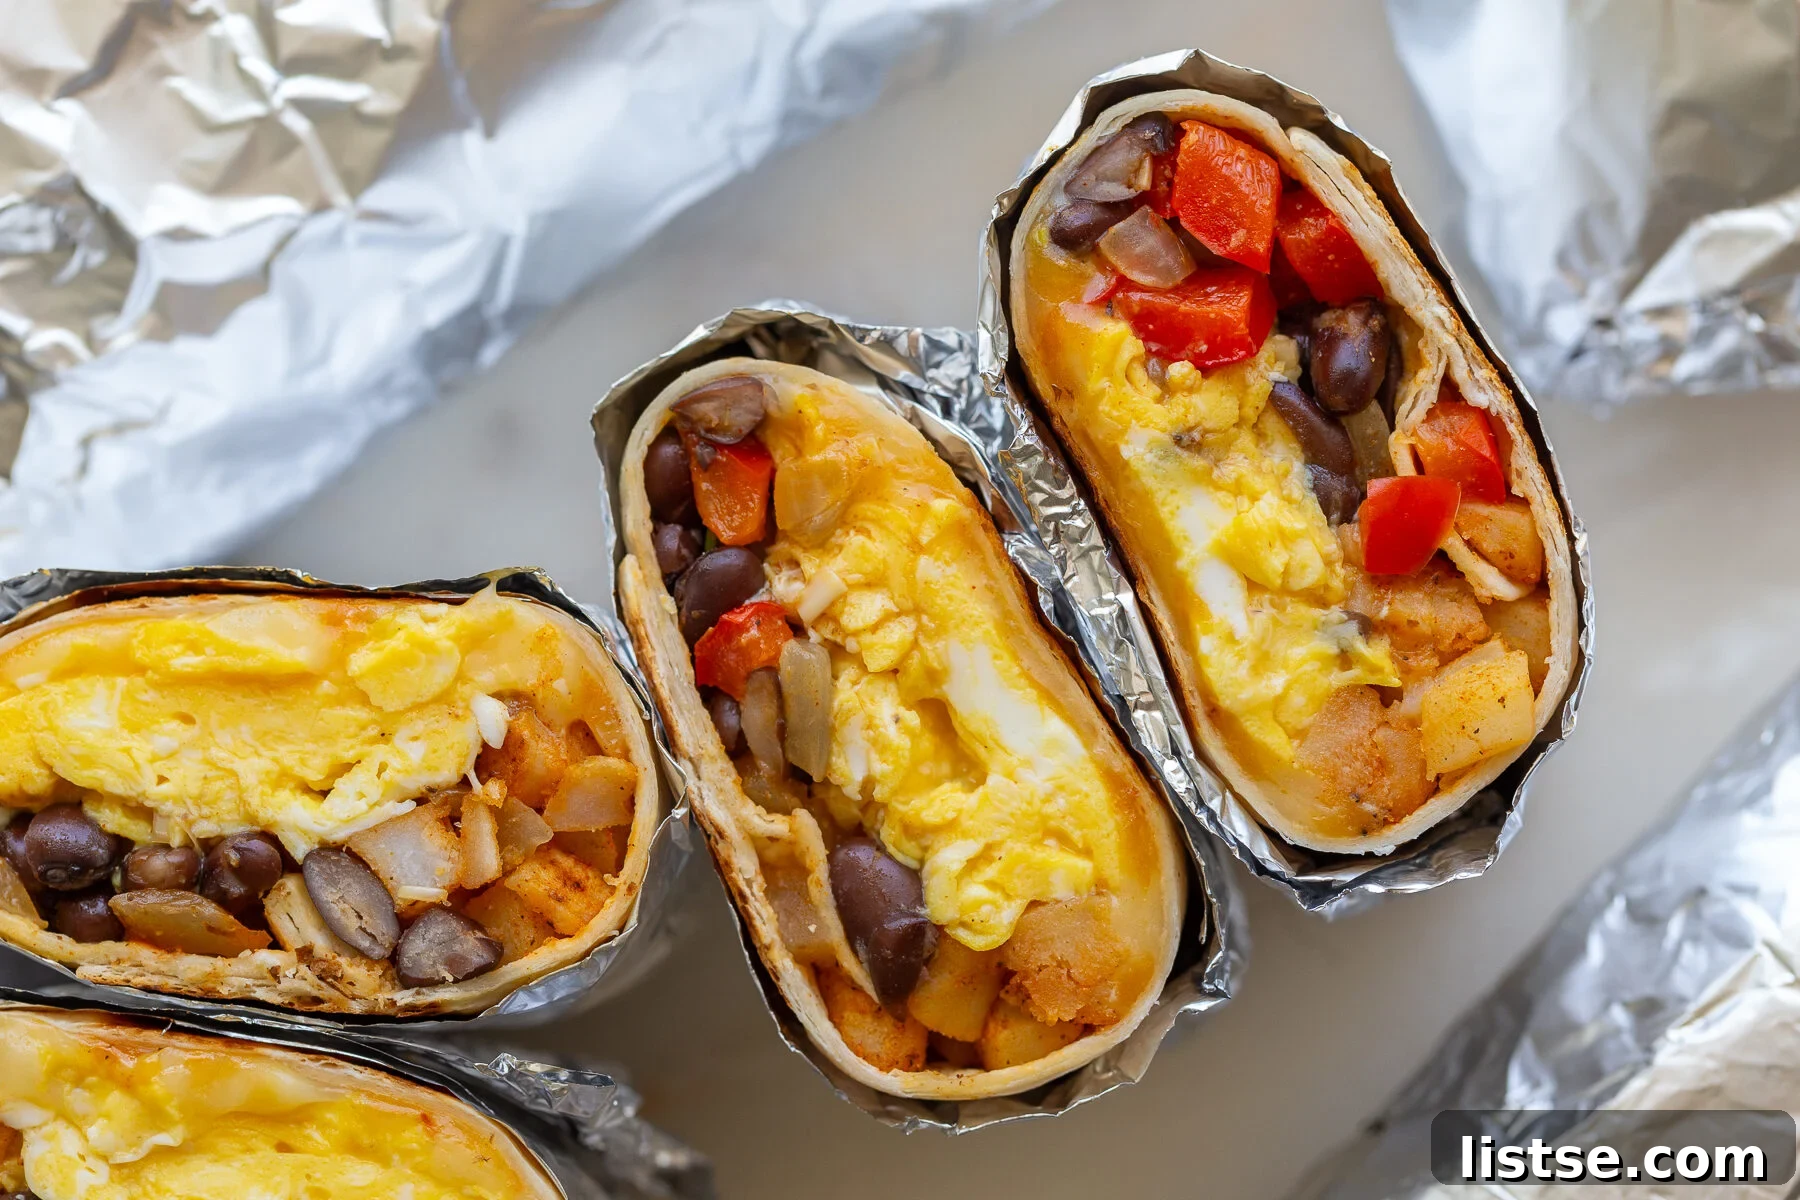
Why Meal Prep Breakfast Burritos? Your Ultimate Morning Solution
Let’s face it: mornings can be a blur. Between juggling responsibilities, getting everyone out the door, or simply trying to savor those last few moments of sleep, preparing a wholesome breakfast often gets pushed aside. That’s precisely why make-ahead breakfast burritos are an absolute game-changer! By dedicating a little time upfront, you unlock a treasure trove of stress-free, nutritious breakfasts for the entire week (or even longer, thanks to the freezer). This strategy doesn’t just save you precious minutes each morning; it also helps you sidestep unhealthy impulse purchases, cut down on expensive takeout, and minimize food waste by intelligently using your ingredients. It’s a win-win for your schedule, your budget, and your commitment to healthier eating habits.
Embracing breakfast meal prep with burritos means you can look forward to waking up knowing a delicious, satisfying, and balanced meal is just minutes away. No more skipped breakfasts, no more sugar crashes, and no more scrambling for options. These burritos truly empower you to take control of your mornings!
Essential Ingredients & Versatile Customization for Your Burritos
The complete, detailed recipe, including precise measurements, is provided in the recipe card at the bottom of this page. However, let’s first dive into the core ingredients that make these burritos so fantastic, along with endless possibilities for customization. The true beauty of this recipe lies in its incredible flexibility—feel free to swap, add, or omit ingredients based on your dietary needs, what you have readily available, or your family’s particular tastes!
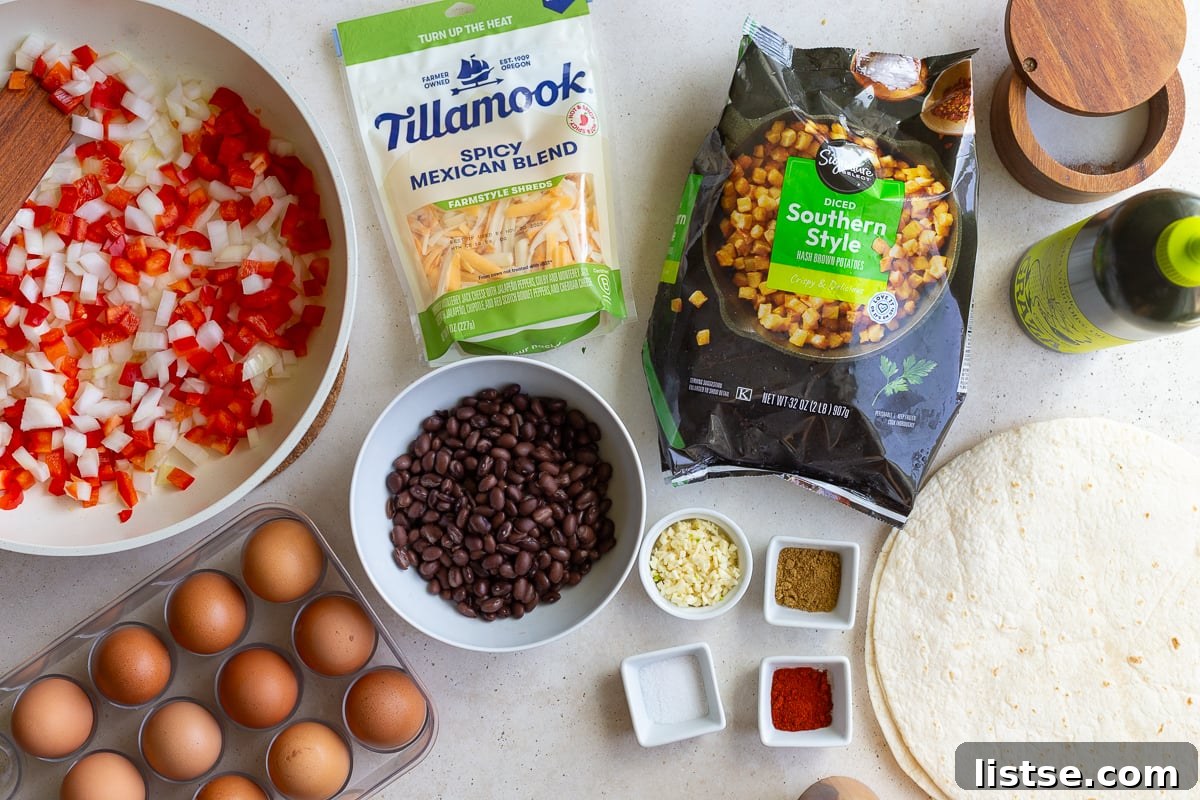
- Fluffy Scrambled Eggs: We utilize a generous dozen large eggs to ensure each of your eight burritos is packed with approximately one and a half eggs, delivering a substantial protein boost. While I favor a soft scramble for its creamy texture, cook them to your desired firmness.
- Protein Swap: For a completely plant-based or vegan option, substitute the eggs with two batches of my highly-rated Tofu Scramble recipe. Alternatively, any commercial liquid egg substitute works wonderfully.
- Hearty Black Beans: Black beans contribute a delightful earthy flavor, satisfying texture, and a significant amount of fiber and plant-based protein, making these burritos exceptionally filling and nutritious.
- Bean Varieties: Don’t feel confined to black beans! Pinto beans, kidney beans, or even a flavorful mixed bean medley would be equally delicious. Adjust the quantity to your preference for a more or less bean-centric burrito.
- Crispy Hash Browns: I have a particular fondness for the small diced “southern style” potatoes in this recipe due to their excellent textural contrast. However, any variety of hash browns—shredded, diced, or even mini potato tots—will work beautifully, adding a comforting heartiness.
- Lighter Option: For a lighter, lower-calorie burrito, you can easily omit the hash browns entirely. As an alternative, roasted sweet potato cubes offer a unique flavor profile and an added nutritional boost.
- Pliable Flour Tortillas: I often choose low-carb tortillas to help manage overall calorie intake, but standard burrito-sized flour tortillas are perfectly suitable. The crucial factor is selecting a size that allows for generous filling without hindering the rolling process.
- Gluten-Free Choice: For those seeking a gluten-free alternative, reputable brands like Siete produce excellent gluten-free tortillas that hold up well in burritos. A key tip is to warm gluten-free tortillas slightly before assembly, as this enhances their pliability and helps prevent tearing.
- Melted Cheese: A Mexican blend cheese provides a wonderful creamy texture and a hint of tang, but feel empowered to use your favorite shredded cheese—cheddar, Monterey Jack, or even a spicy pepper jack for an extra kick.
- Dairy-Free: To make these burritos dairy-free, simply omit the cheese or integrate a high-quality dairy-free shredded cheese alternative.
- Aromatic Vegetables (Bell Pepper, Onion, Garlic): These foundational aromatics and vegetables create the flavorful base of our burritos, contributing freshness, texture, and essential vitamins. Finely dicing them ensures they are evenly distributed and meld seamlessly into the filling.
- Flavor Development: Avoid rushing the sautéing of these vegetables. Cooking them until they are tender and slightly caramelized will significantly deepen their natural sweetness and overall flavor.
- Warm Spices (Chili Powder, Cumin, Salt, Pepper): This classic combination of spices infuses the burrito filling with a rich, savory, and subtly smoky profile that perfectly complements the eggs and beans.
- Spice Adjustment: Feel free to customize the spice levels to your personal preference. A small pinch of cayenne pepper can introduce a pleasant heat, while smoked paprika can further enhance the smoky undertones.
- Optional Add-ins for Enhanced Flavor & Nutrition: The adaptability of these burritos is truly one of their greatest strengths!
- Leafy Greens: Stir in a handful of wilted spinach or kale during the final minutes of cooking for an easy nutritional boost.
- More Veggies: Cooked broccoli florets, cauliflower rice, sautéed mushrooms, or corn kernels are fantastic additions.
- Heat Boosters: A dash of your favorite hot sauce, a spoonful of zesty salsa, or finely diced jalapeños can elevate the flavor profile.
- Creaminess & Healthy Fats: Fresh avocado slices (add just before eating for optimal texture) or a dollop of creamy guacamole provide richness.
- Alternative Proteins: Consider adding cooked plant-based sausage crumbles or even leftover roasted vegetables for an extra layer of flavor and substance.
Step-by-Step Guide: Crafting Your Freezer-Friendly Breakfast Burritos
Assembling these delectable burritos is a gratifying and straightforward process, making it ideal for a dedicated meal prep session. Here’s a comprehensive, step-by-step overview of how to bring this recipe to life. Remember, the full, detailed instructions with precise measurements are conveniently located in the recipe card at the very end of this post!
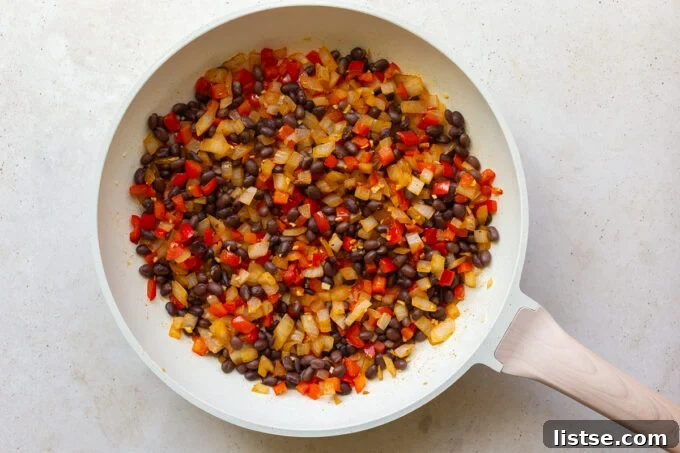
- Sauté the Veggies and Beans to Perfection: Begin by heating approximately 1/2 teaspoon of olive oil in a large, sturdy skillet over medium heat. Once the oil shimmers, add your finely diced onion and bell pepper. Sauté, stirring frequently, for about 5 minutes until they become tender and slightly translucent. Next, incorporate the minced garlic and the drained and rinsed black beans, continuing to sauté for another 2 minutes to allow the flavors to meld beautifully. Season this mixture generously with chili powder, cumin, salt, and pepper, cooking for one final minute to toast the spices. Carefully transfer this aromatic mixture to a separate bowl and set it aside to cool slightly.
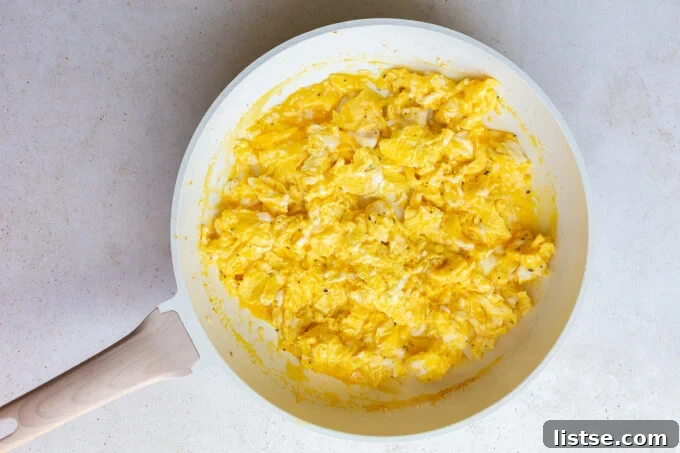
- Master the Scrambled Eggs: Using the same skillet (no need for extra dishes!), add a tiny bit more olive oil if necessary to prevent sticking. Pour in your whisked eggs, already seasoned with a pinch of salt and pepper. Cook over medium heat, gently stirring and folding, until they are set and scrambled to your desired consistency. For burritos, aiming for a soft, moist scramble works best, as it prevents dryness after reheating. Once cooked, remove the eggs from the skillet and set them aside with the veggie mixture.
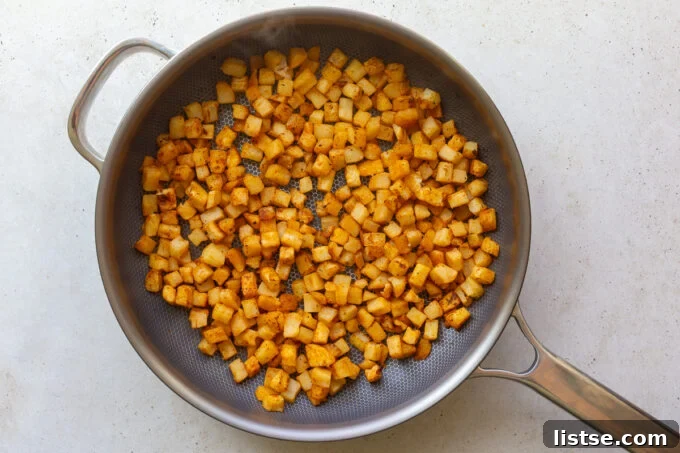
- Crisp Up the Potatoes to Golden Perfection: While your other fillings are cooling slightly, heat the remaining 1/2 teaspoon of olive oil in a separate large skillet over medium-high heat. Add your frozen hash browns along with a dash of paprika, garlic powder, salt, and pepper. Cook for approximately 8-10 minutes, stirring occasionally, until they achieve a beautiful golden-brown color and a satisfying crispy texture. This step adds a wonderful textural contrast to the softer fillings. Once perfectly cooked, remove them from the heat and set aside.
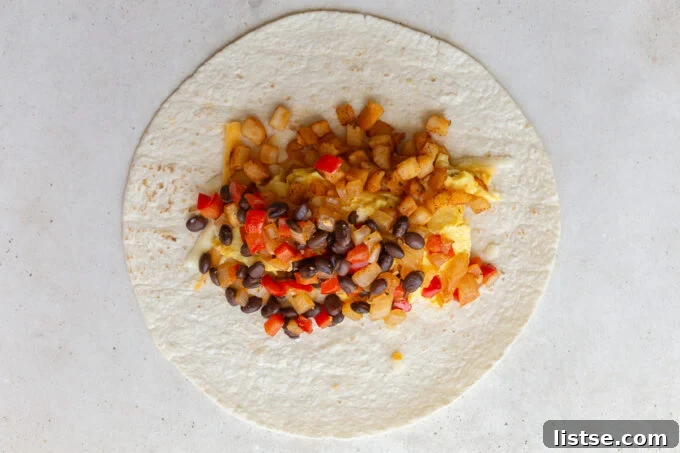
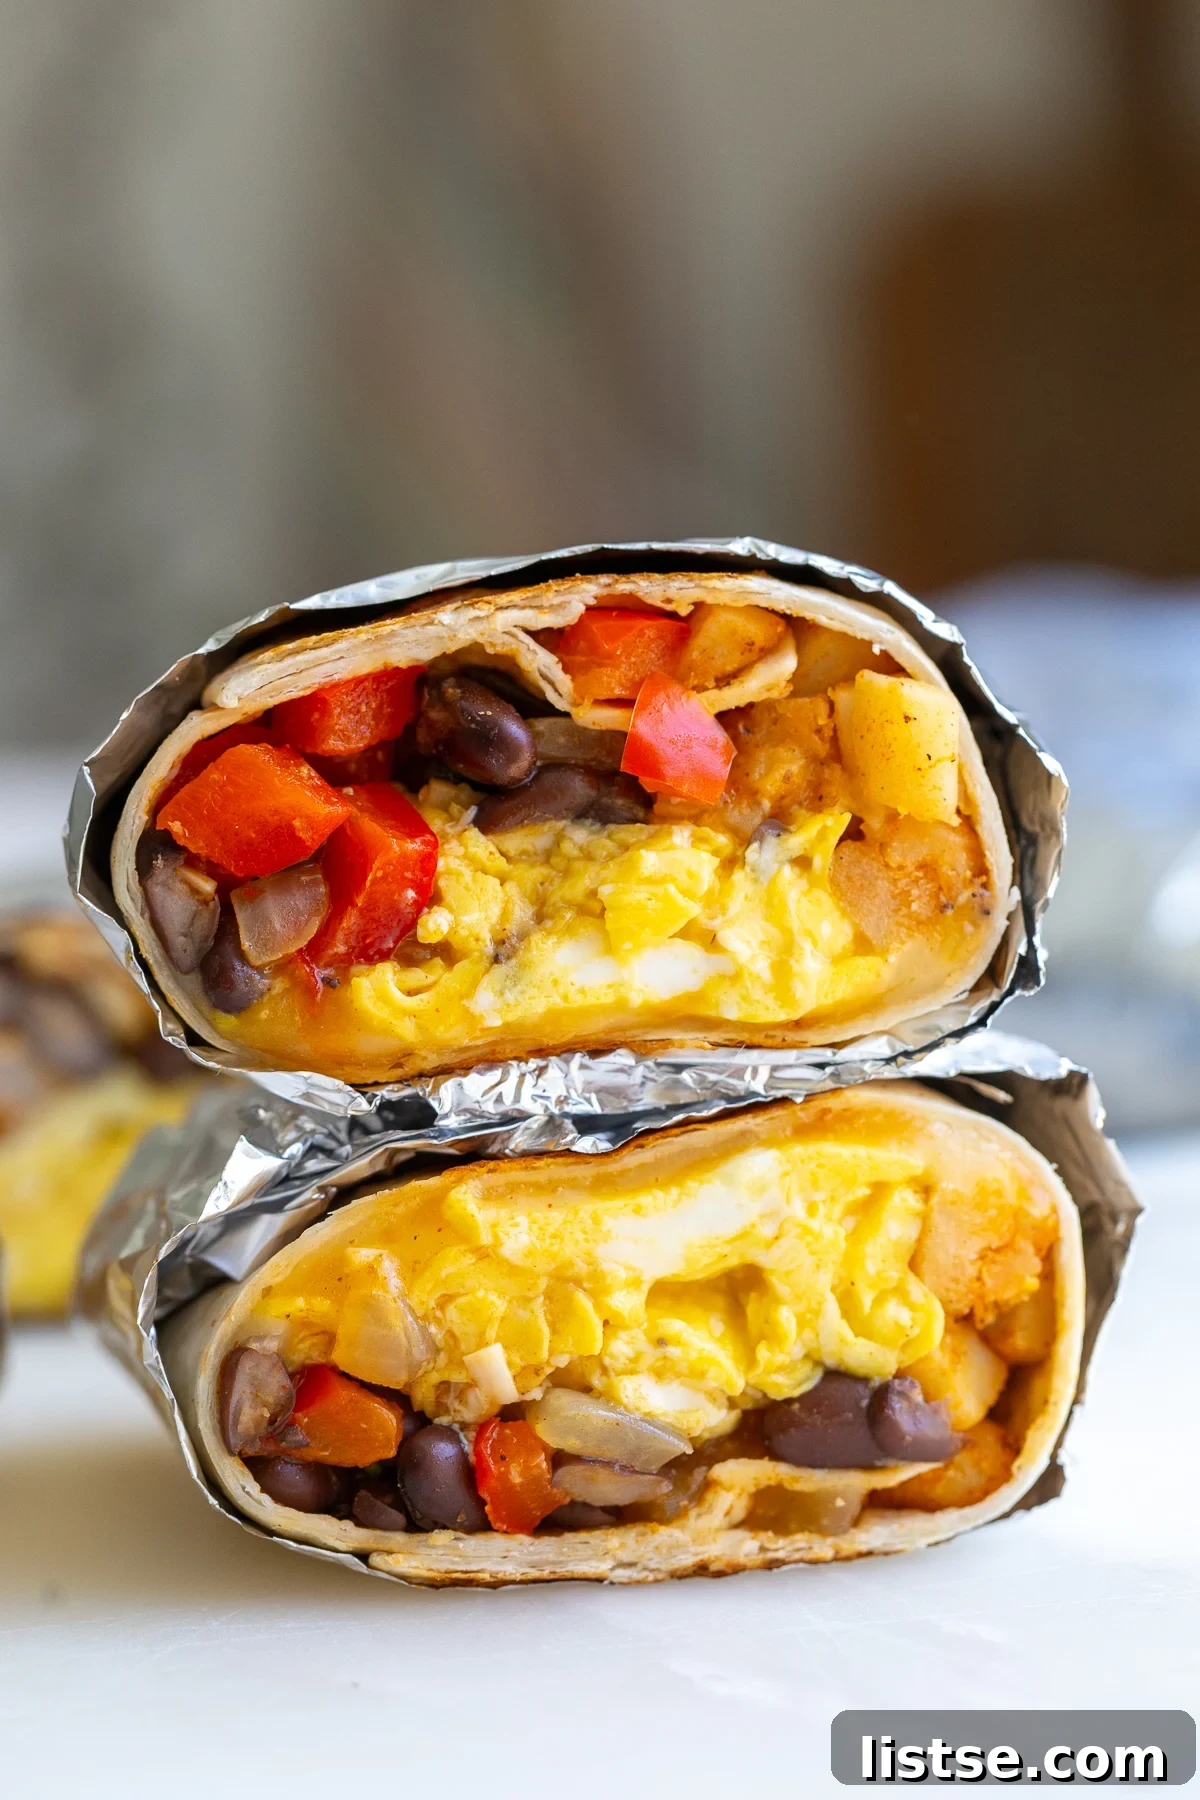
- Expertly Assemble Your Burritos: Lay out all your tortillas on a clean, spacious work surface. For each burrito, begin by sprinkling a portion of shredded cheese down the center. Follow with a scoop of the crispy hash browns, then the scrambled eggs, and finally the delicious black bean and veggie mixture. Finish with a little more cheese on top (I find placing cheese both on the bottom and top helps everything melt and hold together beautifully!). Now, for the roll: fold in the opposite sides of the tortilla, then firmly pull the bottom edge up and over the filling, tucking it in tightly as you roll upwards. The tighter you roll, the better your burritos will hold their shape, especially after freezing and reheating.
Expert Tips for Crafting the Perfect Make-Ahead Breakfast Burritos
Achieving consistently delicious and well-structured make-ahead breakfast burritos involves a few key techniques. Follow these expert tips to ensure your meal prep is a resounding success every time:
- Avoid Overfilling: While the temptation to stuff your burritos is real, resist! Overfilling can lead to tortillas tearing during assembly, or worse, bursting open when reheating. Aim for a generous but manageable amount of filling that allows for a tight, secure roll.
- Warm Your Tortillas: If your tortillas feel stiff, cold, or prone to cracking, take a moment to warm them. A quick 15-20 second zap in the microwave, or a few seconds per side on a dry skillet, will make them much more pliable and significantly easier to roll without tearing.
- Cool Fillings Completely: This is a crucial step for freezer-friendly burritos. Ensure all your cooked components—scrambled eggs, sautéed veggies, and hash browns—have cooled down to room temperature before assembling. Assembling with warm fillings creates condensation inside the wrapped burrito, leading to sogginess and potentially freezer burn.
- Strategic Layering: Placing a layer of shredded cheese both at the bottom and on top of your fillings serves a dual purpose: it acts as a delicious “glue” to hold all the ingredients together as it melts, and it ensures cheesy goodness in every bite.
- Master the Tight Roll: The secret to a sturdy burrito is a tight roll. After layering your fillings down the center, fold in the two opposite sides of the tortilla. Then, pull the bottom edge up and over the filling, tucking it snugly beneath the contents as you continue to roll upwards. A firm, even roll will prevent your burritos from unraveling.
- Wrap Individually and Securely: Always wrap each assembled burrito individually in foil or parchment paper. This protective barrier is vital for preventing freezer burn, maintaining freshness, and making it incredibly easy to grab just one portion when you’re ready to eat. Consider double-wrapping if freezing for extended periods.
- Don’t Skimp on Seasoning: Taste your fillings as you cook! Adjust salt, pepper, and spices to your liking. A well-seasoned filling makes all the difference in the final product, especially after being frozen and reheated.
Mastering Freezing & Reheating for Maximum Convenience
The unparalleled convenience of these vegetarian breakfast burritos truly shines in their remarkable freezer-friendliness! They are custom-made for those demanding days when you crave a quick, wholesome, and utterly satisfying meal without any effort. Follow these precise instructions to perfectly freeze and reheat your breakfast burritos, ensuring maximum deliciousness and convenience whenever hunger strikes:
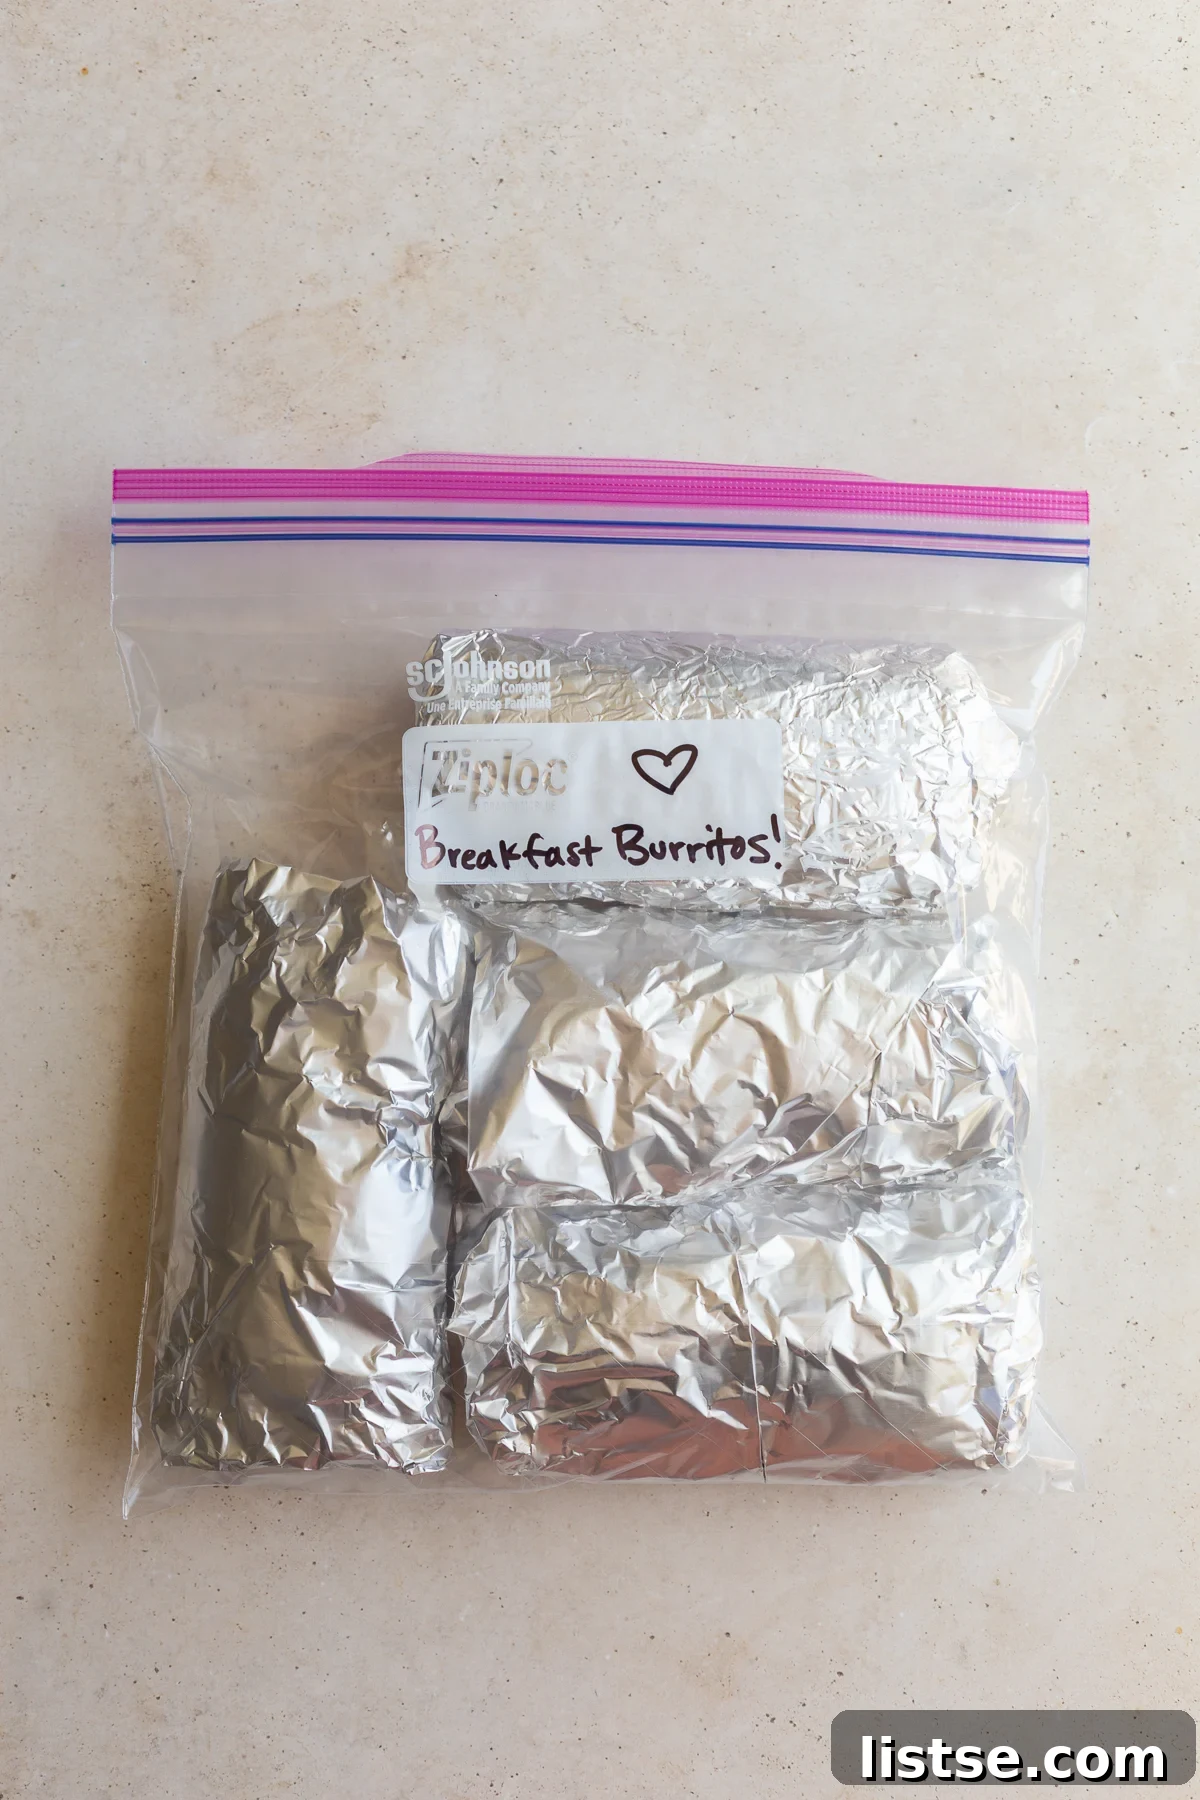
- Preparing for Freezing & Storage: Once your burritos are assembled and cooled to room temperature, wrap each one individually and tightly in foil or parchment paper. This vital step creates a barrier against freezer burn and preserves their freshness.
- Long-Term Storage: Place the individually wrapped burritos into a large, airtight freezer-safe container or a heavy-duty freezer bag (a gallon-sized freezer-friendly bag or reusable silicone Stasher bag works wonderfully). Don’t forget to label the container or bag with the current date. Your burritos will maintain their excellent quality in the freezer for up to 4 months.
- Thawing (Recommended for Best Results): For the most even heating and superior texture, it is highly recommended to thaw your frozen burritos overnight in the refrigerator. Simply transfer one or more burritos from the freezer to the fridge the evening before you plan to enjoy them.
- Reheating from Frozen (Oven Method – Best for Crispiness):
- Preheat your oven to 400°F (200°C).
- Unwrap the frozen burrito and place it directly on a baking tray.
- For a deliciously crispy exterior, lightly spritz both sides of the burrito with cooking oil or brush with a small amount of olive oil.
- Bake for 30-40 minutes, or until the burrito is thoroughly warmed through and the tortilla is slightly golden and crisp. Flip it halfway through the baking time to ensure even heating.
- Reheating from Thawed (Oven Method – Quick Crisp):
- Preheat your oven to 400°F (200°C).
- Unwrap the thawed burrito and place it on a baking tray.
- Lightly spritz both sides with cooking oil for an extra crispy finish.
- Bake for 15-20 minutes, or until the burrito is completely warmed through and the tortilla has achieved a delightful crispness. Remember to flip it halfway.
- Reheating from Thawed (Air Fryer Method – Super Crispy):
- Unwrap the thawed burrito.
- For ultimate crispiness, lightly spritz both sides with cooking oil.
- Place the burrito directly into the basket of your air fryer.
- Air fry at 400°F (200°C) for 8-10 minutes, making sure to flip it halfway through. This method excels at creating a wonderfully crispy exterior.
- Important Note: Reheating frozen burritos in an air fryer can be challenging for even heating and might result in a cold center. Thawing beforehand is strongly recommended for optimal results with this method.
- Reheating from Frozen or Thawed (Microwave Method – Fastest Option): This is the quickest solution for incredibly busy mornings when time is of the essence.
- Unwrap the burrito and place it on a microwave-safe plate.
- If frozen: Microwave for 1.5 to 2 minutes per side (a total of 3-4 minutes), checking for warmth throughout.
- If thawed: Microwave for 45 seconds to 1 minute per side (a total of 1.5-2 minutes), until thoroughly heated.
- Keep in mind that while the microwave is fast, it will not yield a crispy exterior.
Unleash Your Creativity: Customization and Flavor Variations
While the base recipe for these vegetarian breakfast burritos is incredibly satisfying on its own, their true charm lies in their unparalleled adaptability. Don’t hesitate to experiment and make them uniquely yours! Here are a multitude of ideas to ignite your culinary imagination and expand your burrito horizons:
- Amp Up the Spice:
- Stir in a generous pinch of red pepper flakes or a dash of your favorite smoky hot sauce directly into the veggie mixture.
- Incorporate finely diced fresh jalapeños or serrano peppers for a vibrant, fresh heat.
- Opt for a spicier cheese, such as Pepper Jack, or a cheese blend infused with habanero.
- Go Green (or Other Veggies):
- Fold in a large handful of fresh spinach or kale during the last minute of sautéing the vegetables; their volume will quickly reduce.
- Add finely chopped zucchini, cooked broccoli florets, or even riced cauliflower for extra nutrients and texture.
- Include canned or freshly roasted green chiles for a delightful New Mexico-inspired twist.
- Sauté sliced mushrooms with the onions and peppers to introduce an earthy umami depth and a satisfying “meaty” texture, perfect for any vegetarian meal.
- Sweet Potato Surprises: Replace some or all of the hash browns with roasted sweet potato cubes. This substitution offers a natural sweetness, an earthier flavor profile, and an extra boost of Vitamin A.
- Mediterranean Flair:
- Swap the black beans for hearty chickpeas.
- If not adhering to a dairy-free diet, add crumbled feta cheese.
- Incorporate sun-dried tomatoes and a fragrant sprinkle of dried oregano.
- Consider serving these with a side of creamy tzatziki or hummus instead of traditional salsa.
- Exploring Different Proteins:
- Fully Vegan: As previously mentioned, a well-seasoned tofu scramble or a commercial liquid vegan egg alternative works seamlessly as an egg replacement.
- Meat-Lover Friendly: If your diet isn’t strictly vegetarian, feel free to enhance the filling with cooked and crumbled breakfast sausage, crispy bacon bits, or finely diced ham. Ensure any meat additions are fully cooked before assembling the burritos.
- Additional Flavor Boosters:
- Spread a thin layer of pesto, salsa verde, or even a homemade avocado spread on the tortilla before adding the main fillings.
- Garnish with a sprinkle of fresh cilantro, chopped green onions, or even a squeeze of fresh lime juice over the filling just before rolling.
- For an extra zing, mix a little plain Greek yogurt or sour cream (or their dairy-free counterparts) with a squeeze of lime juice and a dash of hot sauce to create a quick, creamy drizzle.
Frequently Asked Questions About Breakfast Burritos
Absolutely! These burritos are designed to freeze beautifully. For optimal freshness and to prevent freezer burn, wrap each burrito tightly in foil or parchment paper, then place them in an airtight freezer bag or container. When properly stored, they will maintain their excellent quality for up to 4 months, making them an ideal choice for convenient make-ahead breakfasts and efficient meal prep.
They certainly can be, and they are intentionally crafted with nutrition in mind! These burritos are packed with essential protein from the eggs and ample fiber from the beans and a variety of vegetables, contributing to sustained energy levels throughout your morning. To further enhance their health profile, consider opting for whole wheat tortillas, reducing the amount of cheese, or using high-quality dairy-free alternatives. The generous vegetable content is a significant nutritional advantage.
Yes, absolutely! Transforming these into a delicious vegan meal is quite straightforward. Simply replace the scrambled eggs with an equivalent amount of well-seasoned scrambled tofu or a commercial vegan egg substitute like “Just Egg.” For the cheese, you can either omit it entirely or use your favorite brand of dairy-free shredded cheese. The majority of the filling components—vegetables, beans, and spices—are already plant-based.
Indeed, gluten-free tortillas work perfectly well for this recipe! Just be mindful to handle them a bit more gently during the assembly process, as some brands can be slightly more delicate and prone to cracking compared to traditional flour tortillas. A very helpful tip is to warm the gluten-free tortillas slightly (15-20 seconds in the microwave or a quick pass on a dry skillet) before rolling; this significantly increases their pliability and helps prevent any breakage.
When properly prepared and stored, these vegetarian breakfast burritos will maintain their excellent quality in the freezer for up to 4 months. The key to this longevity is wrapping them tightly in foil or parchment paper and then storing them in an airtight freezer bag or container. Always make sure to label them with the date of preparation for easy tracking!
The beauty of these burritos lies in their incredible versatility when it comes to vegetables! Beyond the staple bell peppers, onions, and garlic, you can experiment with a wide array of additions. Excellent choices include wilted spinach or kale, sautéed mushrooms, finely diced zucchini, roasted sweet potato cubes, or even finely chopped broccoli or cauliflower. Essentially, any vegetable that sautés well and complements the savory flavors of the other ingredients is a fantastic candidate. Feel completely free to get creative with your favorite seasonal produce!
Absolutely! All the individual components of the filling—the scrambled eggs, the flavorful sautéed veggie and bean mixture, and the crispy hash browns—can be cooked a day or two in advance. Store each component separately in airtight containers in the refrigerator. When you’re ready to proceed with assembly, simply reheat them gently until warm (or allow them to come to room temperature if you plan to freeze the burritos immediately), then follow the assembly steps as instructed. This approach can help break up your meal prep into even more manageable tasks.
For burritos intended for freezing, sturdier flour tortillas generally yield the best results as they are less prone to cracking and becoming brittle after freezing and thawing cycles. Look for “burrito size” or “large” tortillas to accommodate a generous filling. Whole wheat tortillas are also an excellent and healthy choice. As previously noted, if you opt for gluten-free tortillas, choose a brand known for its flexibility and warm them slightly before rolling to enhance their pliability.
Watch the Video & Share Your Delicious Creations!
For those who benefit from visual guidance, watch the step-by-step video ([Note: A video embed would typically be placed here if available, but it is omitted as per the “ONLY HTML CONTENT” instruction.]) to see firsthand just how effortlessly these incredible breakfast burritos come together. Visualizing the process can provide an extra layer of confidence, especially when mastering the rolling technique.
If you try this Easy Vegetarian Breakfast Burrito recipe or any other delectable recipe from Food with Feeling, we would be absolutely thrilled if you’d take a moment to leave a comment and a ⭐⭐⭐⭐⭐ rating below! Your valuable feedback not only helps us but also assists other home cooks in discovering and enjoying these fantastic meals. And, of course, we genuinely love seeing your culinary creations, so remember to tag us on Instagram @foodwithfeeling when you share your delicious burritos!
Easy Vegetarian Breakfast Burritos (Freezer-Friendly!)
Brita Britnell
20 mins
10 mins
30 mins
8 burritos
Ingredients
For the Veggie Black Bean Mixture
- 1 tablespoon olive oil, divided
- 1 small yellow onion, diced
- 1 red bell pepper, finely diced
- 3 cloves of garlic, minced
- 1 (15-oz) can black beans, drained and rinsed
- ¾ teaspoon fine sea salt
- 1 teaspoon cumin
- ½ teaspoon chili powder
- Pepper to taste
For the Eggs
- 12 large eggs, whisked
- Salt + pepper to taste
For the Hash Browns
- 1 pound of hash browns (about half an average bag, preferably diced/homestyle*)
- ½ teaspoon paprika
- ½ teaspoon garlic powder
- Salt + pepper to taste
To Assemble the Burritos
- 8 low-calorie burrito tortillas* (or regular large flour tortillas)
- 8 oz shredded cheddar cheese, or cheese of choice
Instructions
-
1. Prepare the Veggie & Bean Mixture: Heat 1/2 teaspoon of olive oil in a large skillet over medium heat. Add the diced bell pepper and onion, and sauté for about 5 minutes until they soften. Stir in the minced garlic and drained black beans, and continue to sauté for 2 more minutes. Add the salt, pepper, chili powder, and cumin, cooking for an additional minute. Remove this mixture to a bowl and set aside.
-
2. Scramble the Eggs: Return the same skillet to medium heat and add a tiny bit more oil if needed. Pour in the whisked eggs, seasoned with salt and pepper. Cook, stirring occasionally, until the eggs are set and scrambled to your desired consistency. Transfer the scrambled eggs to a separate bowl.
-
3. Cook the Hash Browns: Meanwhile, in another large skillet, heat the remaining 1/2 teaspoon of olive oil over medium-high heat. Add the frozen hash browns, paprika, garlic powder, salt, and pepper. Cook for 8-10 minutes, stirring occasionally, until they are golden brown and crispy. Remove from heat.
-
4. Assemble the Burritos: Lay out all 8 tortillas on a clean work surface. Evenly divide the shredded cheese (using half on the bottom and half on top), scrambled eggs, crispy hash browns, and the black bean and veggie mixture among the tortillas. To roll: fold in the two opposite sides of the tortilla, then tightly roll from the bottom upwards. Ensure they are rolled snugly to keep the fillings secure.
-
5. Store or Freeze: For immediate consumption, store assembled burritos in an airtight container in the fridge for up to 5 days. To freeze, wrap each tightly in foil or parchment paper and place them in an airtight freezer bag or container. Store in the freezer for up to 4 months.
To Thaw and Eat (Reheating Instructions)
-
Microwave (from frozen): Unwrap, place on a plate, and heat for 1.5-2 minutes per side (3-4 minutes total), flipping halfway.
Air Fryer (from thawed): Thaw overnight in the fridge. Unwrap and spray with cooking spray. Air fry at 400°F (200°C) for 8-10 minutes, flipping halfway.
Oven / Toaster Oven (from thawed): Thaw overnight in the fridge. Unwrap and spray with cooking spray. Bake at 400°F (200°C) for 15-20 minutes, flipping halfway.
Oven (from frozen): Unwrap from foil and place on a tray. Bake at 400°F (200°C) for 30-40 minutes, flipping halfway.
Recipe Notes
Hash browns – I particularly love the homestyle or diced hash browns in this recipe for their texture and how well they integrate into the filling. However, any type of hash browns (shredded, O’Brien, etc.) will work wonderfully. You also have the option to omit them entirely if you prefer a lighter burrito or don’t have them on hand.
Nutrition Information (per burrito, approximate)
Carbohydrates: 23g,
Protein: 20g,
Fat: 18g,
Saturated Fat: 8g,
Polyunsaturated Fat: 2g,
Monounsaturated Fat: 6g,
Trans Fat: 0.03g,
Cholesterol: 274mg,
Sodium: 737mg,
Potassium: 497mg,
Fiber: 5g,
Sugar: 1g,
Vitamin A: 1210IU,
Vitamin C: 26mg,
Calcium: 271mg,
Iron: 3mg
Nutrition information is automatically calculated and provided for general guidance only. It should be used as an approximation.
Tried this recipe?
Mention @foodwithfeeling or tag #foodwithfeeling!