
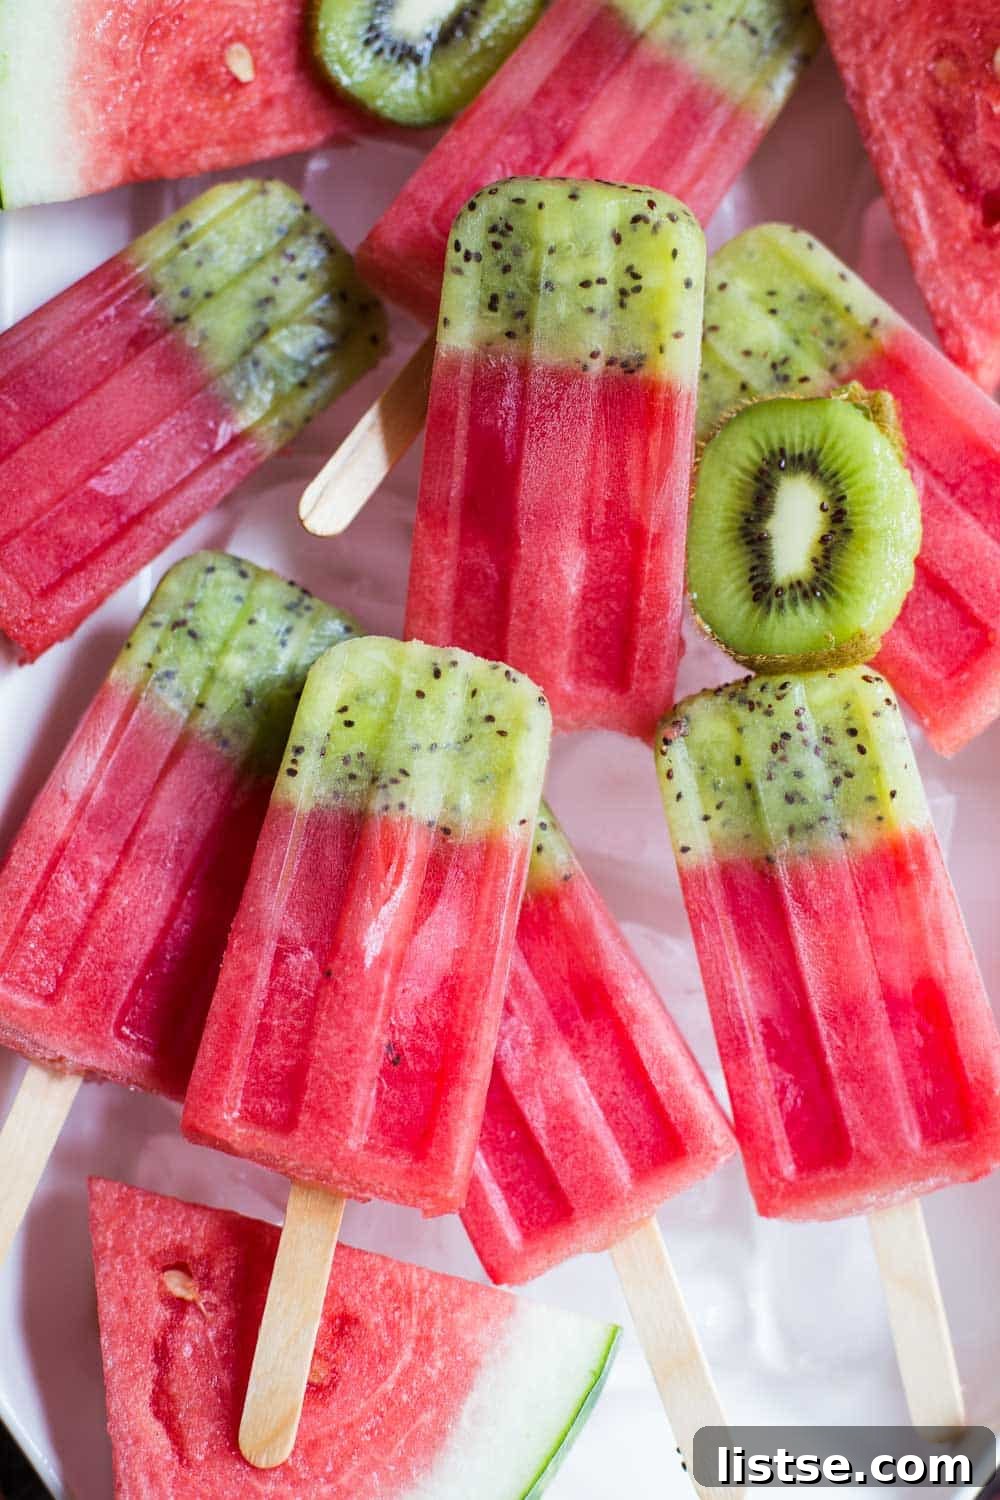
Embrace the quintessential taste of summer with these vibrant and incredibly refreshing Kiwi Watermelon Fruit Popsicles. Crafted from 100% pure fruit, these frozen delights offer a deliciously satisfying way to beat the heat, providing a guilt-free treat for all ages. Forget artificial flavors and added sugars; this recipe celebrates the natural sweetness and hydrating power of two beloved summer fruits, transformed into a convenient and delightful frozen snack.
The Irresistible Allure of Homemade Fruit Popsicles
There’s something truly magical about a perfectly chilled popsicle on a warm day. As temperatures soar and the sun beams down, the simple pleasure of a frozen treat becomes an essential part of daily life. While store-bought options are readily available, creating your own fruit popsicles at home offers a multitude of benefits, not least of which is complete control over the ingredients. With these Kiwi Watermelon Popsicles, you’re not just making a snack; you’re crafting a small piece of natural refreshment, packed with vitamins and hydration.
The beauty of fruit popsicles lies in their simplicity and versatility. They cater to a wide range of dietary needs, being naturally vegan, gluten-free, and free from refined sugars. This makes them an ideal choice for a healthy dessert, a post-workout cool-down, or a delightful treat for children. Keeping a batch of these vibrant popsicles on hand throughout the summer (and honestly, year-round!) is a fantastic strategy to satisfy sweet cravings without any of the guilt often associated with sugary snacks. Since they’re made entirely from pure fruit, indulging in one, two, or even three in a row feels perfectly justified!
Unlocking the Ease: How to Make These Delightful Popsicles
You might be surprised by just how effortless these Kiwi Watermelon Popsicles are to create. The process is remarkably straightforward: blend the fruit, pour it into molds, freeze, blend the next fruit, pour and freeze again. That’s it! No complex cooking steps, no obscure ingredients, just pure, wholesome fruit transformed into a refreshing frozen treat. This minimalist approach ensures that even novice home cooks can achieve delicious results with confidence.
The real artistry comes from the visual appeal of these layered popsicles. The distinct green of kiwi beautifully contrasts with the luscious red of watermelon, creating an eye-catching striped effect that makes them even more appealing. The layering process, while simple, does require a bit of patience – the key is to allow the first layer to partially freeze before adding the second. This prevents the colors from mixing and preserves their vibrant separation, ensuring each popsicle is as pretty as it is delicious.
We recommend starting with the kiwi for the initial layer. Once blended and poured, it will form the top section of your popsicle when it’s upright and ready to eat. Following this, the watermelon forms the bulk of the popsicle, providing a wonderfully sweet and juicy base. This strategic layering not only looks fantastic but also delivers a delightful flavor journey with every bite. The slightly tart kiwi perfectly complements the sweet, hydrating watermelon, creating a balanced and harmonious taste experience.
The Waiting Game: Patience for Perfection
Perhaps the most challenging aspect of making these popsicles is the wait for them to fully freeze. The anticipation of enjoying a cold, refreshing treat can be almost unbearable! However, a little patience goes a long way in ensuring your popsicles are perfectly solid and ready for devouring. A useful trick is to keep some extra fresh fruit on hand for snacking while your popsicles are chilling. This way, you can curb your immediate cravings and enjoy the preparation process without feeling deprived.
Once the popsicles are thoroughly frozen, releasing them from the molds is typically quite simple. A quick run under warm water usually does the trick, allowing them to slide out effortlessly. The reward for your patience is a stunning, delicious, and healthy treat that’s far superior to anything you can buy in a store.
Choosing Your Popsicle Molds
The right popsicle mold can make a big difference in your homemade frozen treat experience. There’s a wide variety available, from traditional plastic molds that use wooden sticks to silicone versions that are incredibly flexible for easy release. Some molds even come with built-in drip guards, which can be particularly handy for kids, minimizing mess and sticky fingers.
For those who prefer the classic popsicle experience, molds that accommodate traditional wooden sticks are an excellent choice. They offer a nostalgic feel and are generally easy to clean. If you’re looking for something more durable and flexible, silicone molds are fantastic; their pliability makes demolding a breeze. Consider the size and shape you prefer, as well as how many popsicles you want to make at once. Regardless of your choice, ensuring the mold is food-grade and easy to clean will enhance your overall popsicle-making journey.
Visual Guide: How to Make Kiwi Watermelon Popsicles
For a step-by-step visual demonstration of crafting these delightful popsicles, consider watching a tutorial video. Seeing the blending process, the careful layering, and the final demolding can be incredibly helpful for first-time makers. Many online resources offer excellent visual guides to ensure your popsicles turn out perfectly, showcasing techniques for smooth blending and effective layering.
Kiwi Watermelon Fruit Popsicles
By
Brita Britnell
5 mins
2 hrs
2 hrs 5 mins
8 popsicles
Print Recipe
Ingredients
- 4 kiwis, peeled
- 3 cups seedless watermelon, chopped
- Optional: a splash of water or coconut water (to aid blending kiwi, if needed. Watermelon usually blends smoothly without extra liquid)
Instructions
- Determine your layering preference. Whichever fruit you pour into your molds first will be the visible top layer of the popsicle when held. For a beautiful contrast, we suggest starting with kiwi.
- Place the peeled kiwi into a blender or food processor. Blend until it is completely liquefied and smooth. If the kiwi is too thick to blend easily, add a small splash of water or coconut water to achieve a pourable consistency. If you don’t have a blender, you can thoroughly mash the kiwi with a fork to create a pulpy base.
- Carefully pour the blended kiwi mixture into the bottom of your popsicle molds, filling them approximately one-third of the way. Place the molds into the freezer for at least one hour, allowing the kiwi layer to firm up. This partial freezing is crucial to prevent the layers from mixing.
- Once the kiwi layer is mostly frozen, blend the chopped seedless watermelon until it is completely smooth and liquid. Watermelon typically has a high water content and should blend easily without additional liquid.
- Pour the blended watermelon mixture on top of the semi-frozen kiwi layer in each popsicle mold, filling them to the desired level. Insert the popsicle sticks into the watermelon puree.
- Return the molds to the freezer for at least an additional hour, or until the popsicles are completely solid. Freezing time may vary depending on your freezer’s temperature and the size of your molds.
- When ready to serve, run the popsicle molds under warm water for a few seconds. This gentle warmth will help loosen the popsicles, making them easy to slide out. Enjoy your homemade, refreshing fruit popsicles!
Tried this recipe?
Mention @foodwithfeeling or tag #foodwithfeeling!